Debugging my lantern pinion

If you want even more, Malcolm Wild's book is excellent.

Sorry for adding to the potential decision paralysis, there are so many ways to make gears :)
I find it oddly fun that there are so many ways to get to the same result. If I end up making parts that work, nobody can fault me for how I arrived there. Thanks for reminding me that I have Wild's book. I haven't looked through there in a very long time.

It also just flashed into my head that I'm not going to be able to drill the #43 center hole on the lathe unless I invest in some type of bit with a huge shank. I have a big Jacobs chuck on my tailstock. I sized it to hold 9/16" shanks for human sized projects. I should flip through the plans and think about any other times I might want to drill an accurate, wire gauge sized hole in something on the lathe, and I should probably just acquire some of those big shank drills in these sizes. Cheaper than the alternative solutions. New tapers, new chucks, new collet holders, new drills. I think the drills have it.

I also kind of like the challenge of using a benchtop engine lathe to do this work. It's on the big side and the sloppy side for trying to do work like this, but I've been making improvements to the lathe over the years, and I feel like I'm getting the most that can be gotten out of it. I think it's going to be fine. I do have enough experience building clocks that run to know that clocks don't have to be perfect to the nearest tenth to run. I think the Wild book is where I saw clock parts that had been hand-filed to an approximation of the right tooth profile, sold commercially, and having run for years. Amazing what you could do with Victorian era sweat labor.

Speaking of which, I'm going to take a moment to appreciate that I don't have to make chronometer chains to avoid starving to death in the street. Fusee chains. I can't find the video, but Tony Robinson tried his hand at the task in one of his Worst Jobs in History shows. Or I guess programmes since he's British. Yeah, okay, enough stalling, I must surrender the keyboard, turn out the lights, and go earn my daily bread at my dismal and unrewarding job.
 
I use pin vises to hold small drills in larger chucks. Outside of 8mm WW collets none of the usual ER11/16 etc. ones will do it well enough. I plan to make more WW collets this winter, finally have a working tol post grinder. A recent article in Model Enigneer's Workshop (Mar 2022) showed a workable method of producing them.
I have a Taig lathe, on which I bored out the spindle to an MT0 taper, to fit the Sherline WW adapter. You could accomplish similar using the mandrel described in the MEW article in a collet chuck on your lathe.

Gerrit
 
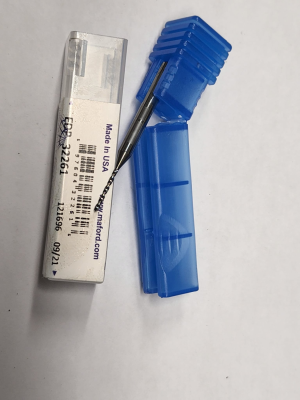
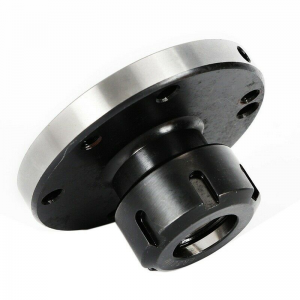
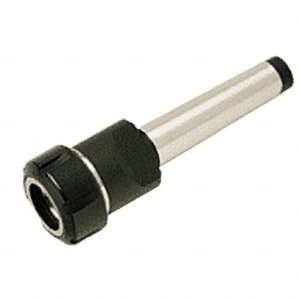
Update: I got ER32 for the lathe headstock, the mill, the rotary table, and the dividing head. I got #60 carbide bits with 1/8" shanks that would fit in an ER32 collet.

1662368547598.png

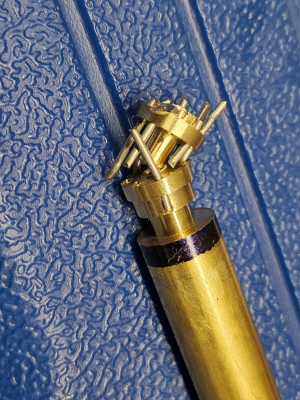
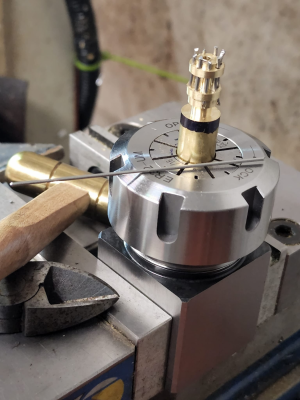
The part ended up being a fail. Whoops. I was stupid enough to try to clean up the music wire stubs on the lathe, with a parting tool. Dumb, dumb, dumb, dumb, dumb! It was actually going quite well, until it exploded. Oh well, it was probably going to be too far off to be useful anyway. It was a practice run. A practice run while I waited for Morgan Fairchild to get out of the swimming pool en deshabillé and come cook me a bacon egg and cheese sandwich. Yeah, that's the ticket! Morgan Fairchild! (If you don't get this joke, just shut up. I'm not old. I'm chronologically enhanced!)

1662367164546.png

Problem 1: I'm getting crappy run-out on the lathe with my horrible ER32 setup that involves an MT3 fixture, a MT3 to MT4 adapter, and the headstock of a Chinese lathe. The TIR is 0.003" and the only reason I persisted with this was because I was getting 0.016" TIR with my 5C collet chuck. Crap!

At intervals, the run-out gets extremely bad, and I have to knock this out and slam it back in to return to the 0.003" that is my optimal achievement. Pretty much if a butterfly breaks wind anywhere within 15 square miles of this setup, it goes all wonky, and needs the knock and slam treatment in order to become somewhat less wonky.

I guess I never noticed before, because none of the stuff I ever made was that critical. Putting ER32 on the lathe headstock could be accomplished with either an 80mm or 100mm ER32 fixture available commercially, but these all advertise 0.016" TIR, which is insanely bad.

1662368768932.png

The best alternative is to learn how to thread and cut very accurate tapers, so I can make my own 1-3/4"-8 to ER32 fixture out of a big slug of steel. For now, that project is beyond my skills. I tried a commercial MT4 ER32 that was a complete piece of Chinese garbage. The nut wouldn't even thread on without binding. I could fix it if I knew how to thread, but wait, I don't understand gibberish (apologies to the member whose photo I just ripped off).

1662368413777.png

I think that says, "If you put a chicken sandwich in a hurricane, your typhoid will forty twenty." It might also say, "If you hello girl say to goat, then rotted spline."

I ordered an ISCAR MT4 ER32 collet fixture from MSC that will be here Tuesday. That set me back. Ouch. In the meantime, I thought I would try making a part anyway. The only dimension that's actually critical is getting the bolt circle right, and centering it on the center bore.

1662368480905.png

Problem 2: I broke all my carbide drill bits. Crap! I was pretty stoked by this and thought I was going to make it through, but everything went sideways after about the fourth hole. That was when I remembered to lock the rotary table. When I left the rotary table unlocked, the bits didn't break. After locking the rotary table, the bits tended to break when hitting the lower flange. Even though I was feeding slowly with the quill knob on my benchtop mill. I blew through $21 in bits, and finally had to swap back to the mini Jacobs chuck and the conventional HSS #60 drill. This probably means all the holes I drilled with an unlocked table are wonky anyway.

Problem 3: I drilled down too far in several places. I kept losing track of things after all the tool swaps. This is easily fixable next time with more care.

Problem 4: After getting all 8 pins tapped in, I went to clean up the stub ends, and WHAMMO! I busted the part.

Crap.

On the bright side, I think the center hole is centered this time. Maybe.

1662369050376.png

So now I'm off to McMaster-Carr to buy another bunch of #60 carbide drills. I will try rotating the quill feed much more slowly.
 
Not sure where you are buying your supplies, but I bought a 100mm ER-32 chuck from Little Machine Shop, and Orange A collets from Amazon and have less than 0.0005" TIR on my mini-lathe.

Are you sure that your spindle is running true? Use a DTI on the spindle taper and measure it. Are the surfaces clean and chip free? All of this matters. On my Grizzly G0752Z I turned my own back plate for an ER-40 set true chuck. I have a threaded spindle so I had to single point the back plate. Very low runout, under 0.0002". First time I have ever attempted something like that.

One thing I know for sure is the smaller the diameter the more critical run out is. I have far more trouble machining small stuff than bigger items.
 
Based on how your drill bits are breaking, it's possible that your mill is out of tram, so they're shifting sideways as they go down. It wouldn't take much of that to break #60 carbide bits.

An out-of-tram condition can be caused by two separate issues. The column can be misaligned with respect to the table; or the head can be misaligned relative to the column. If your head is misaligned and you adjust-out the observed tram by rotating the column, you still will get sideways shift of cutters and drills when you raise and lower the head. This could be on either axis, or could even be a combination of both.

One way to test for this situation is to install a test rod in your collet or drill chuck and use a dial indicator against the side of the rod as you raise/lower the head. You will want to do this on both axes. Mount the DI base on the side of the column and perform RDM to compensate for a test rod that isn't perfectly straight. Using RDM in this fashion keeps column-to-table tram problems from clouding the measurements.

If you do find head-to-column misalignment, how you fix it depends on what kind of mill you've got. Adjusting the Sieg mini mills requires a combination of shims (for the Y axis) and for the X axis, rotation of the head by loosening the mounting bolts. For the latter case, it may be necessary to scrape some paint off the spindle housing block so the head can be rotated. Here is a more detailed description of the procedure.
 
If you do find head-to-column misalignment, how you fix it depends on what kind of mill you've got. Adjusting the Sieg mini mills requires a combination of shims (for the Y axis) and for the X axis, rotation of the head by loosening the mounting bolts. For the latter case, it may be necessary to scrape some paint off the spindle housing block so the head can be rotated. Here is a more detailed description of the procedure.
I confess, I did NOT check the tram. I took for granted that it wouldn't have moved since I dialed it in last time. The g0704 is a dovetail column mill, and adjusting the Y axis tram is a beeeatch.
  • Measure error
  • Unscrew four hex head cap screws
  • Install shim(s)
  • Tighten four hex head cap screws
The problem is that last quarter turn. You can do one, ten, twenty, fifty turns and everything looks perfect, but when you finally get the screw fully tight, the needle moves. A lot. It's necessary to fully tighten all four screws just to see what you got.

I ended up with 0.0015" shims, and I had it dead nuts.

The X axis is evil too.
  • Measure error
  • Loosen three clamping bolts
  • Loosen pivot bolt
  • Adjust
  • Tighten three clamping bolts
Here too, the needle moves a lot in that last quarter turn. In both cases, you kind of just have to guess. It says I need 0.003" but when I get this tight it will move 0.007" so I should adjust -0.004. -0.004 + 0.007 = 0.003"

All of that whining notwithstanding, you're absolutely on target that I need to strap on my big boy panties and check the tram again. The other problem with my mill is that I put it up on leveling feet that aren't bolted to the floor, and if I sneeze hard, it's depressingly easy to move the entire mill. I checked the level just the other day, and had it dead nuts, but I shifted the mill imperceptibly just cranking some part. This is probably my cosmic reminder that I need to drill some holes in the feet, and Tapcon those suckers to the floor.
 
Not sure where you are buying your supplies, but I bought a 100mm ER-32 chuck from Little Machine Shop, and Orange A collets from Amazon and have less than 0.0005" TIR on my mini-lathe.

One thing I know for sure is the smaller the diameter the more critical run out is. I have far more trouble machining small stuff than bigger items.
Ain't that the truth! I've done plenty of useful real world work with my lathe and mill, like fabricating a new oil drain plug, and some centering sleeves for the wheels on an old pickup truck. I've made lots of parts for my lathe and mill to improve them. Now that I'm trying to make an itty bitty part, errors I never would have noticed are punching me right in the nose, and I have developed an appreciation for why the guys who wrote books on building these things were all using a Sherline, Taig, or Unimat. I am determined to push forward anyway.

LMS is a good suggestion as a source for those chucks. At least according to their catalog anyway. They list less run-out than everybody else. Still, if I go that route, I have to buy a back-plate, and fit it. When I did that for my 5C collet chuck, I don't think I did so well, and that's probably why the 5C has heinous levels of run-out. I'm surprised my DTI hasn't filed a restraining order against me, considering what I did to that poor, innocent needle when I checked this. It's posit-nega-pos-ne-po-n-p-n-p-n/\/\/\/\/\/\/\/\/\/\/\/\/\/\/\/\/\/\/\/\/\/\/\/\/\/\/\/ive.

Water under the bridge at this point, I guess. I forgot about LMS in my search, wasn't happy with any of the chucks I could source, so I paid real machine shop prices for the MT4 ER32 made in Israel. For an MT4 ER32 the price points are pretty much $30 and $200, with nothing in the middle whatsoever. My $30 one was junk. I got an MT3 for like $60 that seems well made, but the adapter seems to be ruining the show. I fooled around rotating the adapter different ways, and the best run-out I got out of it was awful. Luckily, my tailstock is MT3 so I don't feel like the part was a waste. I will have ER32 in the lathe headstock, lathe tailstock, mill column, rotary table, dividing head, and collet blocks. One collet to rule them all.

I got Accusize collets. They seem to be adequate. I'm not going to spring for a set of Rego-Fix or Techniks collets until I've ruled everything else out.

Or ever, because I just checked my balance, and saw that I've already spent double my budget. More than ever, now is the time to hunker down and make do.
 
I don't have access to the pictures from this computer, but I drilled holes in the leveling feet and installed Tapcons.

The first chapter of "Events from My Amazing Life" happened when the Tapcons ripped out of the concrete. Crap. Off to the store to buy bigger Tapcons. The next chapter happened when one of the Tapcons snapped off, with about 1/4" sticking proud of the concrete. Awesome.

I tried to drive the broken Tapcon deeper with a punch, and I mangled the punch. Dang!

So I gotta hand it to my Chief mini air die grinder and Chief carbide burrs. I am not generally a fan of Harbor Freight, and that is one of the only powered tools I ever bought there that I genuinely like. That thing ate steel that was harder than a punch, and it digested a little concrete too. The cutter still looks fine. Wow!

I mean, I've shattered at least a dozen carbide end mills and a couple dozen carbide drill bits. I was using the analogy earlier that carbide tools are like ceramic tile. If you put tile on a rigid cement backer, it's pretty much going to survive Armageddon, but if you put tile on drywall, the way my shower was originally built, sooner or later the tile is going to crack. Carbide requires totally rigid setups. (Which is why it's weird that the drill bits broke AFTER I remembered to lock the rotary table.) There is nothing rigid about using a burr in a die grinder, so I wonder how this tool was able to chew through so much without breaking. It's genuinely amazing.

So anyway, now I level the mill again, and it should stay level this time. I don't think it actually matters all that much. You can't level a mill on a ship, and that doesn't stop navy machinists. Still, it will be less dangerous to use now that it can no longer shift around randomly, just from cranking the handles, or torquing a collet with a wrench. It really isn't heavy enough to be stable just relying on its own weight to hold it to the floor. (The lathe is fine though. I built these leveling outrigger feet out of ridiculously sturdy C-channel, and it has a wide base and almost a ton weighing down on the feet with all my chucks and centers and tool holders and other hefty stuff inside a ridiculously strong cabinet.)

Okay. Now to get leveling, and then check the tram. I'm going to bet $5.00 right now that the tram is actually fine. It may have been two years, but it hasn't been that long in operating hours since I last went through and dialed this thing in with a ridiculous degree of obsessiveness.
 
I'm going to bet $5.00 right now that the tram is actually fine.
Maybe so, but if the bit is shifting due to the kind of tram problem I described, locking the RT would be a quicker path to failure. If the part isn't free to move so it can follow that shift the drill wil eventually snap. Eventually the backlash in the RT will be removed and the drill would break anyway, so if that's what is going on there's a limit to how deep a hole you can drill with carbide bits with your current setup.

Now, this theory all depends on a particular situation where the shift occurs in a direction that coincides with the backlash in the RT. That may not be the case, so I could be totally wrong about what is going on.

Something to look into is how much flex a small carbide bit can accommodate before breaking. That would tell you how good your tram really needs to be.
 
Something to look into is how much flex a small carbide bit can accommodate before breaking. That would tell you how good your tram really needs to be.
Yeah, it's probably like picometers or whatever is smaller than picometers. I have snapped carbide stuff that was like 1/2" in diameter, and this is about 0.040". However, I drilled four holes uneventfully. Every time the bit snapped, it always did so upon entering the lower flange. Maybe I just got over-confident after four holes, and turned the fine quill feed knob faster. Also, I used high gear and the highest speed possible, which was something like 1800 RPM. That's probably half what it should be.

Yeah. I poinked some numbers into a speed and feed calculator, and this drill should be running at 19,000 RPM. Okay, that's not happening today.

I still haven't checked the tram. Got side tracked making a fancy holder for my ridiculously fancy center bashing rod. I painted it to match the lathe, which prompted me to realize my paint can is almost empty, and go looking for another one. Hammerite Deep Green used to be $80 a gallon, and now it's over $300 a gallon. OUCH!
 
Back
Top