Craftsman 101.28990 12" Metal Lathe - Refurb

rhjo51

Registered
Registered
Joined
Nov 18, 2019
Messages
31
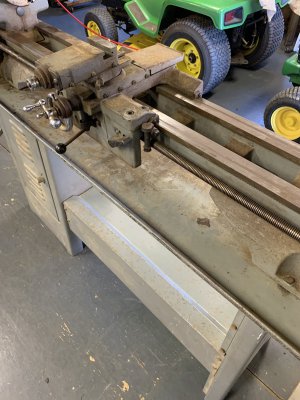
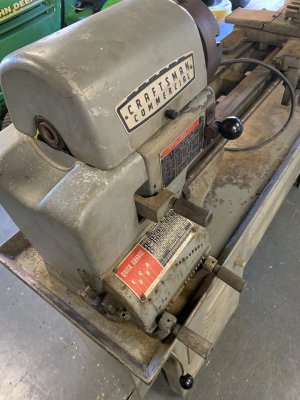
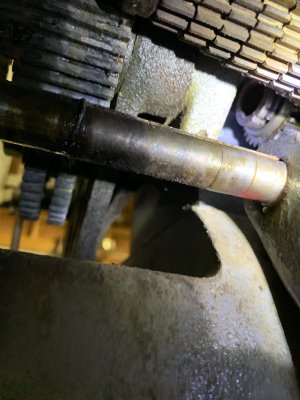
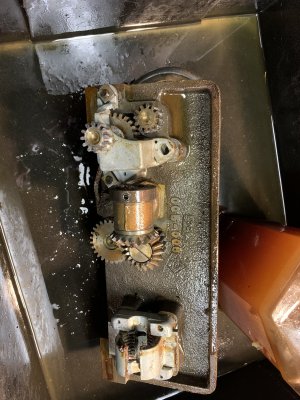
Hi, I recently purchased a Craftsman Craftsman 101.28990 12" Metal Lathe. SN 107765. I'm guessing mid-lates 70s. It appears to be in good shape but really gunky and tight from old hard grease. Almost looks to be hardened wax. I need to basically disassemble and clean. I want to take the quick change box off to start but I'm having some trouble with removing the lead screw. I opened the half nuts and removed the two bolts from the lead screw right bearing. I figured the lead screw would pull out but it wont. It turns, but wont pull out. I don't want to force anything so looking for some advice. This lathe appears to be a later one, in addition to the 2 cap screw on the front holding on the QC, there is one cap screw inside the headstock.

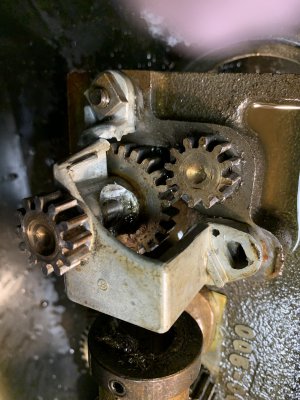
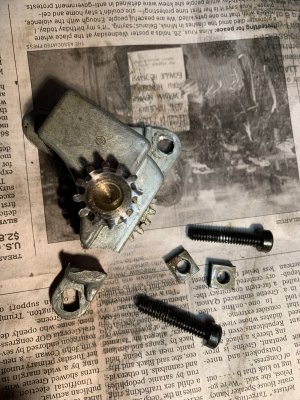
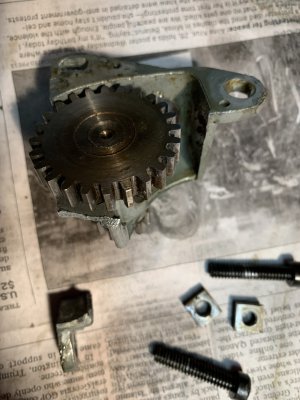
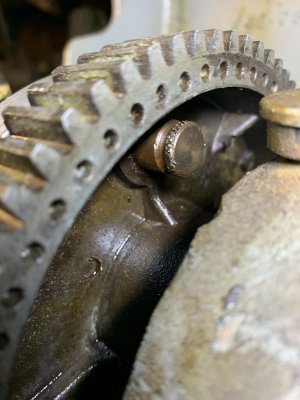
I tried to look under the QC and it's really hard to see but it appears that the end of the lead screw goes through a gear and there is a snap ring holding the gear to the end of the lead screw. I think. if so, I'm guessing I do need to unbolt the QC and the right bearing on the lead screw, then pull the QC to the left and remove the snap ring so I can pull out the lead screw. Can anyone confirm? Thanks
 

Attachments

  • IMG_1186.JPG
    IMG_1186.JPG
    1.4 MB · Views: 64
  • IMG_1189.JPG
    IMG_1189.JPG
    1.7 MB · Views: 63
  • IMG_1208.JPG
    IMG_1208.JPG
    1.5 MB · Views: 64
No! You do NOT want to attempt to remove that snap ring/Circlip.

Do you have one of the parts manuals on the 101.28990? If not, you need to get one or to get the equivalent manual on the Atlas 3996, which is the same machine except for the badge and nameplate. Both manuals are in the Atlas/Craftsman folder of Downloads. The 3996 REV 12 one is the cleanest. However, access to Downloads requires Donor status. A $10 donation will suffice and is good for one year. But that will not allow you to sell on the site. Minimum donation for that is $25 (mainly for historical reasons - the $10 donor level wasn't added until several years later). Or you can go to Vintage Machinery and find a 101.28990 manual there that you can probably read well enough to see what you are doing.

In any case, armed with one of the parts manuals, you will see that the left end of the lead screw slides into the friction clutch that is the item mounted on the same shaft as the Circlip is on the left end of. The keyway that runs the length of the leads screw (except for the extreme right end) meshes with a key on one of the friction disks inside of the clutch. It is probably stuck but proceed as though it isn't, initially.

Normally, if nothing is stuck, the way to remove the lead screw is to run the carriage nearly all of the way to the right end of the lead screw. Engage the half nuts (you may need to jog the carriage back and forth a little to get them to mesh with the threads on the lead screw). Remove the two socket head screws (once in a while they may be hex head) that attach the 041-284 Bracket (right bearing assembly mounting plate) to the bed. Use the traverse hand wheel to extract the lead screw from the clutch. Once it is out of the clutch, disengage the half nuts and slide lead screw and right bearing assembly to the right until clear of the carriage.

If the lead screw is stuck in the clutch, disassemble the clutch and work the lead screw out of the friction disks. Be sure to note the order in which the friction disks are installed upon the lead screw. To disassemble the clutch, refer to the assembly drawing in the manual and unscrew the 127-028 Clutch Cap from the 396-081 Clutch Housing. Slide the cap to the right and work the friction disks out of the housing. Only one of the disks has a male key.
Hello W5Acab, many thinks for your detailed explanation - very helpful! I do have the 101.28990 Manual from Vintage Machinery but it wasn't clear to on how to proceed. I'll try your instructions and see what happens. I likely have to disassemble the clutch as the Lathe is pretty gooed up - not rusted - from sitting. Thanks again.
 
BINGO! I ran out to the workshop at lunchtime and I was able to remove the lead screw using the method you described. Many thanks!
 
OK. Glad to hear that it worked.

One additional point that I forgot to mention is that as the machine is at least 38-1/2 years old and your description doesn't mention any damage that would have been caused by a crash, you should perform the slip clutch calibration. Use a nonmetallic strap wrench both to loosen and tighten the clutch cap and also to rotate the lead screw several turns with the cap tightened by hand before you start the actual setting procedure. This is to clean off the friction surfaces.
 
Good idea. I Will do that when I put it back together. I appreciate the help as I dig into this refurb. I may have more questions coming.... Thanks!
 
Today's adventures - I removed the lead screw and the apron. The saddle was tight and moving slow but I didn't force anything. When I took the apron off, I saw that the traverse gear case was broken with one of the 3 screws and nut missing. I wondered if that was something I did but the screw and nut were missing when I removed it. I think that happened a while ago. Everything else in the apron was good including the half nuts. Now to locate a new transverse gear case. Anybody have one or know where I can get it? Thanks - Jim
 

Attachments

  • IMG_1215.JPG
    IMG_1215.JPG
    1.7 MB · Views: 47
  • IMG_1216.JPG
    IMG_1216.JPG
    2.5 MB · Views: 50
  • IMG_1217.JPG
    IMG_1217.JPG
    2.1 MB · Views: 44
  • IMG_1218.JPG
    IMG_1218.JPG
    1.3 MB · Views: 44
Last that I heard, Clausing still had some. Not cheap, though.
 
Hi - I changed the title of my post as I got past the original problem but have questions as I work though this refurb. I hope that is not against protocol. I had some questions about removing the headstock. I can see the two cap head screws on the left side, and see that there will be a clamp under the right side. Any easy way to get to the clamp bolt? Lift up the bed? I also wanted to ask about the back gear lock pin, is mime in or out? I think out, but it's frozen and wont move. The spindle back gear-bullgear? is not free wheeling.
 

Attachments

  • IMG_1225.JPG
    IMG_1225.JPG
    1.2 MB · Views: 35
Back
Top