After a long hiatus on this, i have been putting some work into it lately. Finally got the chuck scrolling after a bunch of PB Blaster and some tapping with a urethane headed hammer. Still struggling to get the chuck broken free from the spindle. I have tried all type of methods in securing the spindle without damaging the gears, but to no avail. Time and patience i guess. I would prefer to free it before removing the spindle and replacing the felt and oil springs. Unfortunately i am in need of a new phone, but hope to follow with some pictures soon.

-
Welcome back Guest! Did you know you can mentor other members here at H-M? If not, please check out our Relaunch of Hobby Machinist Mentoring Program!
You are using an out of date browser. It may not display this or other websites correctly.
You should upgrade or use an alternative browser.
You should upgrade or use an alternative browser.
Another 9" Barn Find
- Thread starter rodm717
- Start date
- Joined
- Nov 25, 2015
- Messages
- 8,304
I would not remove the spindle yet. I would lock the spindle with a block of wood on the bull gear to lock it without damaging it. I would chuck up a hex large enough to be strong, so that you can lock onto it with the chuck.. I would prepare a wrench large enough to grab that hex..
I would take a torch and heat the chuck backplate up and get it real hot. I would grab that hex and wrench on it... I would tap (not bang) on the backplate trying to break that joint free.
if you've already done all this... I apologize for offering my 1/2 cent worth of advice.
I would take a torch and heat the chuck backplate up and get it real hot. I would grab that hex and wrench on it... I would tap (not bang) on the backplate trying to break that joint free.
if you've already done all this... I apologize for offering my 1/2 cent worth of advice.
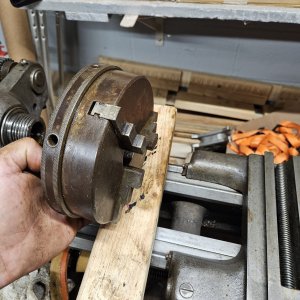
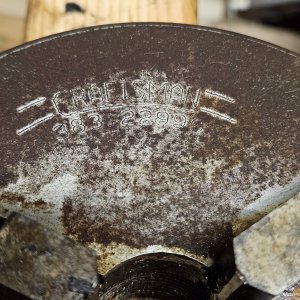
Yep, I finally got it. It does not have a separate backplate. All in one craftsman scrolling chuck, so I did have be careful and not damage the chuck.
A little patience and a couple different looks. Aside from cleaning and flooding the interface with penetrant oil,
I used the old flat belt, lined the inside with a rubber strip and wrapped it around the step cone. Once it seemed good and engaged, I clamped to a piece of wood across the front of the head casting to spread the load. Once it was locked in and not moving it only took one or two quick taps of a hammer to loosen. I did use a piece wood inbetween the hammer and chuck. It looks like someone packed the threads with grease. ??? Why there is a craftsman chuck on here, I don't know. Nice little chuck though.
Attachments
Last edited:
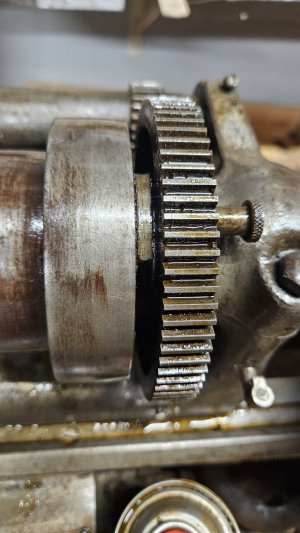
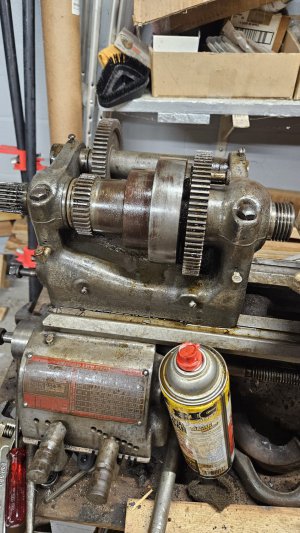
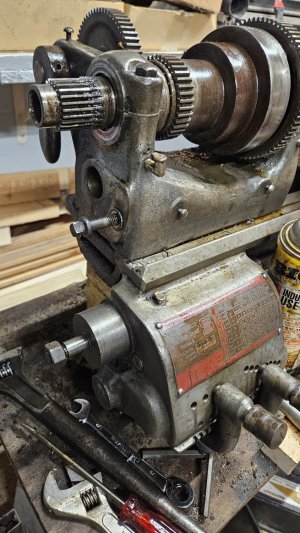
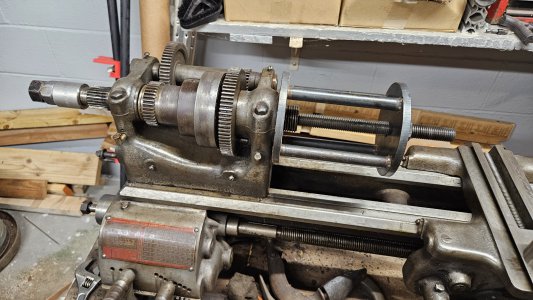
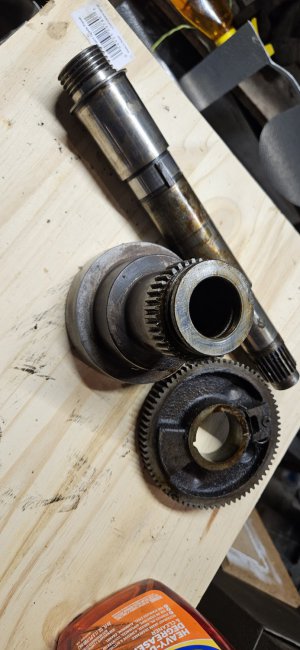
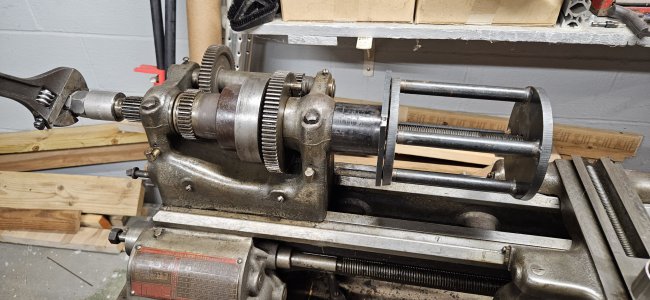
The next roadblock is the step cone. The bullgear pin to engage/disengage the cone pulley took a bit of convincing to get pulled and the bullgear is definitely stuck right now. I did pull the rest if the gear train to prepare to remove the spindle. The spindle, bearings, and rest seems pretty decent and cleaning up nice.
I flooded the front of the cone between bullgear, oil access hole on the cone, and front side of the 3pc. thrust bearing with penetrant, and tapped on the cone with a deadblow. Nothing yet, but will hopefully the spindle will loosen up soon with a little more time and patience.
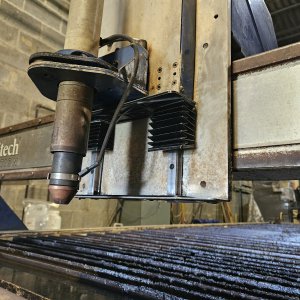
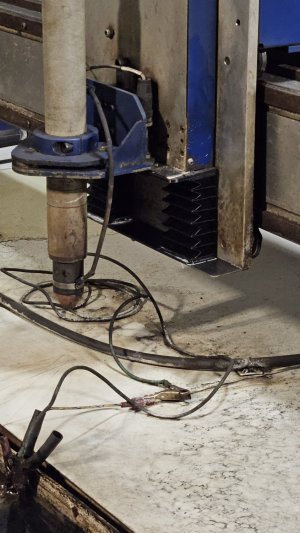
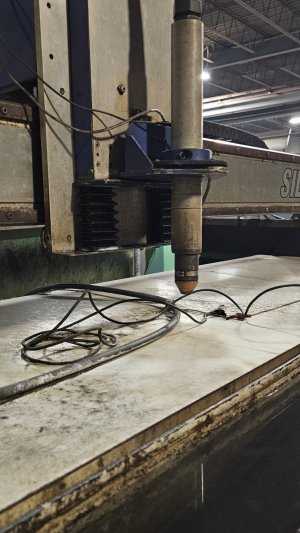
Also finished up a bellows install on a Machitech plasma table. Still do not understand buying a Canadian machine when there is so many better domestic options and systems. The bearing blocks went bad and had to change those after only 3 yrs. of use.
I flooded the front of the cone between bullgear, oil access hole on the cone, and front side of the 3pc. thrust bearing with penetrant, and tapped on the cone with a deadblow. Nothing yet, but will hopefully the spindle will loosen up soon with a little more time and patience.
Also finished up a bellows install on a Machitech plasma table. Still do not understand buying a Canadian machine when there is so many better domestic options and systems. The bearing blocks went bad and had to change those after only 3 yrs. of use.
Attachments
Last edited:
After a week or two of penetrant and patience, and some thought, I'm going to skip the frustration and use the spindle press tool I made for my Enco 110-2034 rebuild. Way overkill, but should make light work of the 9" spindle, once I make an adapter to avoid digging into casting. I'm not pressing roller bearings off the spindle, like the enco.
Attachments
Last edited:
- Joined
- Sep 28, 2013
- Messages
- 4,306
that should do the trick. wouldn't hurt to heat up the cone a bit while you pull
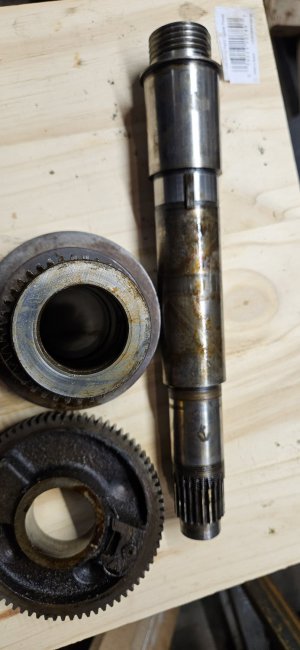
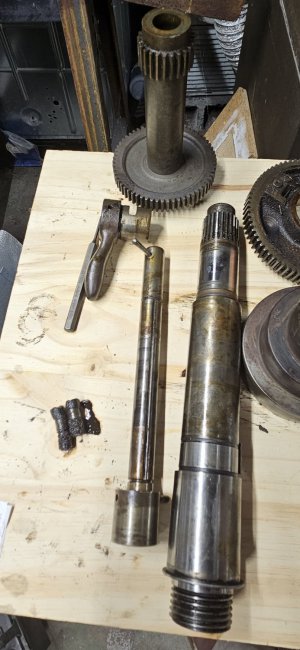
Glad i waited. I cut, faced, and bored a 2" sch40 pipe to 2.03"id and it fit perfectly against the face of the casting, without marring or damaging it. It went pretty easy. I did have to remove the pressing tool and gently tap the last inch or so to completely free it. Looks pretty good to me except the spots on the spindle where the capillary felt was resting. The front feels smooth and is just a stain. The rear, I can barely feel with my finger nail and may require some light buffing with a very mild compound.
The capillary wicks do appear a little stiff, but the casting bearing surfaces appear smooth and free of any radial scaring.
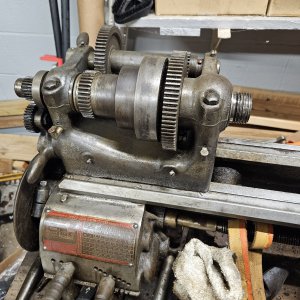
As you can see, it sat for some time without use. This is straight out of the casting, no cleaning or wiping yet.
The capillary wicks do appear a little stiff, but the casting bearing surfaces appear smooth and free of any radial scaring.
As you can see, it sat for some time without use. This is straight out of the casting, no cleaning or wiping yet.
Attachments
-
 20230811_180315.jpg193.3 KB · Views: 29
 -
 20230811_180304.jpg233.4 KB · Views: 27
 -
 20230811_180252.jpg303.2 KB · Views: 26
 -
 20230811_180246.jpg274.1 KB · Views: 27
 -
 20230811_180240.jpg145.4 KB · Views: 27
 -
 20230811_180232.jpg186.2 KB · Views: 29
 -
 20230811_175643.jpg532.5 KB · Views: 29
 -
 20230811_175428.jpg593.7 KB · Views: 30
Last edited:
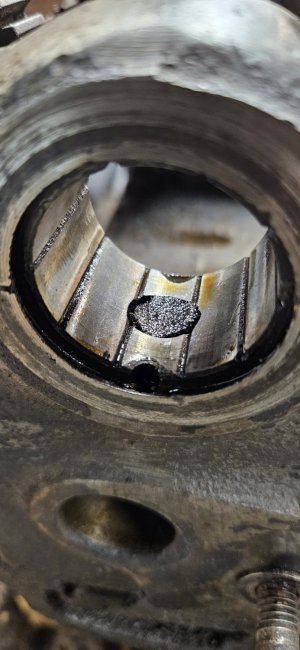
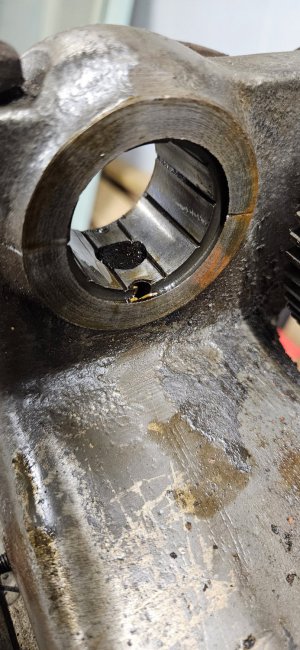
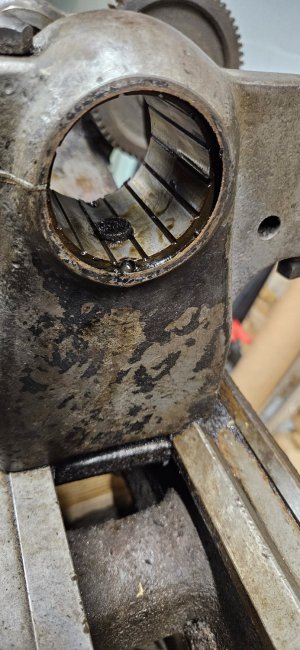
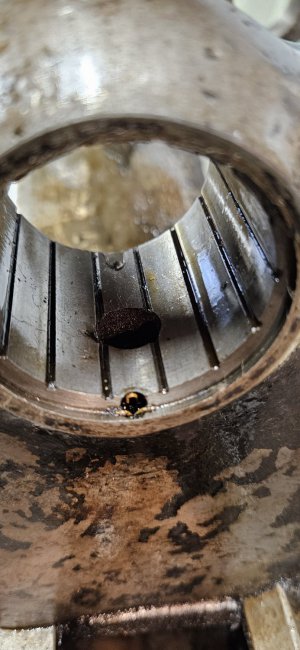
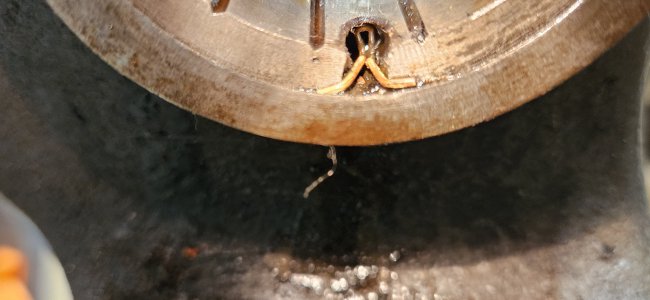
Here we are cleaned up a bit. My previous headstock rebuild was on a 30's "C" and 28' "A". This is different. I'm guessing the little yellow clips are oil retaining clips, but are not what I was picturing. Unfortunately, it has been some time since I bought and received the rebuild kit. Now I need to find it.
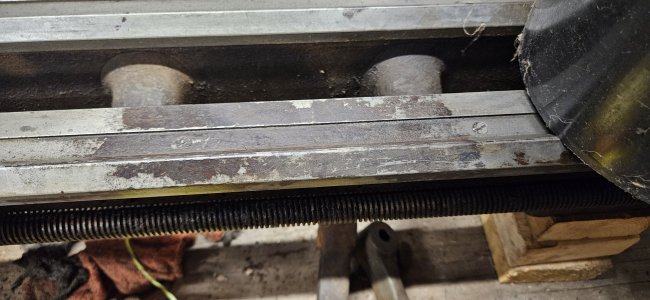
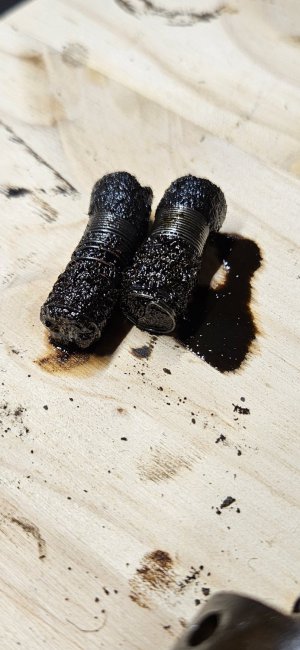
I also included a picture of the substance on the ways I cannot get off. I've thrown everything and the kitchen sink at it chemically, while carefully abrading in an attempt at getting something to penetrate.
I also included a picture of the substance on the ways I cannot get off. I've thrown everything and the kitchen sink at it chemically, while carefully abrading in an attempt at getting something to penetrate.
Attachments
- Joined
- Nov 25, 2015
- Messages
- 8,304
they redirect the oil back into the galley down below. Retaining is a good name, since they are not seals, just meant to direct it.Here we are cleaned up a bit. My previous headstock rebuild was on a 30's "C" and 28' "A". This is different. I'm guessing the little yellow clips are oil retaining clips, but are not what I was picturing. Unfortunately, it has been some time since I bought and received the rebuild kit. Now I need to find it.
I also included a picture of the substance on the ways I cannot get off. I've thrown everything and the kitchen sink at it chemically, while carefully abrading in an attempt at getting something to penetrate.
Found the rebuild kit. Just where I left it and in the first place I actually looked. Apparently I need some new glasses. Lol.
To be fair it was in the back of the drawer.
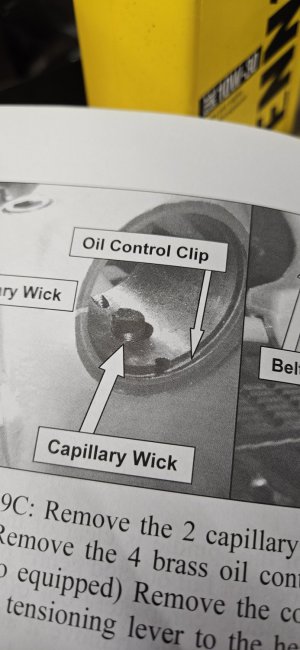
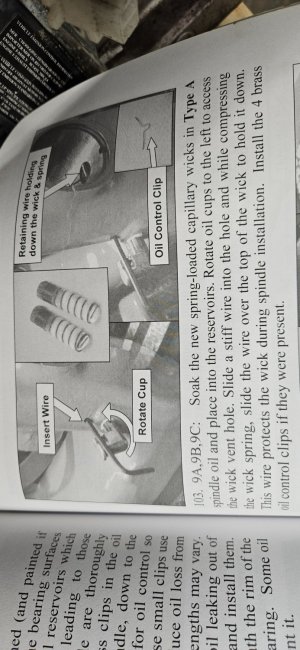
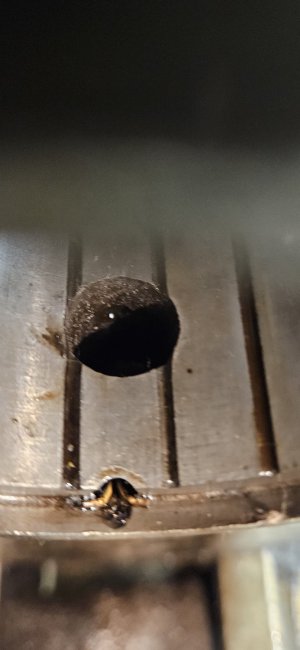
I was picturing the oil retaining clip to be radial seated in the outer groove.
Below is how my book has it. It doesn't show it installed and certainly is not shape it is installed.
Nit sure if I want chance snapping them try to remove, but would like to ensure all the grime is free from them and the oil channel.
To be fair it was in the back of the drawer.
I was picturing the oil retaining clip to be radial seated in the outer groove.
Below is how my book has it. It doesn't show it installed and certainly is not shape it is installed.
Nit sure if I want chance snapping them try to remove, but would like to ensure all the grime is free from them and the oil channel.