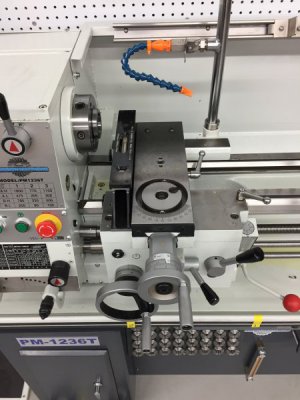
Setting-up the PM 1236-T Lathe

Really enjoying the details of your set up. It's refreshing to see an obviously detail oriented individual with no preconceived conceptions of "what's right" go through the process. I'm largely self taught and probably do a lot of things "wrong", but they work for me. At my place of work we are encouraged to take new approaches and not get stuck in old paradigms.

PLEASE keep the string going and remember that machinist's can be very opinionated. Just like A-holes, everyone has one.

Bruce
 
Last edited:
TK, your vibration and dB tests confirm that the isolation set up really works, although it should, right? You completely decoupled the lathe from the stand. However, what I am curious about is what happens when you turn a work piece. Nominal stock is not round so it will vibrate. No chuck is perfectly balanced so that will add to it. Then the cutter induces side loads that impact on vibration in some fashion.

The currently accepted practice is to have the lathe be as rigidly coupled to the ground as possible to resist and dampen these vibrations. You have isolated these vibrations to the mounting plate and they have to go somewhere. I would imagine that some of that energy will be converted to heat so those anti-vibration pucks will warm up but the key thing I am interested in is what happens to the work piece. I realize that the only way to really tell is to turn a variety of identical work pieces with the lathe rigidly mounted and decoupled as yours is and compare the results. I'm not suggesting you do that but that is what it would take to demonstrate the difference. In the end, if your set up works well for you then that is what matters.

I really like that you're showing what you did and confirmed with tests that it did what you intended. Your unorthodox approach is very refreshing, TK - good for you!!
 
Mikey, you are correct, I am new to this. I am still in the period of magical thinking where almost anything is possible and I am unincumbered by dogma. It is also about the journey for me. I derive a great deal of pleasure thinking about these things; It can be a wonderful distraction and stress reliever. It is not about the fish, it’s about the fishing. Although I get pretty ****** off when I don’t catch any fish. Seriously, I thoroughly enjoy the challenges of the hobby and the discussions that ensue, even yours P. Waller if you are still alive!

Your post reminded me of an experience I had recently. I took my wife to the Bay area this past summer for a medical thing and we stayed near my son. He works for NASA and I had the wonderful opportunity to tour the Ames campus with him. I met a number of interesting folks and in our discussions, I learned the difference between the thinking of a "normal" guy, me, and these amazing innovators. Where I tend to ask why, these guys ask, "why not?" There is a world of difference between these approaches. I saw some awesome things on my visit but what I really got was this difference in thinking - THAT changed me.

You, TK, would fit right in with those guys.
 
Mikey, thank you for the praise and support, it means a great deal coming from you.

I will play around with some unbalanced set-ups. One way to couple the lathe and stand together temporarily would be to put equipment jacks between the top of the stand and the baseplate.

Should mention though that the equipment mounts are really robust. They have a capacity of 1,100 pounds each and are quite firm. They are similar to my sons as teenagers; they are operating at about 20-25% of their capacity.
 
I will play around with some unbalanced set-ups. One way to couple the lathe and stand together temporarily would be to put equipment jacks between the top of the stand and the baseplate.

This would be good. Then you can see what the differences are and either prove or modify your approach.

They are similar to my sons as teenagers; they are operating at about 20-25% of their capacity.

Yeah, my son was like that. He is fortunate that I allowed him to live until he became human at around 23 years old. He is now 39 and is a wonderful, intelligent young man and I am very proud of him.
 
As with others, I am watching with interest at how this build goes. My 1340GT headstock base had a crown that allowed it to flex - bump the lathe and it would wiggle for awhile. I welded a 3/8" plate inside, with vertical reinforceing ribs to tie everything together. Obviously, I was in the "tie it to the ground " camp - based on where I work. My questions have been asked and answered, the proof will be known soon. As Bruce said, you didn't know better and came up with a thoughtful alternative. As I think about this, you look at old lathes with their elegant, but relatively unsubstantial, legs, this solution isn't that far out there. One cool feature is you have not really changed anything if issues arise - the rubber isolation system could be replaced with something more solid, and your ground plate gives you a fairly flat plane to work off of. Or maybe the headstock goes solid and the tail stays like it is. From designing Diesel engine mounts, I know that the amount of preload on the bushings affects how they isolate - could be something useful while tuning things.

If this is what you come up with for a base, can't wait to see what you come up with on a real machining project. You seem to think enough and detail oriented enough that you will fit right in. Nice job, thanks.
 
I have been following your approach and I am considering going down the same path. What I dont know or understand is how that caster/leveling works.

How does this work? Do you have to level each time you move it? Sorry if I have a blind spot, but that happens sometimes to me. Help?
 
“Leveling” and a Discussion on Vertical Miasalignment

FAE3C1D1-FD5D-4345-BE87-03895E5A0731.jpeg

First of all, my favorite work shirt is pictured above. I will explain this picture more fully later but for now let me just say that I might possibly be the only man alive that has set himself on fire leveling a lathe. More on this later.

For a newbie like myself the term leveling creates a lot of confusion; it really is an untwisting of the lathe ways that uses a level to accomplish the untwisting. I am going to quote John.K again from the beginning of this thread because he said it so well:

A lathe does not need to be level in any axis............it makes no difference to the accuracy..................however being level means an accurate level measurement tool can then be used to check for bending or twisting of the bed,and such corrected .......and later on used to check for wear...........

The untwisting ended up being much more straight forward than I anticipated but I would recommend a time when you are not in a hurry. Also make your changes in very small increments. Although I think I mentioned earlier that it took a quarter turn of the jack screw, my notes indicate that it was only a one eighth turn; so be patient. It’s pretty satisfying when you get it just right.

I did the alignment a couple of different ways. Many sources say to put a precision level directly on the ways. Well, this does not work with the PM 1236-T because the v-ways are a different height and the level is too far out of level to be useful. I think you can see this with this picture:
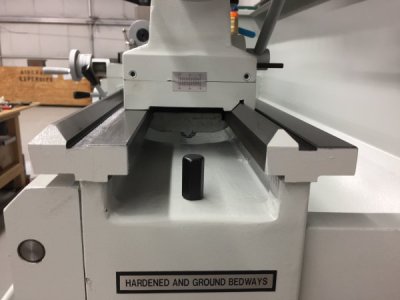
9D609BD2-DEFA-410E-95CD-1300CA129BDD.jpeg

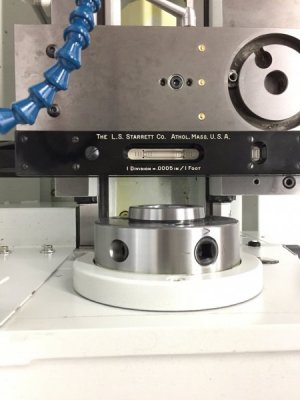
I decided to take the compound off the carriage and place the level on the carriage. I liked this approach because you are not repositioning the level, which can produce errors and since the carriage is what holds the tool in position and is ultimately what determines the height of the cutting tool. I placed tape on the the lathe at four evenly spaced intervals and took readings with the Starrett precision level by moving the carriage to each position using the carriage. I was careful not to let the level change position. It really is surprising how exquisitely sensitive the machine level is. These are the steps I took:

1.) level precision level using the leveler on the casters at the headstock end
2.) take readings at positions 1,2, and 3
3.) adjust the jack screw at the tailstock end
4.) back to step 1

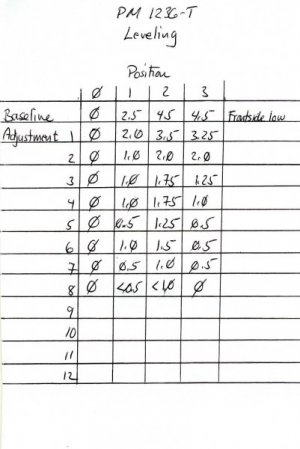
Here is my set-up and my results:
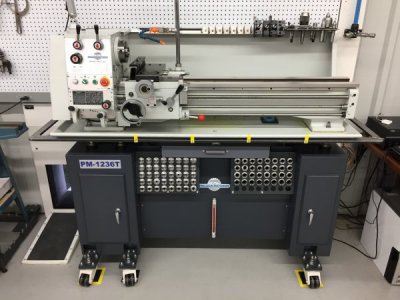
3B6CC9CE-4DC2-4962-822F-5EA457956A51.jpeg

82F7B970-EF0D-41D2-9F9A-58AB96520E4F.jpeg

FE704B2A-BD44-433F-92CE-E0C093272236.jpeg

Lathe Leveling Table001.jpg

You can see that it took eight tries to get it to where I felt I couldn’t get it any better, which was under 0.0005”/foot for the length of the bed. I am going to stop here for a bit. I have a very important date with a three year old to go to “Little Mermaid”. I will tell you about the shirt later today but just let me say that it is a lesson in “the enemy of good is better” .
 
now I understand, you level the lathe to the base and the base has the casters that you lift off the ground with the outrigger jack screws when you park it. I was missing the rest of the story but I see it now. All is good!
 
Back
Top