Press Feeder

So the main drive roller needs a way to drive it. Both for machining and in operation. I could have keyed it and used set screws to secure it to the shaft, but I really hate set screws and keys. They don't hold well and in start stop (or reversing) application they have a tendency to wear and get loose. You can actually transmit more power with a clamp.

The main shaft is 1 inch, so add a 1 inch shaft collar. This will be the only drive interface with the roller. Those are 10-24 screws, I would have used two 1/4 inch screws, but the wall of the clamp is a bit skinny for 1/4 inch. The shear load that those 4 screws will take far exceeds the torque that the motor is capable of producing.

I set this up in my 5C fixture on the shaft that it will be installed on.
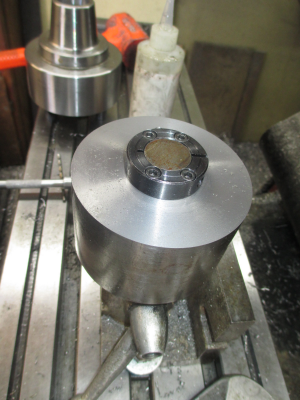
1584765111449.png

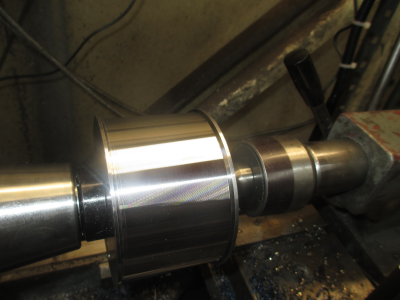
Then over to the lathe for final finishing. Still using the same shaft as an arbor.
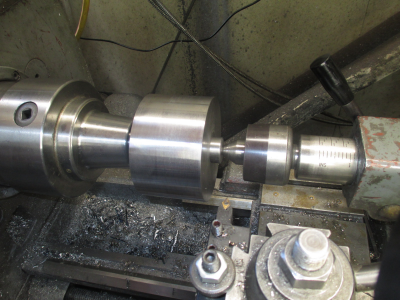
1584765229094.png

And done. 8620 is a pleasure to machine.
1584765273628.png

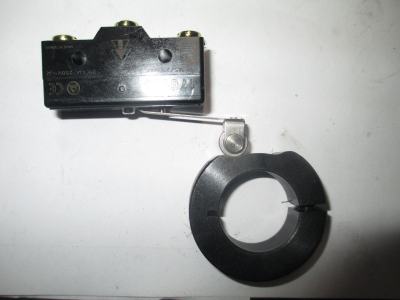
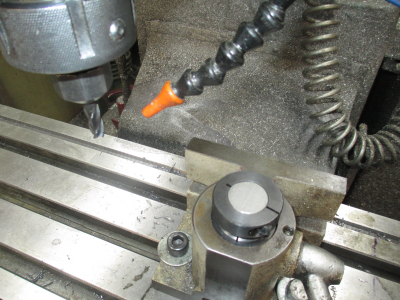
Then for the next piece, I need to modify another shaft collar to be a cam for the On/Off switch. I used a shaft collar because I want it to be easily adjustable. So set it up in the 5C collet fixture.
1584765460683.png

And done. Took about 10 minutes.
1584765544263.png

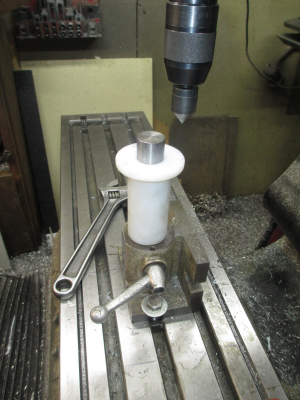
And the last bit for today, drill and countersink the attaching holes in the swing arm bushing.
1584765751572.png

Tomorrow I'll cross drill the swing arm shaft, turn a little button for the spring pressure screw, and design & turn the adapter shaft for the VFD speed pot. That should finish up all of the machined parts for this project unless I forgot something. There will most likely be some machining on assembly just to get a final fit.

I'm going to try to get the frame welded up and painted this weekend also.

Stay tuned......
 
Jim, I really appreciate you sharing projects like this. It is a great help for hobbyist like me to see understand how you work out both the overall design and also the part manufacturing. Also thanks for the extra work you do to be a moderator on this great site.
 
I think we all call them dance rollers because they seem to " dance " while running . We made sets for shrink sleeve machines that would accumulate 5 minutes worth of run time when the rolls ran out . The operators had 5 minutes to splice the new rolls to the expiring rolls , thus the line never stopped .

I've seen these called "Dancers" as well. I did a job for my day job that was programming a set of these for a sheet metal painting line. Had about 4 minutes of material in the makeup system to allow changes of spools without stopping the line. The metal went through a curing oven immediately after having paint applied so stopping or slowing the line was not an option (the paint would burn). Pretty neat concept and wasn't terribly difficult to program (we used AB ControlLogix PLCs).

Looks like a great project! Good luck and keep sharing your progress!
 
Jim, I really appreciate you sharing projects like this. It is a great help for hobbyist like me to see understand how you work out both the overall design and also the part manufacturing. Also thanks for the extra work you do to be a moderator on this great site.

Thank you for the kind words.

I try to show the thought process that goes into designing each piece, and in many cases the parts design is driven by the tooling that I have to work with, right down to what endmills I have in the drawer. The design has to work, but you also have to be able to build it.

As I am doing the design, I'm also ''machining'' the parts in my head figuring out order of operation, what setups are going to be required, and generally how it's all going to be done. The idea is to make the workflow as efficient as possible, so this may mean partly machining a piece, and then coming back to it later on another setup. A little extra time spent in the design process is a big help when you start making chips.

You'll note that I started with the vise on the table and finished all of those vise held parts before I removed it to machine the main mounting plate, then mounted up the 5C collet fixture to do that work. Next the vise will go back on the table for the next operations that I couldn't do earlier. I try to minimize changing setups. The order that the parts were machined in was pre-planned as well as the order of operation on the individual parts.

Having a CNC mill helps, but I have done nothing on this project that could not have been done on a manual machine with a rotary table. And had I only had a manual machine to work with, the design of some of the parts would have been different to more easily machine them.
 
This is not really part of the project, but is related and what I did today.

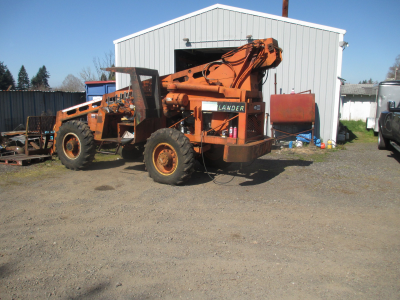
I finished a couple of small parts on the lathe, then thought I would dig out the welding table, kind of in front of where the forklift is sitting. I was going to use the small forklift to grab the table, but the ground is still a bit soft in that area and I didn't want to get stuck. So go bring the big forklift around. This is important only because that is also where the forklift stopped......... Dead. 99% of the time when a Diesel engine quits and won't start it's a fuel system problem. This old girl has been exhibiting some odd fuel related behavior for the last year or so, but I didn't think too much of it because it normally squared itself away in a short time. Well this time the system just failed. :bang head: And sitting right in front of the shop door, which was a blessing and a curse. I either had to fix it or drag it out of there. Since it is a nice day to work out side, and right in front of the shop, I figured it would be a good time to fix it.
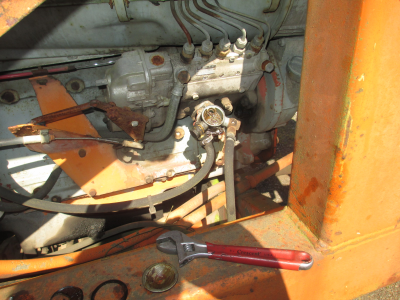
1584837603017.png

So pull the cover off of the mechanical lift pump to look at the screen, that's the easiest thing to get to. Center of the picture with the two fuel lines hooked to it.
1584837653365.png
Here is what I found. Completely plugged up. o_O
1584837738363.png

I have no idea what this crud is, it's not soluble in any chemical I have around the shop, and I have most common solvents from acetone on down. I have never seen anything like this in a Diesel fuel system before. The stuff reminds me of #2 Permatex gasket sealer, gooey and sticky. I managed to scrape the stuff off with a knife blade, and sprayed it down with carb cleaner and got it to clean up.

So off to NAPA Auto Parts for a fuel filter and more carb cleaner. Then I decided I better check the fuel lines to make sure they are not full of this stuff. Yup, crud all through the system from the tank suction tube screen to the injector pump. The fuel tank suction tube screen was completely plugged off couldn't even get air through it. OK, gonna clean the entire system and replace all the fuel lines. So back into town to get more carb cleaner and 25 feet of fuel line.

Everything had this crud in it, so clean the filter adapter, all the banjo fittings, the lift pump, and run all new fuel line, Those of you who know Diesels, know what fun it is to get the engine started with a completely dry fuel system. First I slightly pressurized the fuel tank with the air hose with a rag wrapped around it to force fuel from the tank, through the lift pump and up to the filter adapter. Then installed the filter. Then used the primer lever to fill the filter and get fuel to the injector pump inlet, then pump for a while more to charge the injector pump. It fired right up.... more or less, had quite a bit of air in the system so took awhile to smooth out. But seems to run fine now.

The one thing I didn't do was drain the fuel tank and flush it out. :cautious: But I did fish around in there and could not find a thing. I think I will drain the tank and put fresh fuel in it before I use it again.
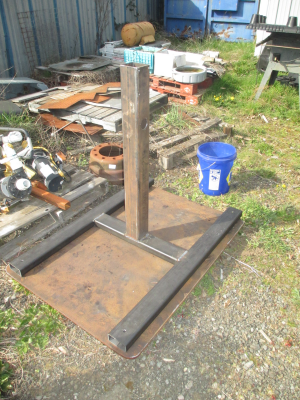
So about 3 hours and $120 in parts later, the welding table is now sitting on the shop floor.

I'll do the welding tomorrow.
 
Last edited:
Now THAT'S a forklift ! :encourage:
 
My only experience with diesel crud was algae plugging everything up. Cut the new filter open if it's not a cartridge type, mine would be all black. I was burning a few hundred gallons a month, and not doing a lot of sitting though. I always got fuel in the system, and cracked the injector nuts, crank the motor, when you start getting shots of diesel, and not bubbles you can start tightening them and it should fire. My experience with lift pumps was frustrating
 
Well after the forklift ordeal I got the main frame welded up yesterday.

Not much to it. I was going to paint it today but the weather turned to winter again, and for the next week or so according to the weatherman. So painting will wait for the next nice day. Unless I find something really pressing that needs to be done, I may just take the week off. ;)

1585008898289.png
 
I’ll second the algae notion.
When I had a sailboat I had to condition the fuel annually to ensure no creatures setup camp and clogged the system. Biocrud in the injectors is not fun when trying to transit a narrow passage against a 3 knot current!


Sent from my iPhone using Tapatalk
 
Back
Top