POTD- PROJECT OF THE DAY: What Did You Make In Your Shop Today?

Interesting. Please keep sharing the progress.

Is that a plastic material (as opposed to a white paint)?

I assume the copper inserts are tubing. What diameter (for scale reference)?
The plastic is a solid surface material from Staron, it was 21mm thick. The Copper tubing is 1/4" and the slots are 7.2 wide x 3.8 deep. The wood is Oak with an Osmo wax finish.
 
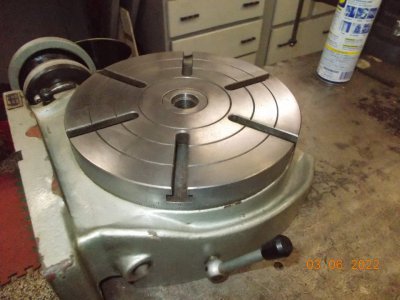
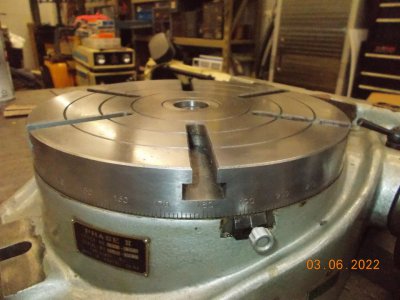
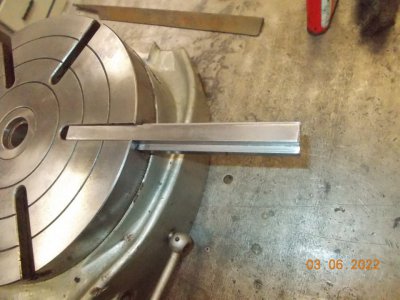
Making some TEE nuts for the rotary table I snagged yesterday.
Will get them drilled and threaded tomorrow. Spent a few hours cleaning and polishing the table and I think it turned out well. Sure looks a lot better than when I got it home!
Still have the underside to do yet and I'd like to take it apart and clean the inner workings and re-lube.
There is a drain port on one side of it.
What kind of oil should I use?
Now, if I only knew how to use this piece of equipment!!
 

Attachments

  • DSCN9174.JPG
    DSCN9174.JPG
    115.3 KB · Views: 36
  • DSCN9175.JPG
    DSCN9175.JPG
    114.5 KB · Views: 30
  • DSCN9176.JPG
    DSCN9176.JPG
    121.7 KB · Views: 45
@finsruskw

You've got that RT looking like new already.

I wouldn't expect it to be filled (or partially filled) with oil. Show a picture of the "drain plug" and where it's located.
I also don't see any oil fittings in any of the pictures you posted. Curious?
Way oil should do fine.

Below is a link to a thread about an 8" Phase II RT. There may be some info that will help you there.
 
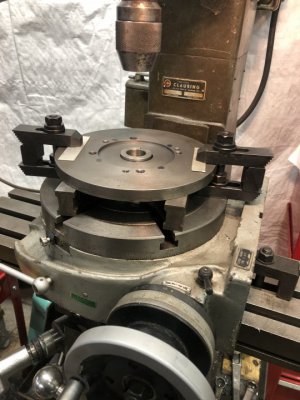
My I make a suggestion, while your making T slot nuts make a few extra long so if you have large parts to machine they can become “ outriggers “ for clamping blocks . Also I have the same rotary table if you look close at the pointer i machined the outer edge so the pointer could be moved to Zero with relative to the table T slots. Edit : This wasn’t the picture of how I used the longer T slot nuts I guess I didn’t take a picture of that .
 

Attachments

  • 479E57E3-6C92-42B8-9FB9-81219D0C44DC.jpeg
    479E57E3-6C92-42B8-9FB9-81219D0C44DC.jpeg
    84.5 KB · Views: 40
Making some TEE nuts for the rotary table I snagged yesterday.
Will get them drilled and threaded tomorrow. Spent a few hours cleaning and polishing the table and I think it turned out well. Sure looks a lot better than when I got it home!
Still have the underside to do yet and I'd like to take it apart and clean the inner workings and re-lube.
There is a drain port on one side of it.
What kind of oil should I use?
Now, if I only knew how to use this piece of equipment!!
Here's is a link to a complete setup system you might consider for quick accurate setting of the rotary table and locating parts to be machined.
 
My I make a suggestion, while your making T slot nuts make a few extra long so if you have large parts to machine they can become “ outriggers “ for clamping blocks . Also I have the same rotary table if you look close at the pointer i machined the outer edge so the pointer could be moved to Zero with relative to the table T slots. Edit : This wasn’t the picture of how I used the longer T slot nuts I guess I didn’t take a picture of that .
Will do! And thanks!
Looks like the bolts/holes will have to be at least 3/8"
Was thinking 7/16 but there is not much meat in the tee leg for that.
Did these comem with 3/8 nuts or was that stuff all aftemarket?
May have been metric as well I suppose.
 
So I took a few days off work to try to finish the milling machine... VFD and Maxi Torque Rite install... But looks like my wife had other plans for me...

Instead I spent the day building two planters... 18"x24"x108" each

Sweet potatoes on one side (last year we did well with those in large pots, figured we would do better in a larger planter this year) and one for yautia (taro/malanga).

IMG_4797.jpeg

IMG_4800.jpeg

IMG_4802.jpeg

Wife and father-in-law planting...

IMG_4801.jpeg

I did finish the drawbar and installed it during the afternoon yesterday... but nothing got done today in the garage... uff...

IMG_4776.jpeg

Maxi Torque Rite bolted in place... now to find a place to install the switches so I can run the air lines...

IMG_4785.jpeg
 
Last few days i've been spending the little free time i have in the garage working on the Scenic. Part by part i managed to put it together and get it fired up. It has great oil pressure and seems to run even on all 4 cylinders, i fill the cooling system with coolant and let it run to get all the air out of the cooling system. I also run it on LPG and seams to run good on it also. I have few thing to fix on it from under it but i think i'll drive it over the inspection pit. It will be easier than the oil soak concrete it now on.
IMG_20220305_081352.jpgIMG_20220305_094957.jpgIMG_20220305_095102.jpgIMG_20220305_103721.jpg
 
Back
Top