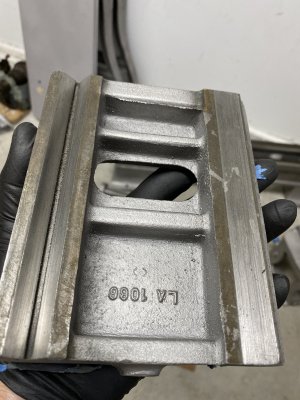
New To Me 11" Logan 920

You asked recently how to straighten the bent gib and I haven't seen any replies. From the picture, showing a gradual bend, I'm assuming the gib is mallable enough to endure straightening without fracturing. If that seemed correct in person, I would do the following.
On a granite or cast iron surface plate, sandwitch some of the straight portion of the gib between a 1-2-3 block (on the surface plate) and a piece of CRS (on top). Clamp securely to the surface plate. Leave enough of the straight portion extending beyond the 1-2-3 block to allow another 1-2-3 block to be used as a moveable fulcrum. Using a dial indicatior on a surface gage, survey the exposed gib to quantify the magnitide and start of the bend. Place the fulcrum to support the straight portion. with the indicator displaying deflection, use a screw clamp (not a hammer or wrench) to straighten the bend. Don't try to get it 100% the first time. Notice the magnitude of spring back when you remove the straightening clamp. Straighten .XXX" and survey the part again to see the progress. Move the location of the fulcrum as required to keep the straight portion supported.

On the other hand, If you get a replacment compound from Bear . . .
 
Good news about the powder coating. I much prefer to make suggestions that turnout to be usefull, even implemented, rather than unconsidered and/or defective. Excellent price too.
To clarify - the powder coater did not want to powder coat - due to the mass of the objects. Too long to cook in his oven.
However - the suggestion turned out to be a good one in its own way.
He gave me a fantastic price on sandblast for all the components - there is a lot of detail - and the $125 price tag was days of labor saved. So in the end, I will paint - but the suggestion did turn out to deliver good opportunity.

How to remove the cross slide screw? Same disclaimer, so my answer is "one part at a time". LOL
Start with that setscrew in the graduated dial, and so on.
A set screw makes more sense - but it looked like a pin - thus my question.
I'll double check this morning.

Anyone else have to wrestle one of these apart that can add some advice?
 
Media blasters made quick work of it.
I know some are not fans of this approach - and there is some basis for that.
Media blasters are hardly renown for their pin point accuracy...
That said - this mill has seen some miles - and a lot of coats of paint - and so I took the chance.

Have to say - really pleased with the outcome.
On the bed - they appear to have been very careful as per my request.
You can see from the photos that they didnt even come close to the bottom fo the ways.

On some of the hand held pieces - they were a little less surgical - but I had taped off and plugged the holes - and the outcome seems quite good.
If anyone is interested, the good bad and ugly are below.

While they were at it - the aluminum parts were chemically stripped.
There is some method to my madness (or vice versa).
I am planning on polishing out the aluminum to create a kind of classic look.
I did a super quick test pass to see what I will be dealing with.
It is going to take some work - but I think the end results will be nice.

A few before pictures - after pressure washing, but before media blast:
IMG_3287 2.JPGIMG_3288.JPGIMG_3289 2.JPG

And some of the after: So much nicer!

IMG_3343.JPG
Clean!
IMG_3345.JPG
She's got legs: as if they just left the foundry IMG_3344.JPG

The worst spot they goofed was a tiny overstay on the bottom of the tail stock. you can see it on the right.
The wear from age and use is frankly worse...
IMG_3332.JPG

I took the chance they could do the lamp without destroying... this came out great - it was a rusty, triple paint coated mess.IMG_3326.jpg

Quick practice run on the cover - I'm going to have to hit it with a sander to take out some of those deeper scratches - but you get the idea of where I am going with this. Note - prior owner hinged for the collet closer. little rough. Bear... how is your cover stock?IMG_3338.JPG

The whole kit ready for paint
IMG_3340.JPG
 

Attachments

  • IMG_3332.JPG
    IMG_3332.JPG
    2 MB · Views: 6
Last edited:
Media blasters made quick work of it.
I know some are not fans of this approach - and there is some basis for that.
Media blasters are hardly renown for their pin point accuracy...
That said - this mill has seen some miles - and a lot of coats of paint - and so I took the chance.

Have to say - really pleased with the outcome.
On the bed - they appear to have been very careful as per my request.
You can see from the photos that they didnt even come close to the bottom fo the ways.

On some of the hand held pieces - they were a little less surgical - but I had taped off and plugged the holes - and the outcome seems quite good.
If anyone is interested, the good bad and ugly are below.

While they were at it - the aluminum parts were chemically stripped.
There is some method to my madness (or vice versa).
I am planning on polishing out the aluminum to create a kind of classic look.
I did a super quick test pass to see what I will be dealing with.
It is going to take some work - but I think the end results will be nice.

A few before pictures - after pressure washing, but before media blast:
View attachment 372278View attachment 372279View attachment 372280

And some of the after: So much nicer!

View attachment 372291
Clean!
View attachment 372294
She's got legs: as if they just left the foundry View attachment 372292

The worst spot they goofed was a tiny overstay on the bottom of the tail stock. you can see it on the right.
The wear from age and use is frankly worse...
View attachment 372293

I took the chance they could do the lamp without destroying... this came out great - it was a rusty, triple paint coated mess.View attachment 372287

Quick practice run on the cover - I'm going to have to hit it with a sander to take out some of those deeper scratches - but you get the idea of where I am going with this. Note - prior owner hinged for the collet closer. little rough. Bear... how is your cover stock?View attachment 372288

The whole kit ready for paint
View attachment 372283

I'll have to look at my cover... I don't remember it looking like yours... mine had the underdrive cabinet, so the cover may be different.

I still need to look at the way wipers on mine... 70 hr work weeks don't leave a lot of time to think about other things.

I'll try to remember to check in the morning when I get home.

-Bear
 
Ha - Thanks Bear,
Nothing like coming off work to rummage through your old parts - which are in that box - underneath the other box - on the shelf - you have to step over the stuff to reach.
:)
Actually - judging from your picture - seems your work space may be a bit better off.
-CM
 
To clarify - the powder coater did not want to powder coat - due to the mass of the objects. Too long to cook in his oven.
However - the suggestion turned out to be a good one in its own way.
He gave me a fantastic price on sandblast for all the components - there is a lot of detail - and the $125 price tag was days of labor saved. So in the end, I will paint - but the suggestion did turn out to deliver good opportunity.


A set screw makes more sense - but it looked like a pin - thus my question.
I'll double check this morning.

Anyone else have to wrestle one of these apart that can add some advice?
You have to remove the crossslide bushing with a pin wrench or reasonable facsimile there of. . There is a flange on the cross slide screw that gets pulled to the back side/inside if the bushing when you use the nut that's next to the micrometer dial to take up the back lash. But you have to leave it loose enough the dial can spin. That's where a lot of, if not most of, the back lash you asked about earlier is. Look at the parts diagram to see the flange on the cross slide screw.
 
Last edited:
There aren't any way wipers on my Logan... I did find the cover, but didn't have my phone with me, so I'll get some pics tomorrow and compare it with yours...

-Bear
 
You have to remove the crossslide bushing with a pin wrench or reasonable facsimile there of. . There is a flange on the cross slide screw that gets pulled to the back side/inside if the bushing when you use the nut that's next to the micrometer dial to take up the back lash. But you have to leave it loose enough the dial can spin. That's where a lot of, if not most of, the back lash you asked about earlier is. Look at the parts diagram to see the flange on the cross slide screw.
Good insight. So the back lash can actually be adjusted by turning that flange screw - but it is a fine line between too tight and too much back lash - If I read correctly.

As for the pin - I will look a second time - but it looks like a roll pin in a blind hole. Not sure how those are removed. Off to the internet if that is the case.
 
Apparent backlash in the cross feed of most at least older lathes is actually the sum of two things. End float in the cross feed screw, and actual backlash in or between the threads on the cross feed screw and in the cross feed nut. End float on most machines is adjustable and can usually be reduced to almost zero. Actual backlash between the male and female threads is not in general adjustable and in the general case can only be reduced by replacement of the screw and nut.

However, the effect of backlash can generally be eliminated by technique. Always approach a setting for turning an OD or facing by turning the crank CW. If you overshoot the desired setting, back up more than the known backlash and try it again. For turning an ID, approach the desired setting by turning the crank CCW.
Got it. Good explanation of the variables. Thanks!
 
Back
Top