-
Welcome back Guest! Did you know you can mentor other members here at H-M? If not, please check out our Relaunch of Hobby Machinist Mentoring Program!
You are using an out of date browser. It may not display this or other websites correctly.
You should upgrade or use an alternative browser.
You should upgrade or use an alternative browser.
Monarch 10EE - what to do?
- Thread starter Phayb
- Start date
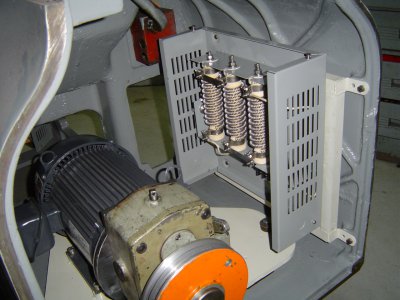
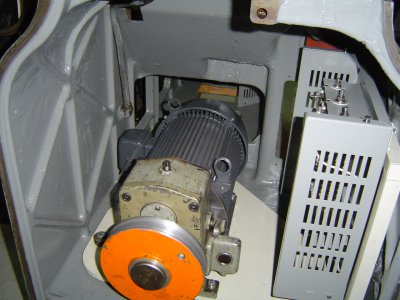
Finally an update! The rest of 2019 was a busy time for me and nothing got done on my lathe project. Today I finally got to install the motor/gearbox assembly into the machine as well as the braking resistor bank.
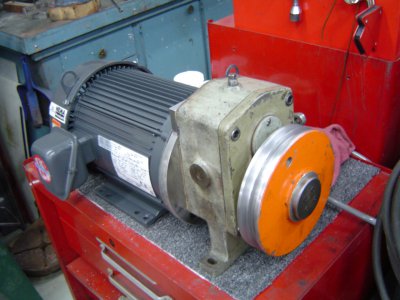
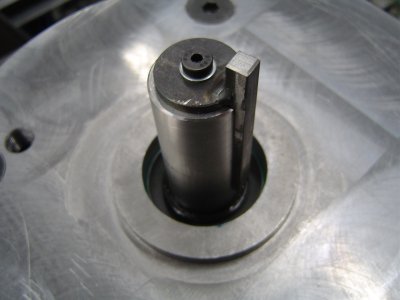
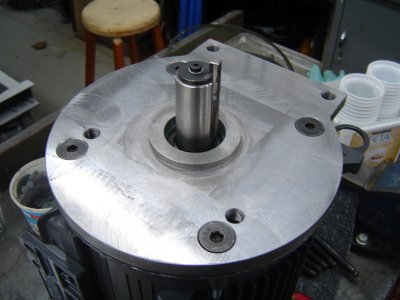
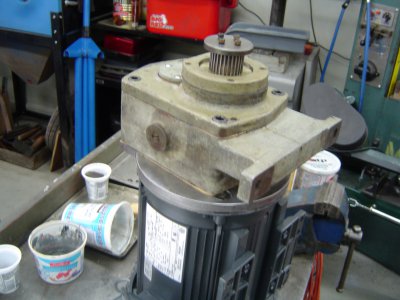
In the build-up to this point, I had acquired a used gearbox and pulley. The sliding gear of the gearbox had to be adapted to work with the motor I bought. I sleeved it with a diameter 1.5" x 1/4" 4130 tube - welded and bored to fit with a keyway. I designed and made an adapter plate. After some fiddling to get things to line up properly, I think it turned out pretty good.
In the build-up to this point, I had acquired a used gearbox and pulley. The sliding gear of the gearbox had to be adapted to work with the motor I bought. I sleeved it with a diameter 1.5" x 1/4" 4130 tube - welded and bored to fit with a keyway. I designed and made an adapter plate. After some fiddling to get things to line up properly, I think it turned out pretty good.
I made a base plate that closely resembles the original - although I went by the pictures in the old manual and my particular motor set-up. The pulley I acquired needed to have the V-grooves widened. I had to fix the key onto the motor shaft - I elected to fasten it with a disc that is bolted into the end of the shaft. Everything seems to fit well and shift into and out of direct drive. We'll see how it goes once I power up the motor.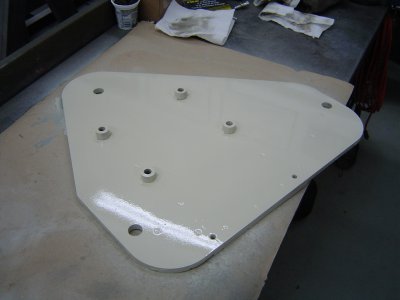
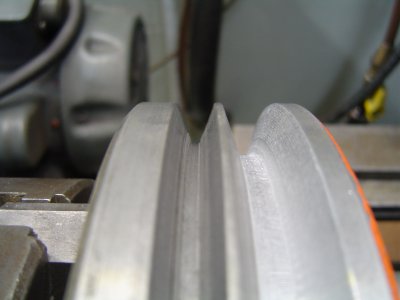
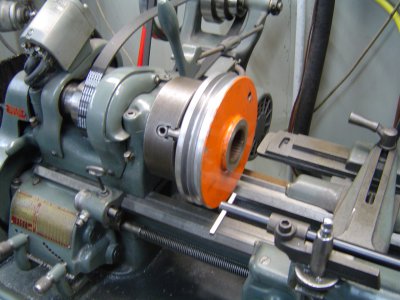
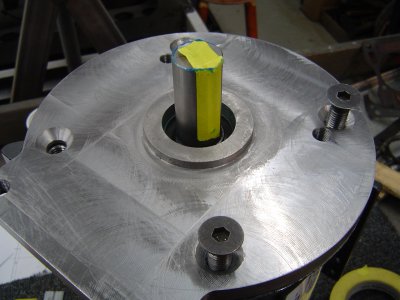
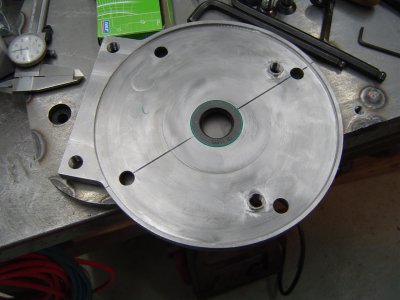
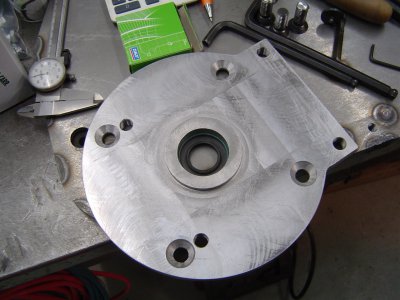
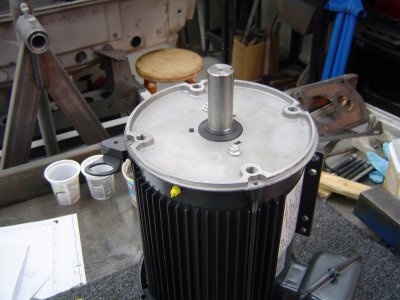


I made a base plate that closely resembles the original - although I went by the pictures in the old manual and my particular motor set-up. The pulley I acquired needed to have the V-grooves widened. I had to fix the key onto the motor shaft - I elected to fasten it with a disc that is bolted into the end of the shaft. Everything seems to fit well and shift into and out of direct drive. We'll see how it goes once I 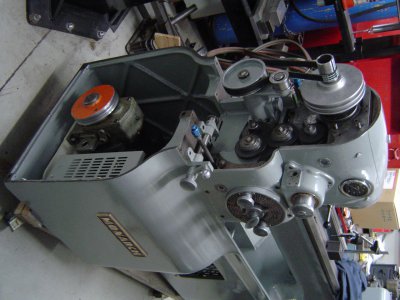


It's been a while...and a crazy year! As we all know, 2020 is one for the record books. Hoping everyone out there is doing ok. Fingers crossed that 2021 will be a good one.
I got the machine running in the late spring. I mounted the VFD on a dedicated frame that I fabricated from laser cut 3mm steel. I also fabricated a rheostat mount with a 3:1 reduction for speed control. I also needed a mounting arrangement for a set of idlers (I found that Toyota V6 timing belt idlers are a good fit) as I needed to control the belt whip on both sides - some rumaging through the scrap pile at work turned up some heavy plate material that worked out to be a good base to start with. I'm pretty happy with how it turned out. It runs, stops, goes forward and reverse...all appears to be good. I can fiddle with things and fine tune later. Video link:
I'm finishing up the cross slide and compound. Next in line is the apron and then the tailstock. With any luck, the chips will be flying soon after.
I have not been able to locate a used top end cover so I decided to fabricate one out of 3003 aluminum sheet. I'll make up a hammer form and pound one out. I've already got the flat pattern worked out so it should work out. I'll post pictures of things when I'm working my way through it.
Last edited:
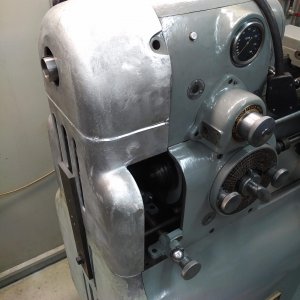
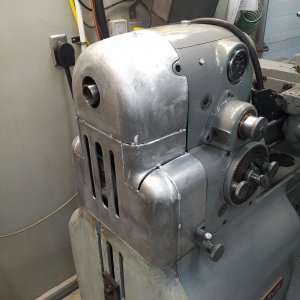
So...to wrap things up, here's where things ended up. I needed to buy some parts from Monarch for the rebuild of the apron. While doing that, I found out that I could buy a new, raw, unfinished casting for the upper cover. It doesn't fit the older machines but I decided to take a chance and give it a go - cut and weld a cover that would fit and make anything that was missing (pins, lock mechanism, trim). It was quite a bit of work, but I did it and I'm pretty pleased with the results. It's not "showroom quality" but it suits me just fine.
Oh...and yes, I've been making chips at last!

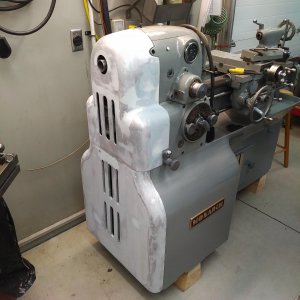
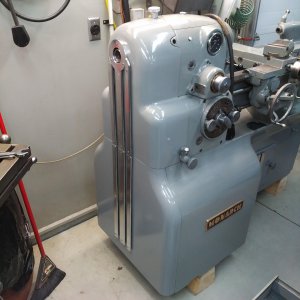
Oh...and yes, I've been making chips at last!


![IMG_20210101_1313369[1].jpg IMG_20210101_1313369[1].jpg](https://www.hobby-machinist.com/data/attachments/306/306820-bfe1126ee430cf170477ed8423bffac0.jpg)
![IMG_20210101_1313466[1].jpg IMG_20210101_1313466[1].jpg](https://www.hobby-machinist.com/data/attachments/306/306821-52c01d5e700d5dda3dd068699bb95176.jpg)
![IMG_20210101_1314170[1].jpg IMG_20210101_1314170[1].jpg](https://www.hobby-machinist.com/data/attachments/306/306822-f7579dfc32e396e7fa443aa201f05690.jpg)
![IMG_20210101_1314297[1].jpg IMG_20210101_1314297[1].jpg](https://www.hobby-machinist.com/data/attachments/306/306823-32cff944009d47f70ed5a90a53f02109.jpg)