[How do I?] Make a box square and set of small dovetail gages (straightedges)

Be careful! Those steel toed shoes may not hold up to that two pound chunk of cast iron if it slipped out of your hand.:(

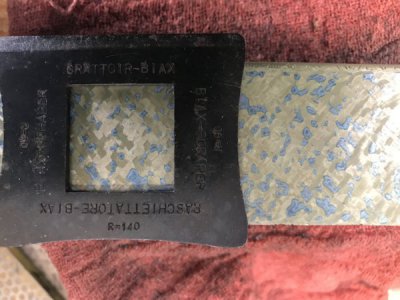
I like your box square. Next project on my list. I have a piece of 4-1/4" square cast iron that would make a perfect box square out of. Got me thinking now. I notice your scrape marks are long. That could prevent you from getting to the 40 ppi spotting you are after. Try to shorten them to half that. Yeah, I know, it's hard to do with a hand scraper. Much easier to do with a power scraper when you have one.

Thanks for sharing!

Heh. I'm a bit of a safety nazi myself since I work alone in my shop, but we are having a bit of a heat wave and I wasn't using any power tools, so I permitted myself the sandles this one time.

I'm usually a stickler for proper attire, ear and eye protection, etc. but I think the risk was acceptable: the tiny little four inch part is bolted down to the table and I've got both hands on a manual scraper slowly removing just the tiniest little flakes of metal. I was more at risk barefoot at dinner, manipulating a sharp knife with just one hand.

I agree you need short scrapes as you get close, but I find bump scraping by hand lets me make far shorter/smaller scrapes than I can get with my biax power scraper. In that last photo I was removing a hump and not particularly focused on PPI, but the scrapes were still mostly about an eighth to a quarter of an inch long.

The photo is also a little deceiving, but the part is only about an inch or two wide. A few of the scrapes appear to connect end to end (which isn't ideal, but again I'm just removing a hump). Regardless, I'm pretty close to 40 PPI across the entire surface except a few spots near the sharp edge. Another few passes and I'll be satisfied with this surface (five more to go! :).

Re: the box square: I can highly recommend the casting I bought from the link in the first post in this thread. Very nice guy, and a cored/ribbed and stress relieved casting should be more stable and definitely lighter than a solid chunk of metal. Even hollow, mine is pretty dang heavy.
 
I have a local heat treater that can stress relieve the cast iron after I get it roughed out. He does lots of iron and steel/duplex stainless steel castings in the line of work he does. They all have to be stress relieved. My apology on the scrape marks, I was thinking on a way bigger scale. Sorry.
Again, super nice work you have done there! And yeah, it's hot here, too, with lots of humidity! Ken
 
I have a local heat treater that can stress relieve the cast iron after I get it roughed out.

That's awesome, Ken. I hadn't even thought about searching for a local heat treat operation. If I do anything of significant size, I might investigate.

No apology required - your "two pound" estimate for the weight of the part was clear testimony re the misleading scale of the photo! The little one I'm working on now is smaller than, and only slightly heavier than, my iPhone!
 
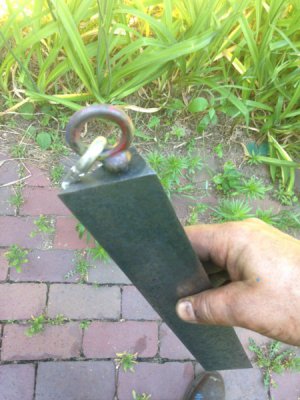
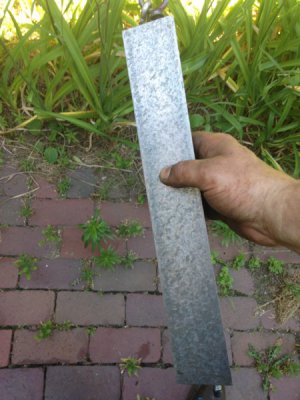
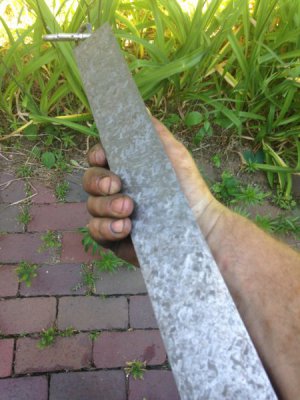
Let me know if you have any interest in one of these "triangles".
We have a couple left. They are durabar. Which I had stress relieved. Then we cut them into triangles on a Marvel tilt bed bandsaw and then shaped to close on a GE16" shaper.
I have one remaining and I believe that a friend of mine has a second extra. I'll include the pine bed which I used to scrape mine.
I drilled and tapped mine and have it hanging next to my BS camelbacks instead of boxed.

I've got some 20x1x2 inch cast gibs out of a scrap pile I want to scrape in as parallels. Someday....

PM me if interested.

Daryl
MN

IMG_1536.JPG

IMG_1537.JPG

IMG_1538.JPG
 
Let me know if you have any interest in one of these "triangles"... we cut them into triangles on a Marvel tilt bed bandsaw

Nice!

I'm basically making the same thing, less the stress relief (perhaps slightly smaller, the largest is about 12" long). I'm not expecting a whole lot of movement after the initial milling with such small parts, but if they do start curling up like a potato chip I may very well drop you a line.

Now, about that bandsaw and Brown and Sharpe camelback .... :)
--
Rex
 
Rex,
Not sure if you are serious about the straight edges I sent you a PM.

Daryl
MN
 
Let me know if you have any interest in one of these "triangles".
We have a couple left. They are durabar. Which I had stress relieved. Then we cut them into triangles on a Marvel tilt bed bandsaw and then shaped to close on a GE16" shaper.
I have one remaining and I believe that a friend of mine has a second extra. I'll include the pine bed which I used to scrape mine.
I drilled and tapped mine and have it hanging next to my BS camelbacks instead of boxed.

I've got some 20x1x2 inch cast gibs out of a scrap pile I want to scrape in as parallels. Someday....

PM me if interested.

Daryl
MN
Nice triangle there Daryl. I used to have one that was about 40" long. Dad did something with it the week before he passed away. Never did figure out what happen to it. I made another one about 12" long, more of a dovetail template, a while back, that works for my needs right now.

I notice on Rex's bandsaw, he has his 4 x 6 set up with the table and a vee block. I may try that and make a 45 degree triangle, which I don't have.

Ken
 
I notice on Rex's bandsaw, he has his 4 x 6 set up with the table and a vee block. I may try that and make a 45 degree triangle, which I don't have.

It was a little dicey, but it got the job done. It's pretty scary using a horizontal bandsaw in vertical mode (all that exposed blade with no guard gives me the willies).

I only had a pretty dinky v-block, though. If you do go that route, make sure you clamp it pretty close to the blade (without room for the work to tip into the blade). If I were to do it again, I'd make a much longer v-block rest out of wood, then plunge it into the blade an inch or two before clamping it to the table. That would provide support both in front and behind the blade, which would have been a lot safer and less scary.
--
Rex
 
Rex, this is all good stuff!! I happened to have watched Stefan's video recently and have to say it is quite good for content.

Keep it up!! I'm learning by only online content and some books, so all you include is most beneficial!
 
Thanks, TD. Stefan's videos are definitely the best intro I've seen.

A little more progress today.

First, a brief video of a part that is hinging perfectly (for Brino and anyone else that's curious). This is what you're after:


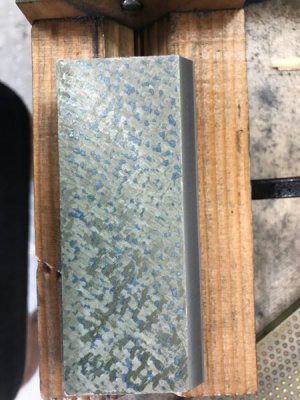
I put it in a few more passes on the first side of the shortest part. I quit when I got to this stage:
IMG_0355.JPG

I'm still not satisfied even though it's about 40 PPI. It's a little hard to see in the photo, but the entire left edge is still low. If you look closely, it's only bearing on a very few points anywhere within about an eighth of an inch of the left edge. Not good since this edge is a critical surface for checking narrow dovetails.

Keep in mind that I still barely know what I'm doing. I've got weeks of practice, not years.

Anyway, another thing I've learned is to use all your senses. Here's a photo of me licking the part to detect a low spot:

(Kidding)

In all sincerity, though, pretty much all your other senses are involved. You can feel the part sucking onto the plate when it's flat. If it isn't hinging perfectly, your fingers will tell you before your eyes (one side might be easier to swing than the other, for example).

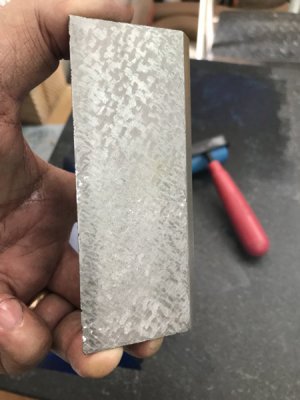
In my case, I could actually see the low spot along the edge. Hard to set up decent lighting to show it in a photograph, but in person the low spot is directly visible. You can sort of see it in this photo:

(Edit: I was completely wrong about this. The dark stripes along the edge weren't low, they were a side effect of the casting process. See my follow up post later in the thread.)
IMG_0366.JPG

See the dark spot along the left edge?

(Edit: again, not a low spot, despite appearances. I'm an idiot)

I actually need to back up a bit, stop pinpointing, and go at almost the entire surface with slightly longer scrapes to lower the rest of the part to this level before continuing. (More on this later.)

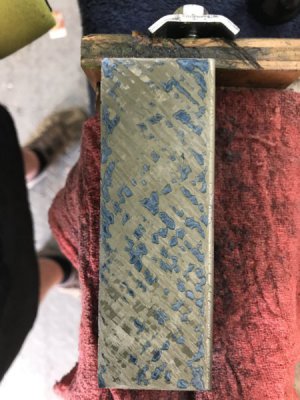
Before getting carried away, I decided to start working on the other surface for a bit. Here's the new surface around five passes after scraping away the mill marks:
IMG_0356.JPG

(Note the rag to give a little protection to the already scraped surface.)

This side started off pretty flat right after power scraping the mill marks off, so I started hand scraping almost immediately.

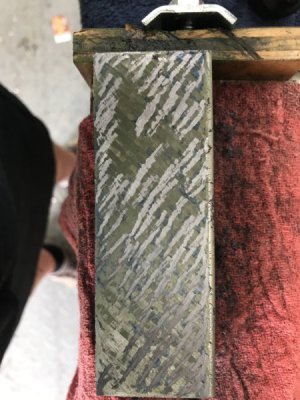
This is what it looked like right after scraping off the blue peaks shown above:
IMG_0357.JPG

Notice the length of the scrapes (about a half inch mostly, since I'm still at a medium roughing stage).

Here is the marking immediately after that pass:
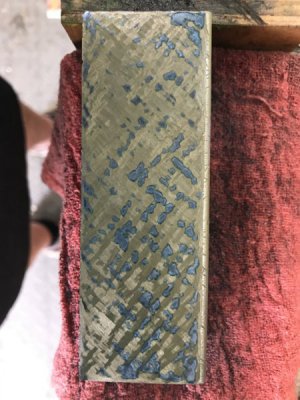
IMG_0358.JPG

So now I went at it from the other direction:
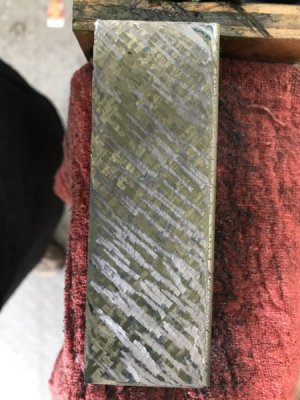
IMG_0359.JPG


After several more passes, most of the "valleys" had at least a few bearing points showing, and I got to around 15-20 PPI.

At that point I started "bump" scraping (more later):
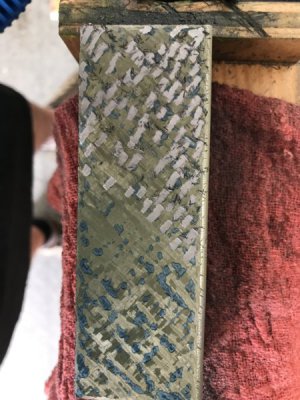
IMG_0362.JPG

Notice the much shorter scrapes. I'm targeting each individual blue spot now, trying to just take off the absolute peak of each individual mark. Notice where I missed a few but just kept going trying to keep the 45 degree rows fairly neat and straight, and trying to scrape to the same depth each time.

Arguably, I could have gone a few more passes still before starting to bump scrape, but none of the valleys were even dime sized so it seemed a reasonable time to start.

After just a few more passes I had it in even better shape than the first side:
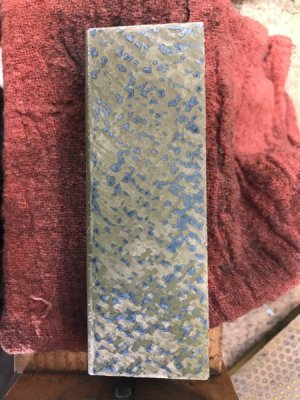
IMG_0363.JPG
IMG_0364.JPG

You can also tell visually that this side is in better shape than the first:
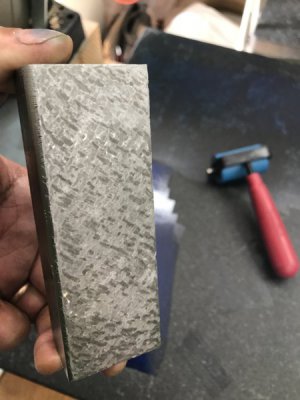
IMG_0367.JPG

Before getting too cocky, though I should point out that even canode spotting ink is too thick to REALLY claim success. The ultimate test is to flood the part with alcohol, then let it evaporate to create a slightly dull haze. Then rub the part on a dry surface plate.

This time the lighting and photography is REALLY tricky:
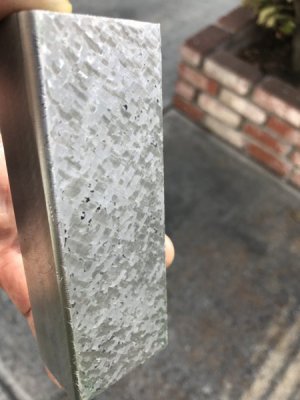
IMG_0368.JPG

Those dark glints you see are high spots. They are actually evenly spread over the surface of the part, but I'd need to drag out a real camera and lighting equipment to show it better. The blue showed about 40 PPI but these glints are only about 20, sadly.

If I set up decent lighting on my benchtop I could bump scrape even these alcohol marks, but I'd have to do it in the evenings as I have a skylight in my shop. I'm pretty confident I could get it flat down to about 50 millionths of an inch that way (if I wanted to drive myself crazy).

Anyway, I still need to fix the first side.

I was tired of the tedious finish scraping though, so I decided to start on the 8" part next.
 

Attachments

  • CC8C2242-D18A-49FA-BD8F-FE1994879377.MOV
    0 bytes · Views: 9
Last edited:
Back
Top