Machining A Replacement Cross Slide For A Logan 11" (as Promised)

Here's some pictures of the compound slide I did last year. Might give you a few ideas on placing the marks and stamping the numbers.

Hey, thanks, Ken! That's awesome. Nice job stamping the numbers. I've made a few dials now and while the scribed lines come out great, I've never been completely happy with the stamped numbers (I've made a variety of jigs to hold the stamps). I may eventually build GHT's "universal pillar tool" just for this sort of thing, but I'm currently leaning toward engraving or laser-cutting flexible plastic laminate to make the protractor dial (a black plastic base with a white laminate on top).

You put the protractor marks on the cross-slide and the index marks on the compound. I'm planning on going the other way around (same as the original).

Since I already milled off the "ears" on the cross-slide, doing it your way isn't feasible for me. There is no circular raised area on my cross slide, and since I milled off the ears, the circular bottom of the cross slide (see photo below) is the full-width of the cross-slide. I plan to put index marks on the top horizontal surface at "North" on the compass (on the far side of the compound where it was on the original) and at "South". I also plan to put in index at "East" and "West," but they will go on the vertical surfaces on the right and left (hopefully that makes sense).

IMG_0602.JPG

Regards,
--
Rex
 
You put the protractor marks on the cross-slide and the index marks on the compound. I'm planning on going the other way around (same as the original).

Oh! Wait, you made a compound-slide not a cross-slide! Sorry — I misunderstood.
 
Rex,
I did make a cross slide and compound slide. The project started out just making a new compound slide. But when I really got into it, the cross slide was in as bad shape as the compound slide was. I had enough ductile iron purchased, so I made a cross slide, too. Yes, I used ductile Iron! Wish I had enough DI to make my slide as long as yours for a back tool rest as you did!
The degree marks on your Logan are laid out just like they are on my big Lodge & Shipley, marked on the cross slide.
 
More progress.

I was able to get about 0.180" back in tool height adjustment bymilling a small amount off the top of the cross slide and both the top and bottom of the compound.

This was just enough to be able to adjust my 5/8" tool bits and cut-off tools to center height without the tool-holder bottoming out. Whew.

Hopefully nobody is following along, but don't do what I did and assume you have enough adjustability that the extra thickness in the cross slide won't be a problem! Once I'm satisfied with everything, I'll post drawings of what I should have built (considering this one a prototype).

Here's what it looks like now:
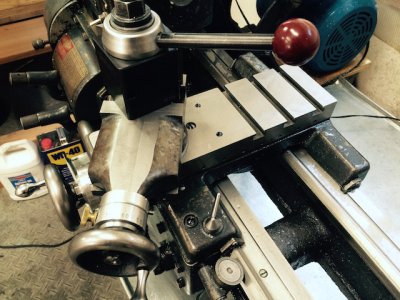
IMG_0639.JPG

Other than the fact that my compound-slide looks kinda like a freshly-shorn marine, I think it looks pretty spiffy, and it works a champ (I still need to make my gib lock levers, though).

I couldn't remove any more off the top of the cross-slide because the tee-slots (both straight and circular) were getting uncomfortably thin (about 0.160"):
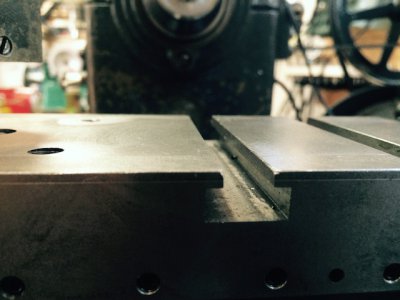
IMG_0640.JPG

Other than the slightly funny look of the compound, the only other issue I ran into was with the square-headed bolts and captured nuts that hold the compound onto the cross slide:
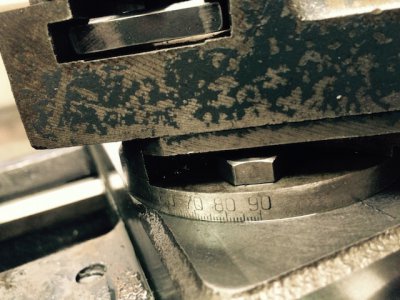
IMG_0641.JPG

I had a nasty surprise when I first re-assembled everything and tried to face a piece of aluminum. I swiveled the compound to 30 degrees (60 degree mark on the rear of the compound) and tightened the two lock-nuts on either side as shown above. Then I put a turning tool in the QCTP, loosened the top of the toolpost and swung the tool around for a facing cut. When I re-tightened the toolpost, though, the entire compound spun a bit to the right!

Get out the wrench and crank down on the nuts a bit more. Huh. Feels a little weird when I torqued the nuts down. Is there some swarf trapped somewhere? (No.) I was able to lock it down tight enough that it wouldn't turn, but it definitely bugged me (everything was slathered in oil, but still). Then I try to advance the compound slide. Very tight. Huh. Did I over-tighten the gib screws? (No.)

Eventually I copped to the fact that removing material from the bottom of the compound meant the square headed bolts were now too long. As I drew them up with the nuts, they were hitting the top of the slot in the compound (which acted almost like a gib screw and made the slide hard to move).

So I cut the screws a bit shorter and found a 5/16-18 die to cut the threads a little farther along the shaft. (As an aside, I don't know what those screws were made from but it was the easiest machining I've ever performed -- the die cut so easily and smoothly I couldn't believe it.)

Anyway, all is well with the world again. After a slight tangent adjusting my spindle take-up nut, my lathe is now fully operational again.

I think my next task is to make a bunch of ball-handles for various things (gib lock levers, a better carriage lock handle, and replacement gib locks for my mill). I've been in conversation with Jim Sehr who has a brilliantly simple design for a ball turning attachment, and has also taught me several interesting things (like "timing" front and rear mounted tools for production operations).

I've done enough scraping now that I at least know how to do it. Flat to maybe 20 ppi isn't terribly difficult, but I'm struggling to two sides of my transfer block perpendicular and flat within a couple thou. Dovetail ways are definitely still beyond my skill level at the moment, and the Russian straightedge I bought off of ebay doesn't seem to transfer dykem-hi-spot very well, so I think I'll hold off on scraping the ways for a good while longer and get back to actually using my lathe!

I also need to make my rear-mount tool holder. That will be useful for making ball handles, so that may be next in the queue before the ball turner. This hobby needs a shorthand term for making parts for tools to make tools to make parts for tools.

Regards,
--
Rex
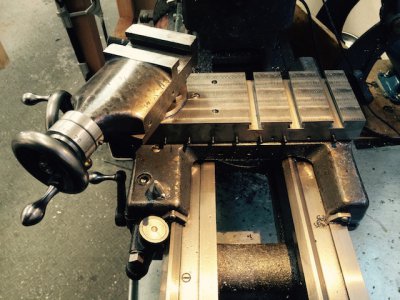
 
This hobby needs a shorthand term for making parts for tools to make tools to make parts for tools.
I think the term your looking for is MACHINIST
Really enjoyed your thread.
I want a machine with a cross slide like yours. May have to start looking for materials.
I too am learning to scrape my machines and have had some great results and a few screw-ups that must yet be corrected.
It' all a learning experience.
Jim
 
Late to the party, but really nice work Rex!
 
You could use a qctp or a four way , even a second compound. Nice job on the build. I bet the studs were leadloy 12l14. I used lots of bars of that in a valve shop on turret lathes. It's just so nice to work with. I could cut 1" acme threads on ten inch shafts with a die head in about a minute or less. Brass is another of my favorites. I may still get the ruff casting for my logan 11" someday if I get back straightened out. Two very good neurosurgeons said no more surgeries on my spine it can't take anymore the last one said. At least now I have proof the butcher that did the first two really did turn me into a quadriplegic. I got back to walking with a cane but the damage caused me to walk back into a wheelchair. Life's good to me YA think.
 
I refer to making parts, for making parts,for making parts as the snowball effect. It will sneak up on you.
Loved your build and detail.
Ron in ohio
 
wow that's some sweet looking work... gonna be one hell of a lathe when your done! and I just love those dials that a person can actually read. to bad no ones reproducing them commercially.
 
I earmarked this post just so I could refer to it when I build a cross slide. So... here I am ready to start and I can’t find the MLA web site to order the casting. Anyone know what happened to them?
 
Back
Top