John Deere F935 rebuild

Awesome work Greg, You not only have a well equipped metal fab & machine shop, but an impressive wood working shop evident from past posts. Your ability to produce the quality work you do shows years of hard practice. Well rounded craftsman indeed. Kudos man!

Paco
 
Come on guys, your making me blush.
Your right Jeff, it was the same when I studied for exams, left it to the last minute, now I have too many projects left and getting old. lol
Not necessarily good, more like I've done it the wrong way so many times Im starting to know what won't work.

Greg
 
Takes a certain amount of combobulating to make things like that come to fruition. Four days doesn't seem excessive. Very impressive project, and recycling of materials. Cheers, Mike
 
I agree with Mike. Four days is what it took. Combine design and build and things take time.

It is all looking really good Greg. You going to get a chance to actually try it? Snow season is coming to an end.
 
Just seamed to take too long. For some reason thought I needed 6 pulleys so made six but the good news is I now have spares. The cylinder is fixed using the tie rod bolts, took a lot of buggering to get the plates made, they also act as gussets to the mount arms. The tube that wraps around the pulleys to keep the cable in hit the chute, so I had to make a spacer plate out of polyethylene to go under the chute. Wanted to do that anyway, swivels smoother now. Of course the spacers I'd made to hold the keeper plates up squashed the plastic so I had to make longer ones that went through the plastic. The usual redesign as you go.
Had to buy a piece of 1 1/4 shaft for the auger and the cylinder so far, the rest is recycle Mike.
Probably get a chance to try it Randy, the snow was pretty much all gone but we got a couple inches yesterday and expect we'll get our usual late snow dump. Was a poor winter for the snow mobile though.
Start building bearing mounts for the blower and jack shaft today, Hope they don't require as much redesign.

Greg
 
Have the blower shaft bearings aligned to the auger input. A lot of fiddling and making new rods for the dial indicator.
Started on the blower itself.
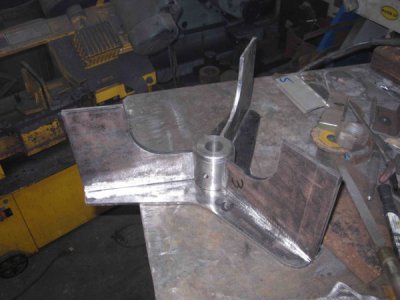
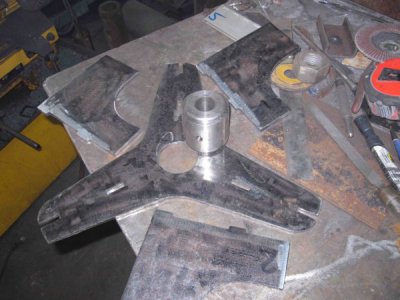
The plasma table does a great job of odd shaped parts like this. Makes it possible to key the blades to the back plate with tabs and slots. The hub was slotted with the dividing head to take the ends of the blades as well.
IMG_3982.jpg

Test fit.
The edge of the blade tips will get a slight bend put in them to catch the snow and stiffen the outside.

IMG_3981.jpg

May give it a static balance as it will be running at about 900 rpm.
Haven't decided if I'll key the hub or drive it from a second hub via a shear pin. The shaft on the auger would have to be shortened to make room for the second hub. Might be easier to put the shear pin back at the chain drive.

Greg
 
Back
Top