Heat Treat Oven...

Hi Oldgoaly,

I was going to weld-up some racks with closely spaced joists using the remaining SS rods.

I have no plans of sticking anything (ie. hands, tongs etc) in there while the coils are energized. Call me a chicken if you want... I'm not the kind of guy who sticks a fork in the toaster to dislodge a slice of bread :)... For safety, I have a switch between the controller and element which kills the high power, leaving the controller energized. The only feedback the controller gets is from the TRD -it's not monitoring current. That way, it doesn't lose track of what's going on and only thinks temperature is dropping despite it's gallant attempt to tell the coil to heat up. If I were to power off the PID mid-stream, I noticed it takes several minutes to self-adjust and re-learn the response time.

Ray


what are your plans for a shelf (for lack of better term) where your parts are going to sit on? It looks like yours will be safer than my Muffle furnace and kiln set up. When you I the blacksmith tongs in the heat zone, you need to be care not to touch the heating element, same with the tooling being treated. there is a bit of a magnetic attraction. worse when you are trying to get a bunch done in a hurry.
 
Hope this thread isn't getting on anyone's nerves... Status Update.

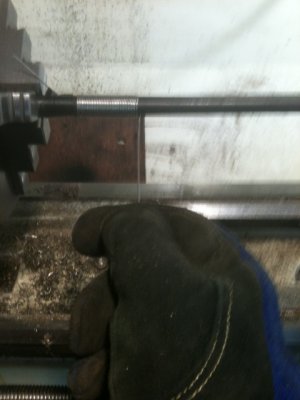
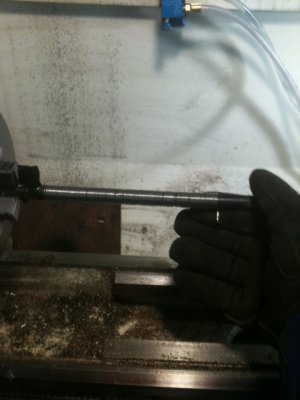
Today I rolled my own heating element wire by determining the amperage I desired, determining the appropriate resistance and calculating the length using the unit normalized resistance factor. I spot checked with an Ohm meter and it was basically dead-on. When fired-up the current was exactly as planned. I wanted a custom element with bigger loops and calculated the closest gauge wire to get the length I was hoping for. If anyone wants details on how to calculate that, let me know and I'll write something up. There's a lot of factors involved with heat loading etc.

The unit got up to 1500 in about an hour and 15 minutes. The PID algorithm was actually the limiting fact as it slows down the heating process as not to overshoot and hold within the 5% tolerance I set it for.

Here's some self explanatory pics of how to wind the wire. A 1/2" diameter rod was used for a specific reason. [BTW, if you do this, spin real slow around 50 R's, wear gloves and be careful. -Don't want to sound like mother hen here but, it would really suck to get caught-up in that wire. Do this with a very sober mindset].

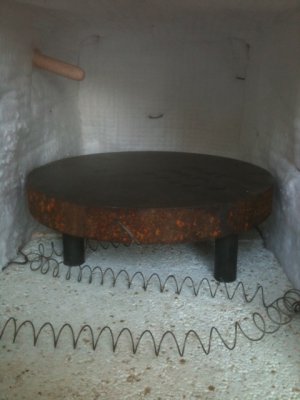
Anyhow, my next "self-project" requires a normalized and heat treated piece so, here it is. That's 1.5" thick, 11" diameter 1045 round. Normalizing temperature was 1550 with a 90 minute soak. Its in the gradual cool down phase now until it becomes martensetic -probably will be done tomorrow AM. You'll notice I'm not using a foil bag -that's because I don't care about surface decarburization on this big thing. The project? It's a mystery for now and I'll start a different thread when I get cutting on it.

If there's interest, I'll start another thread that explains the heat treating process (as I've learned it so far) and will use that round as an example all the way from normalizing, heat treating, quenching and 2 tempers.


Ray

Wind 1.JPGWind 2.JPGBig Round.JPG

Wind 1.JPG Wind 2.JPG Big Round.JPG
 
Well darn it... Wanted to get an early start and it's still 450 in there. Just about ready to go martensetic... Probably doesn't make a whole lot of difference but I want to do this one by the textbook. No doubt I'll screw-up others in the future...


Ray
 
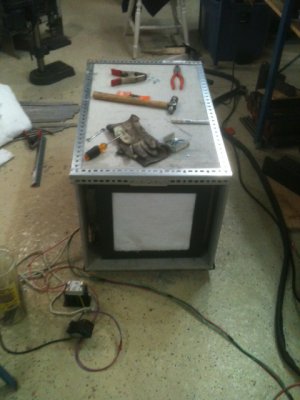
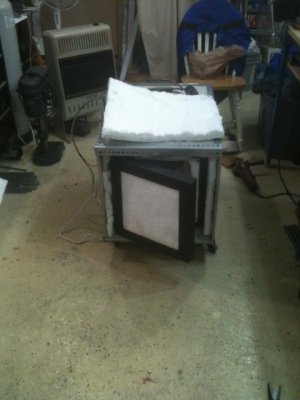
It's pretty much done so here's a final pic of the construction. All that's needed is a box to hold the relay and PID controller. Its on wheels and fits nicely under the main workbench. I have no plan to put a solid door on the front and will just cover it with the inswool. The side material is concrete board and the galvanized metal snaps off and the sides can be taken apart in a few moments. Man, I kinda hate that concrete board stuff...

Box 1.jpgBox 2.JPG

Box 1.jpg Box 2.JPG
 
Earlier, I mentioned an issue/problem with the controller. The problem was solved by separating the pyrometer wiring from the "harness" that housed the power lines to the element.

After putting the box around the oven, the unit was taking a long time to converge and sometimes, the temp read-out was bouncing up/down by 50 degrees or so. It didn't happen all the time and resetting the controller always fixed it temporarily. Since the outer box covered the head of the pyrometer, I suspected heat build-up in the layers of insulation was the cause but, a small opening to vent the pyrometer head didn't fix it.

Later on, I happened to notice the problem always happening as it reached a target temperature and while it was cycling the element to prevent overshoot. -Bingo. Light bulb went on. I used tie-wraps to tidy-up the wiring and the pyrometer lead was bundled with the element lines. Even though the lead has braided shielding, it's not grounded and was inducing power from the power lines. (classic case radiated interference).

Separating the lines fixed it. Could also be solved by grounding the braided shielding.


Morale of the story. The controller and pyrmometer are fine. I'm half-tempted to buy another set and build a smaller box for smaller-sized jobs.

Ray
 
2200? Sounds like this can be modified to melt aluminum or brass.

Have you had any thoughts about that?

Gary
 
Could easily be done. My box isn't setup for that. Extra inswool, class A firebrick and Kanthal A1 instead of Nichrome wire. Would need to find a different pyrometer though if you needed to know the precise temperature in there.


Ray


2200? Sounds like this can be modified to melt aluminum or brass.

Have you had any thoughts about that?

Gary
 
Correction... The pyrometer is rated up to 2370 and the controller deals with numbers between -1999 and 9999.

Anyhow, I'm only thinking about heat treating up to the 1700 range. Are you thinking about casting etc?


Ray


Could easily be done. My box isn't setup for that. Extra inswool, class A firebrick and Kanthal A1 instead of Nichrome wire. Would need to find a different pyrometer though if you needed to know the precise temperature in there.


Ray
 
Anyhow, I'm only thinking about heat treating up to the 1700 range. Are you thinking about casting etc?

Ray

Yes, I am. I already have some castable refractory cement. I just picked it up last week. It's good for 2700°. I can make a mold and cast any shape. Probably even with grooves for wires.
I had been thinking about using gas, but electricity might be better.

I wonder what the cost difference would be?

Gary
 
Easy to figure that out. Just tell me how much cubic volume and what temperature you want. I'll tell you how many Watts. Once you have Watts, you can convert that to BTUs, Calories etc and price it out. Propane stores always have tables of consumption rates for various Watt or BTU output. It's all online for ever flammable gas you're likely going to use.

Right now, my heater is pulling about 20 Amps which is half the amount required by my home's central AC when the compressor is running. It's about on-par with an electric clothes dryer.

EDIT: I went with electric because it will be useful to heat the shop in the winter.


Ray


Yes, I am. I already have some castable refractory cement. I just picked it up last week. It's good for 2700°. I can make a mold and cast any shape. Probably even with grooves for wires.
I had been thinking about using gas, but electricity might be better.

I wonder what the cost difference would be?

Gary
 
Back
Top