-
Welcome back Guest! Did you know you can mentor other members here at H-M? If not, please check out our Relaunch of Hobby Machinist Mentoring Program!
You are using an out of date browser. It may not display this or other websites correctly.
You should upgrade or use an alternative browser.
You should upgrade or use an alternative browser.
Heat Treat Oven...
- Thread starter Ray C
- Start date
- Joined
- Jan 28, 2011
- Messages
- 3,582
Our con caster is rated to 2600F continuous as long as the water cooling and cover gases are present. The floor is just a 2" thick layer of the soft insulating modules (these can be cut and drilled to fit odd shapes ) and a ceramic pedestal that the soft modules are fitted around, for the crucible to sit on. The floor has a water jacket just like the 4 sides do to control the heat build up on the exterior walls.
On the heat treating oven that we purchased from Brownell's, the heating wires are set into a groove in the side of the oven, this supports the wire at temperature so that it does not sag. You might have to give that some thought. I will take some pictures to illustrate if you want.
Pierre
Me too. Just got back from test ride on motorcycle and will be watching Mom while Dad goes to church shortly. I cut lawn on Friday after work so that weekend is free.
Last edited:
- Joined
- Aug 11, 2011
- Messages
- 117
I found a small muffle furnace at a swap meet for 20$ and another Ammco kiln for bigger stuff for 5$ so I haven't had to build one. here are a couple of pics of the little one, it might show better what the previous poster was saying about the grooves for the heating element. I've cast special firebricks using Mizzou mix in a sheet metal form, but mm is much more dense that the bricks in this oven or the kiln. When I got my Johnson furnace the pid controller was bad, 1k is what Johnson wanted, so I did some research and found a 30$ exact replacement uses a K-type thermocouple, You would need to do some experimenting but I'm sure you could make a pid controller work for a accurate controller. Good Luck with your project!
tt:thumbsup:
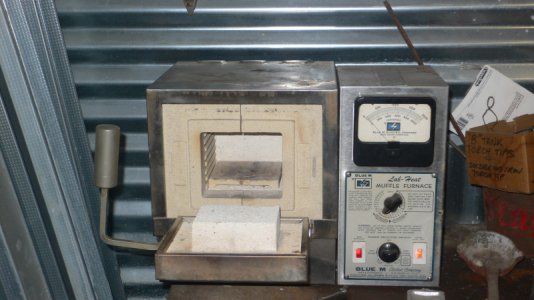
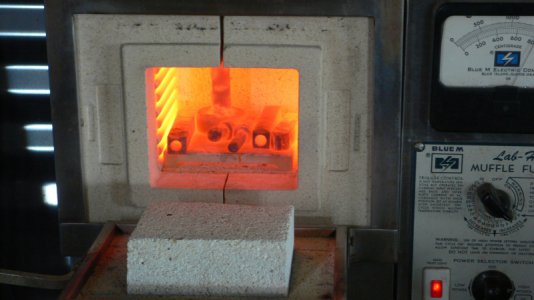


tt:thumbsup:


- Joined
- Nov 16, 2012
- Messages
- 5,596
Only marginal progress today. Got the grass mowed and dog walked but, one of the garage door springs broke so that robbed me of 2.5 hours. I did both overhead doors while I was at it.
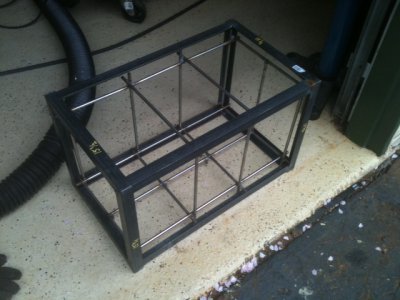
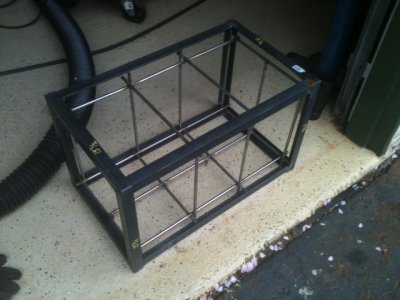
Anyhow, I made the external cage of angle iron and it fits well. One end is welded, the other end can be removed. Also managed to wire up the cord and controller. I could have installed the insulation today but, just wasn't up for it...
Oldgoaly,
You sure did stumble on some nice stuff for cheap... Good going! Oh, if you look further down, I purchased a controller, SRC, pyrometer etc a while back. I'm just getting around to putting it all together.
Ray


- Joined
- Aug 11, 2011
- Messages
- 117
Ray,
here is how I cast fire bricks, I use 26ga galv-cote sheet metal cause I have a lot of metal working equipment. No reason you could not use wood sealed and a wax for a mold release. If you were to make a 1-1/2 thick bricks with grooves for your heating element wire. Then pack around it with as much of the kaowool insulation, you should have a nice furnace. a trip to a pottery supply see if you can get the plates they use in kilns that will keep the parts at a nice height in the center of the furnace.
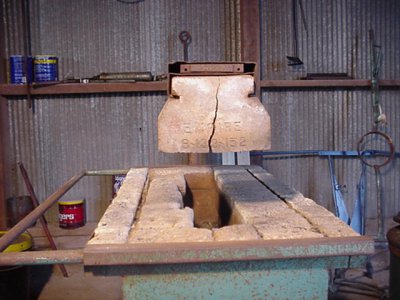
the problem missing and broken bricks
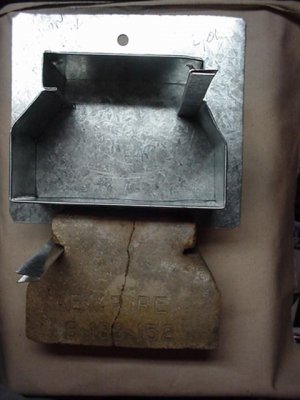
the form it unscrews from the back plate to help get the brick out.
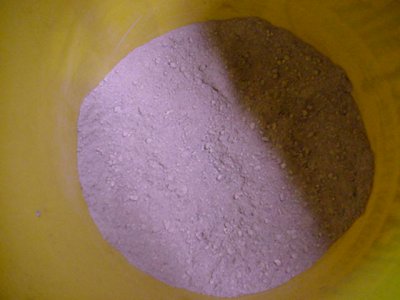
mizzou mix is a APGreen/ Habirson product, not cheap but strong, I've used this in solder furnaces and wood burning stoves, they are much stronger than the older fire bricks.
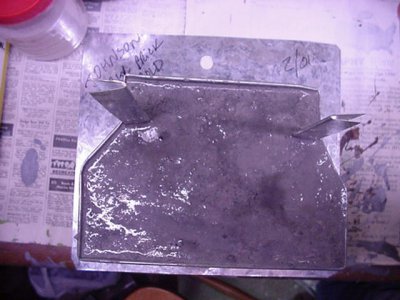
following the instructions on the bag using minimum of water, give it a day or so to dry, take out make another one. Finding stuff cheap is getting harder to do, swap meets, auctions, good old Craigslist is the ticket.
You have a good size, I hate to fire up the big one it eats watts like crazy, and it's in the main shop, not the hot shop, not enough juice to run it there. The small one, well sometimes I can only do one part at a time, it takes all day. but there is plenty to do in there.
I'm interested in seeing how your controller works, mine are both semi-manual, it only cycles one section of heater wire you have to turn it to low/med/high or switch on the other elements 3 of the 4. it would be nice to have a timer maybe an alarm when it was done...or goes over heat. Take care! tt


here is how I cast fire bricks, I use 26ga galv-cote sheet metal cause I have a lot of metal working equipment. No reason you could not use wood sealed and a wax for a mold release. If you were to make a 1-1/2 thick bricks with grooves for your heating element wire. Then pack around it with as much of the kaowool insulation, you should have a nice furnace. a trip to a pottery supply see if you can get the plates they use in kilns that will keep the parts at a nice height in the center of the furnace.

the problem missing and broken bricks

the form it unscrews from the back plate to help get the brick out.

mizzou mix is a APGreen/ Habirson product, not cheap but strong, I've used this in solder furnaces and wood burning stoves, they are much stronger than the older fire bricks.

following the instructions on the bag using minimum of water, give it a day or so to dry, take out make another one. Finding stuff cheap is getting harder to do, swap meets, auctions, good old Craigslist is the ticket.
You have a good size, I hate to fire up the big one it eats watts like crazy, and it's in the main shop, not the hot shop, not enough juice to run it there. The small one, well sometimes I can only do one part at a time, it takes all day. but there is plenty to do in there.
I'm interested in seeing how your controller works, mine are both semi-manual, it only cycles one section of heater wire you have to turn it to low/med/high or switch on the other elements 3 of the 4. it would be nice to have a timer maybe an alarm when it was done...or goes over heat. Take care! tt


- Joined
- Nov 16, 2012
- Messages
- 5,596
Very interesting. It never occurred to me to cast the bricks and figured it was pretty-much an industrial process out of the reach of homeshops.
I've wanted a furnace for a while because I really notice how internal stresses put a wrench in the works of some of my lathe and mill projects. I'm hoping this works for normalizing medium carbon steel and after the machine work is done, retreat it to a desired condition.
I spoke to an industrial thermal engineer, I think in Georgia. His company makes all kinds of ovens and blast furnaces but mostly big stuff (-really big stuff). I initially asked about bricks and he steered me away once I mentioned this thing would only see monthly, and once in a great while, weekly use. I'm taking his word for it and hope he's right. His theory was that brick is good for continuous use machines but wool is better for occasional use because the wool lasts about as long and heats-up 3-4 times faster. -And that gives better and more rapid control of the internal temperature. He claims the wool insulates much better. The only down-side is suspending it overhead and of course, it makes most folks itch like crazy. I hope he was right about all the technical info but given he makes furnaces for steel companies as well as industrial ovens, he must be doing something right.
Initially though, I was gung-ho to make one of fire brick but the guy really talked me out of it...
We'll see!
The little controller I got is pictured down below in this thread. The instruction manual was a little lacking but, I've noticed many commercial heat treat ovens are using the same device.
Can't wait to get this thing fired-up but, it's going to take a couple more days. -The real day-job gets in the way of all the good fun...
Ray
- Joined
- Aug 11, 2011
- Messages
- 117
Listen to all the ideas, lots of different ways to make kilns / ovens. I know the blacksmiths have their way for portable forges. I'm for interlocking bricks with out cement. There are many of the bigger ones are made with hard brick this way. Make it right and once, it will out last all of us! I figure mine are from the 1960 or 70's some of the electrical components will fail in time. Btw I would stay away form a chicken wire reinforced shell, they suffer from weakening from the expansion differences. I got started in relining appliances while researching building a cupola, still don't have that done. Finding good help when you need to make molds and pour, it's work!
- Joined
- Nov 16, 2012
- Messages
- 5,596
OK, we're making some progress now...
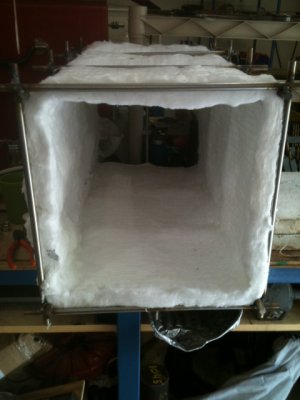
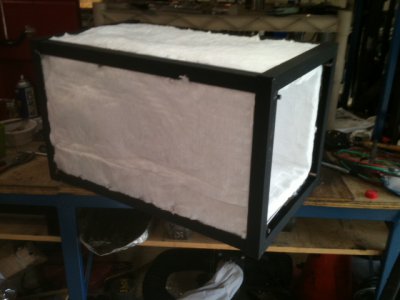
Here's the inner wrap held in place with 20 ga SS safety wire.
... The outside with the second wrap and the cage installed. I used some spray heat paint. Claims to be resistant up to 1200 degrees and used for BBQ grills and fireplaces. It dries almost instantly with a black matte finish.
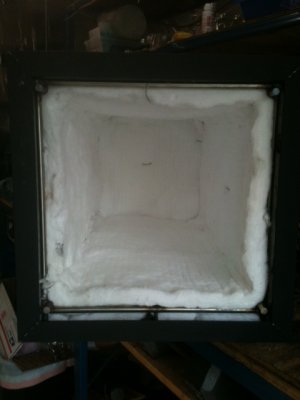
A view of the inside...
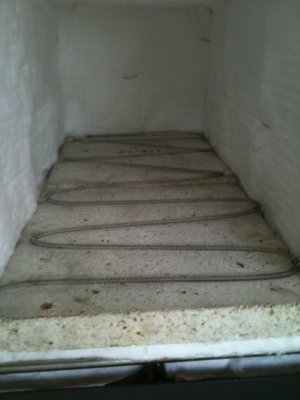
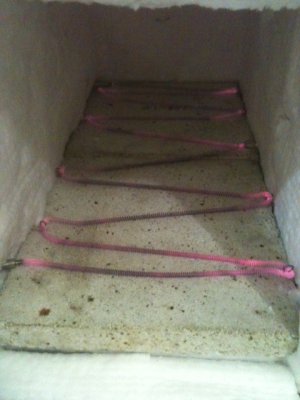
And finally, here's the kanthal wires. The piece I used should draw 30 Amps. It's held in place by some hooks bent out of the SS wire.
OK, going to take a quick break then, install and insulate the door then wire it up. Hopefully get most of it done today.
Ray


Here's the inner wrap held in place with 20 ga SS safety wire.

... The outside with the second wrap and the cage installed. I used some spray heat paint. Claims to be resistant up to 1200 degrees and used for BBQ grills and fireplaces. It dries almost instantly with a black matte finish.

A view of the inside...

And finally, here's the kanthal wires. The piece I used should draw 30 Amps. It's held in place by some hooks bent out of the SS wire.

OK, going to take a quick break then, install and insulate the door then wire it up. Hopefully get most of it done today.
Ray


- Joined
- Nov 16, 2012
- Messages
- 5,596
OK, we're cooking now!
Houston, We Got Heat!
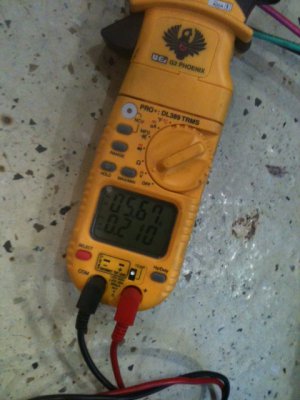
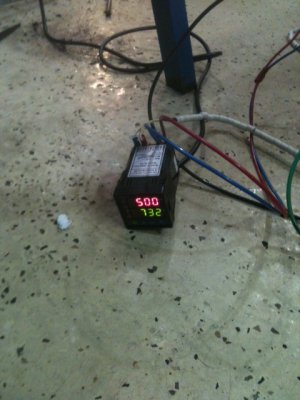
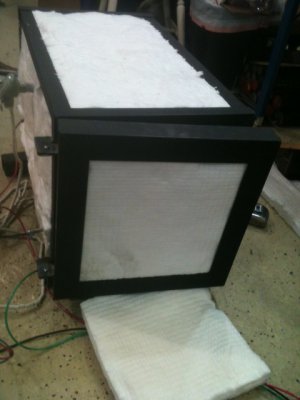
It took about 12 minutes to get up to 500 degrees and it's only pulling 11.4 Amps and some of the kanthal wire is not fully glowing red. I'll snip one of the zig-zags off to reduce the resistance and hopefully bring the current up to around 15-17 Amps. It might take a few tweaks to get it right. The SSR is rated for 40 Amps and it's heat sink is over-sized a good bit. It was totally cold. The setup is make-shift at the moment but, it's wired safely. At 500, the outside insulation was positively cold to the touch. Oh yeah, here's a picture of the door. Just welded a quick hinge on there.


