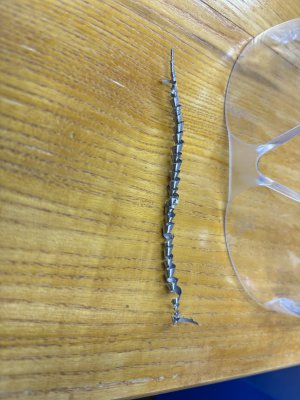
Destroying Drill Bits

In a lathe or press, something where the machine holds everything and a lever is used to apply pressure, one can drill 1/2 inch in a single pass.

If using a hand held motor, one may need to make smaller steps due to lack of motor torque or ability to apply pressure.

For anything above 3/16, too slow is better than too fast, increase pressure to get a good chip and good to go.

Smaller bits are too weak for this process as they need to take a smaller chip and use a higher rpm with tiny chip.

Oil is still critical as it keeps it lubricated and cool.

Smaller the drill, higher the speed, lower the pressure.

Sent from my SM-G781V using Tapatalk
 
If you look at the outer lip on these photos you will see they are sharp. [...] That edge can get destroyedx or degraded in just one action, then won't drill well or not at all. [...]
If I understand what you are talking about correctly (but my previous post did not concern this aspect of the matter), then:
Yes, you are right - the outer ends of the drill bits cutting edges are exposed to the fastest wear, that's clear: this is where the highest cutting speed exists, and therefore the highest temperature is generated during the drilling operation because there is the worst heat dissipation, there are the worst conditions for it - that's where the drill bits dulling process begins.
There is a way to improve these bad conditions, i.e. to correct this edge, which consists of grinding it at a different angle than the main angle (116-120°), as if slightly "breaking" this sharp transition of the drill's cutting edge into the side (helical) edge.
This angle can have a value of, for example, 80°.
Then the drill is more resistant to temperature (wear) and therefore remains useful for longer.

Image for clarity (standard and HSS drill bits):
Drill bit correction 1.jpg
 
Last edited:
I honestly have to say I didn't read all the reply's but have to ask if drilling work on your lathe do you pull the bit back to clean the bit and add more lubricant then continue your drilling.
 
Speed charts are more for industry/mass production.
Ideal conditions(as close as you can get), and a trade off between metal/material removal rate and tool life.
Slow it down, plenty of coolant/lubricant, pecking and of course drill point accuracy(how well you sharpened it).
Of course it helps to know what the tool and work piece are comprised of, as that can affect your settings.
 
Thank you everyone. I really appreciate all the replies. That was incredibly helpful.
Could be many things.

First thing that comes to mind, and the most obvious, is that the drill is not the expected grade of HSS, so you're running it too fast, and ruining it.

But I doubt it.

The way you describe it, I think it's the bar itself. It may have some nasty incrustations. For example, high silicon impurities often make stuff nearly unmachinable. A friend of mine always told me, that stock stuff you find in junkyards is not to be trusted for that reason, as there is usually a reason why it ended there.
I also have decided to quit buying the scraps from the scrapyards. I’ve been burned by it multiple times and would rather have the confidence that I know exactly what my material is. I have a hard enough time just figuring out how to do everything and don’t want to add extra variables.
You will never burn a drill up from running it too slow .
Incredibly helpful statement. Thank you!
Probably more than one issue; can't disagree with any of the other suggestions.

IMO you have too large of a pilot hole, so the drill is only cutting on the outer 1/8" lip of the bit, quickly overheating and dulling that area of the grind. And you are turning too fast, which only amplifies that problem. Pilot hole should only large enough to accommodate the webbing.
I appreciate this point a lot. You a couple others mentioned that but hadn’t even of thought of that. I think that’s likely what happened. It was just cutting through it so easily I think i just went way too fast.
 
I got the piece finished. I slowed my RPM way down, kept a close eye on the temperature, and added lots of cutting fluid with firm pressure and it came out nicely without destroying my other bit. I think my main problem was too fast of an RPM, with a secondary issue of not having the right pressure. I think because my pilot hole was so big, I just shoved it through too fast.
 

Attachments

  • IMG_5936.jpeg
    IMG_5936.jpeg
    271.2 KB · Views: 11
I seem to have an issue with burning up my drill bits. Today was particularly frustrating and I could use some advise.
On the lathe, I was using a 9/16” drill bit to bore a hole in mild steel (.75” diameter). I had previously used a 3/8” bit as a pilot hole. The 3/8” hole was 2.25” deep and though I also had problems with that one, I am focusing on the 9/16” problem. I used the formula (100 x 3.82 / .5625) which gave me an RPM of 679. I chose the 560 RPM on my lathe. Initially it appeared as though all was well. I had nice curly chips about an inch long rolling out of both sides of the flutes. I had medium pressure and it was a steady chip load coming out. When I got about .75” into it, the chips rapidly became dust and everything overheated leaving me with no chips coming out, a scorched blue part, and yet another trashed drill bit. I might add all my drill bits are used but it appeared to be cutting very well at first and sharp. I’d like to fix my drilling problem before investing in nice new bits so I don’t destroy them.
This is almost the same problem I had with the 3/8” bits except they both lasted 1” each. I tried using cutting fluid on the second one but that made no difference.
I appreciate any help.
Hi I just spotted this, not read all the posts but looking at the photo's my first thoughts are you are using a carbon steel drill bit rather than HSS ? In which case you need to at least half the speed to say 300rpm max and make sure you use cutting lube. I usually try to position the spiral so it assists the lube to run into the hole, granted as you go deeper the spiral moves but its more important to have the oil running in when you are at 1" plus deep.
As for the drill I would suggest you cut off the front section behind the blued overheated area with a cutting disc making sure you keep it cool, then regrind and make sure you dip it frequently.
Personally I use HSS bits but do have some large size CS drills for over one inch sizes and run them very slow -- never bother with tables just use experience ! One must remember the "recommended " speeds & feeds are produced mainly for ideal industrial working conditions and maximum efficiency of metal removal -- flooded coolant etc etc. not what you are likely to find in most home shops.

Whoops ! should have had a look at some of the posts !!!!
 
You will never burn a drill up from running it too slow .
Alas, don't apply this principle if you need a forty mil hole in stainless; get five thousand
RPM and cobalt drills, it works; HSS drills and 500 RPM, it burns. Work hardening
is the reason.

Slow drilling makes more chip-ejected-surface-area, and the waste heat is roughly proportional
to that area. Rapid cutting attack for short periods of time does minimize heating... if it
doesn't untwist your twist drill.
 
Alas, don't apply this principle if you need a forty mil hole in stainless; get five thousand
RPM and cobalt drills, it works; HSS drills and 500 RPM, it burns. Work hardening
is the reason.
Stainless steel doesn't really work-harden. It's called passivation. Chrome in the alloy gets exposed during cutting, which causes it to oxidize (air), and cover the material (again) with a tiny layer of chrome-oxide. It's a ceramic and it's really hard, so getting through it causes a softer metal (in this case, HSS) to give in, instead.
Slow drilling makes more chip-ejected-surface-area, and the waste heat is roughly proportional
to that area. Rapid cutting attack for short periods of time does minimize heating... if it
doesn't untwist your twist drill.
It doesn't minimize heating. It minimizes chrome exposure to oxygen, and thus re-oxidation (passivation restores the tiny ceramic layer that originally protects stainless steel from rust).

It's not necessary to drill stainless steel fast or use cobalt drills. You can use clay to make a sort of dam around the bore and fill it with some liquid (such as oil) that prevents the cutting area from replenishing of air (oxygen).

It's actually best to drill as slow as you can as the turbulence caused by the tool can cause foaming, and thus transfer air via microscopic bubbles to the bottom / cutting area.
 
Last edited:
Work hardening is the ONLY way a 200 or 300 series stainless increases strength (aka hardens)
You can buy cold rolled stainless with an ultimate tensile strength of 200 ksi.
 
Back
Top