-
Welcome back Guest! Did you know you can mentor other members here at H-M? If not, please check out our Relaunch of Hobby Machinist Mentoring Program!
You are using an out of date browser. It may not display this or other websites correctly.
You should upgrade or use an alternative browser.
You should upgrade or use an alternative browser.
Craftsman 6" 101.07301 tear down and rebuild thread (and some questions)
- Thread starter mattthemuppet2
- Start date
- Joined
- Sep 28, 2013
- Messages
- 4,395
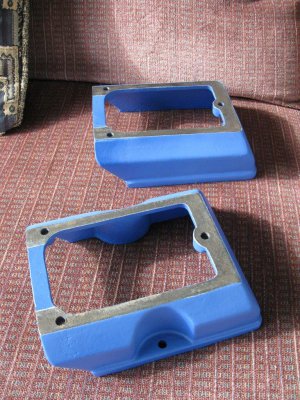
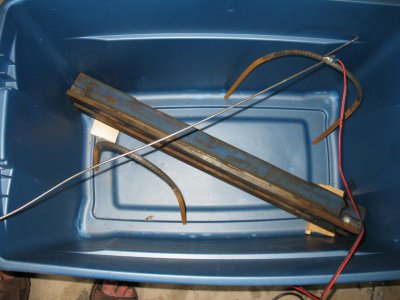
thanks Jim and Robert, I can't take any credit for the way wipers though - they came with the lathe, which I was quite surprised by. Just the bed, headstock and countershaft to do and it'll be done. I need to make a larger electrolysis bath for the bed and leadscrew, so that will be a little while. I am very curious about what the bed will look like once all the crud is cleaned off!
Quick Q Robert - how is the halfnut handle supposed to be held on - on this one there's no retaining screw, so the handle just pulls off. Not a big deal, but I was thinking of adding a set screw to make it more secure while still be easily removable.
Quick Q Robert - how is the halfnut handle supposed to be held on - on this one there's no retaining screw, so the handle just pulls off. Not a big deal, but I was thinking of adding a set screw to make it more secure while still be easily removable.
- Joined
- Dec 25, 2011
- Messages
- 10,552
Matt,
The early 10" and 12" and at least according to the drawings in the parts manuals all of the 6" had the square end of the scroll (cam) shaft peened to hold the lever on. The later 10" and 12" had a lever that was cast with the square hole not quite going all the way through. The lever was then drilled through and the hole countersunk. On the later scroll (cam), the square part on the end was shorter, and was drilled and tapped for the flat head machine screw that holds the lever on. What I would do is to face off the square end of the shaft so that when you slide the lever on, the end of the shaft is maybe .005" to ,010" below the outer face of the lever. Then drill and tap it and use a binding head screw and flat washer to hold the lever on. Or you could partially countersink the end of the shaft before tapping, countersink the washer, and use a flat head screw. The latter would probably look better.
The early 10" and 12" and at least according to the drawings in the parts manuals all of the 6" had the square end of the scroll (cam) shaft peened to hold the lever on. The later 10" and 12" had a lever that was cast with the square hole not quite going all the way through. The lever was then drilled through and the hole countersunk. On the later scroll (cam), the square part on the end was shorter, and was drilled and tapped for the flat head machine screw that holds the lever on. What I would do is to face off the square end of the shaft so that when you slide the lever on, the end of the shaft is maybe .005" to ,010" below the outer face of the lever. Then drill and tap it and use a binding head screw and flat washer to hold the lever on. Or you could partially countersink the end of the shaft before tapping, countersink the washer, and use a flat head screw. The latter would probably look better.
- Joined
- Sep 28, 2013
- Messages
- 4,395
thanks Robert, I like those "screw in the end of the shaft" ideas, way better than peening but still removable and less ghetto than my set screw idea  I'll have a rummage around in my odd screw collection and see if I have anything that would stay in character.
Frank - thanks, it's coming along really nicely and I love the colour too. It'll certainly brighten up the workshop too Unfortunately I don't think it's going to be all that durable as it scratches really easily and it's relatively soft, but I can cross that path if and when it becomes an issue.
Frank - thanks, it's coming along really nicely and I love the colour too. It'll certainly brighten up the workshop too
- Joined
- Dec 25, 2011
- Messages
- 10,552
I think that the screw used in the late 10" and 12" half-nut lever is an oval head flat head, AKA a rack and panel screw. I have them in #8-32 and #10-32 but only in a length that you would probably have to cut off. However, the late levers with the countersunk hole are dome shaped on the casting. In your case, a standard flat head would probably look better.
For the record, I no longer comment on the 10 million colors that people have repainted poor Atlas lathes. All of mine will remain the original colors, which at this printing is Chinese OD, Shopsmith Green, Onan Green, and Atlas gray.
For the record, I no longer comment on the 10 million colors that people have repainted poor Atlas lathes. All of mine will remain the original colors, which at this printing is Chinese OD, Shopsmith Green, Onan Green, and Atlas gray.
- Joined
- Sep 28, 2013
- Messages
- 4,395
thanks Robert, fingers crossed I'll find some time at the weekend 
As for colour, as far as I can tell this lathe was blue to begin with as it was that colour underneath the tags that I've removed and in other funky places that no repainter would have touched. So, like the colour or not, lack of originality shouldn't be the source of its criticism
As for colour, as far as I can tell this lathe was blue to begin with as it was that colour underneath the tags that I've removed and in other funky places that no repainter would have touched. So, like the colour or not, lack of originality shouldn't be the source of its criticism
- Joined
- Dec 25, 2011
- Messages
- 10,552
On the tenderness of the paint, it may be like the Signal Corps Green Wrinkle paint that I used to sell. Other than very small parts that would slip into a ZipLok baggy, I learned not to even pack for shipping any item for at least a week after painting. The hardness improves significantly after about a month. And after 6 months it was pretty good.
- Joined
- Sep 28, 2013
- Messages
- 4,395
that's good to know, thanks Robert. The likelihood of me using this much before the summer is pretty minimal, so hopefully it will have hardened most of the way to whatever hardness it'll have by then!
- Joined
- Sep 28, 2013
- Messages
- 4,395


