-
Welcome back Guest! Did you know you can mentor other members here at H-M? If not, please check out our Relaunch of Hobby Machinist Mentoring Program!
You are using an out of date browser. It may not display this or other websites correctly.
You should upgrade or use an alternative browser.
You should upgrade or use an alternative browser.
Chassis Build
- Thread starter jbolt
- Start date
Hi Sendit, I'm not sure what you are asking?
Jbolt, sorry i was in a bit of a hurry when I typed my message. How did you go about modeling the pocket in the chassis for the receiver to sit in? How did you correct the rear tang area since it was off the first time? I'm trying to get a accurate model of a Remington 700 but I do not have the correct tooling just yet to be confident in my measurements
- Joined
- Dec 3, 2013
- Messages
- 1,849
The inlay is straight forward with the receiver being round. The size of pockets for the trigger, safety & bolt release were done by measuring the receiver/trigger and also one of the Bell Carlson stocks I have. Since I am using a box magazine I just used the magazine dimensions with some clearance for fit and measured its location on how it fits against the receiver.
For the tang area the error was in my favor so material removal was necessary. The rear tang is not flat but has a slight radius to match a typical hunting style stock. I didn't bother with that since it is not important for this build.
I have not fully modeled the receiver. Because I am not trying to make a receiver all I need is the relevant dimensions to do the inlay.
- Joined
- Dec 3, 2013
- Messages
- 1,849
I couldn't find a check valve locally that would work and it was a week lead time to order one so I rolled my own. Works great!. I posted a quick build thread on that if anyone is interested.
With the coolant system operational I was able to finish the last op on the barrel guard mount. The 2-1/2" flute 3/8" end mill chatters like crazy no matter what I try. Maybe solid carbide would be better but since this project is getting painted I can live with it. It just adds some handwork. The slots will be done on the 4th axis. The last photo is the fixture parts.
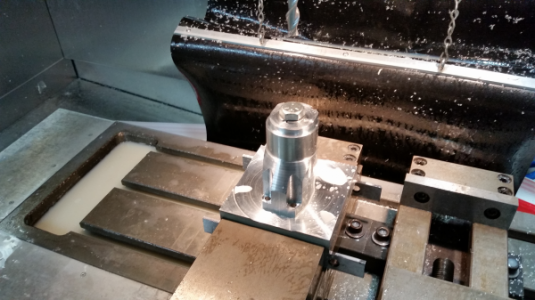
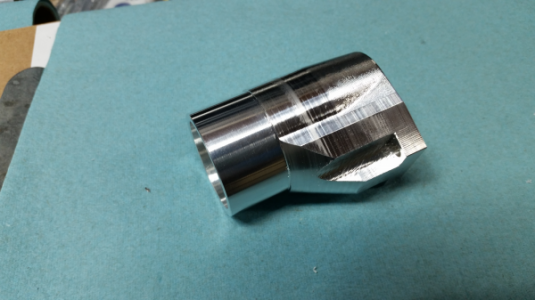
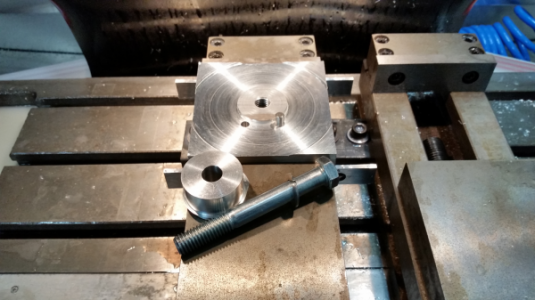
With the coolant system operational I was able to finish the last op on the barrel guard mount. The 2-1/2" flute 3/8" end mill chatters like crazy no matter what I try. Maybe solid carbide would be better but since this project is getting painted I can live with it. It just adds some handwork. The slots will be done on the 4th axis. The last photo is the fixture parts.


For those deep cuts I have used a reduced shank carbide end mill. Various sizes are available. I have used the 3/8" with the flute length of 5/8" and the shank is something like .370. It takes a few steps down for deep pockets or in your case, outside profile. Then a finish pass of .005 pretty much removes all tooling marks. Also make sure you only have the tool sticking out of the holder the min. required. I purchased these from Maritool in Woodale, IL (they have an online store.)
- Joined
- May 4, 2015
- Messages
- 3,583
Watching for more very nice build. What's your finish weight target. About seven pounds I'm guessing.
- Joined
- Dec 3, 2013
- Messages
- 1,849
Watching for more very nice build. What's your finish weight target. About seven pounds I'm guessing.
The stock or the whole rifle?
- Joined
- Dec 3, 2013
- Messages
- 1,849
A little more work completed. I got the 4th axis completed and running but the first motor I used was too long. I had to put a sorter stepper motor and coupler so it would clear the new enclosure so I could use the flood coolant. It also took a while to get the Mach3 post modified correctly for the 4th axis.
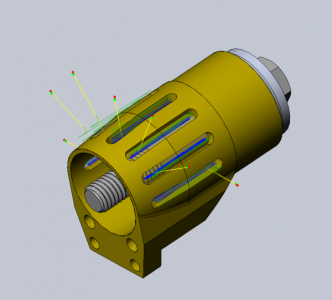
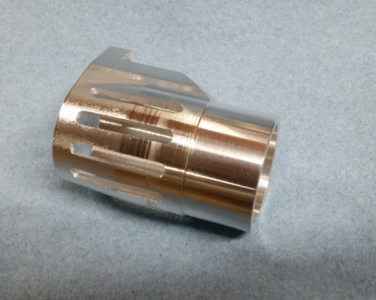
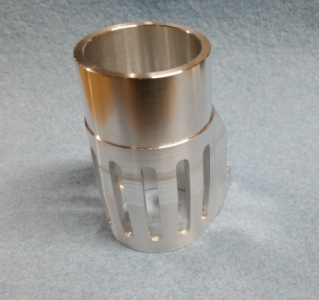
This is the vent slots on the barrel guard mount. To index in HSMWorks I had to create an individual tool path for each slot. That's just a matter of duplicating the first tool path and editing it for the correct orientation and contour of the next slot.
I decided error on the side of caution and run a test part before committing the actual part to the last operation on the 4th axis which I am still getting used to. I turned a piece of stock the same diameter as the finished part and set the offsets for the actual part so if it was successful then the actual part can be ran with no other setup needed other than orientating the part in the 3-jaw.
Success! (and no the chuck key was not in during the machining)
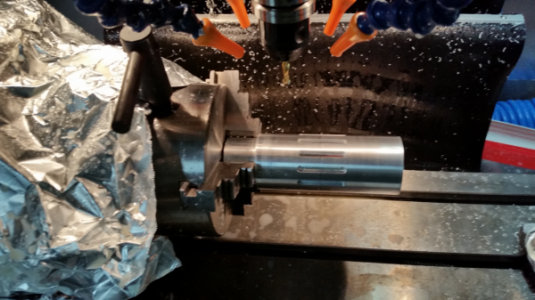
Here is the actual part mounted in the fixture in the 3-jaw ready to machine.
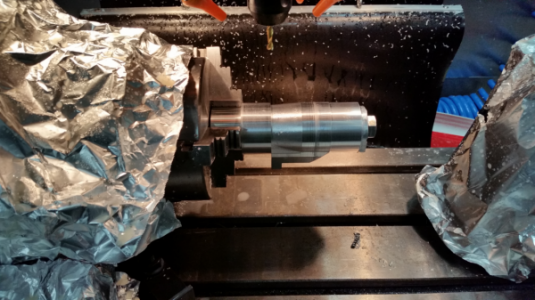
Machining completed!
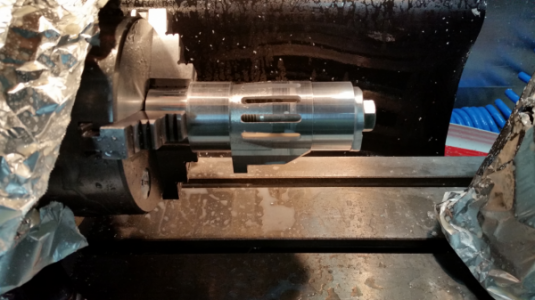
That was the last operation for this part so it is now completed.
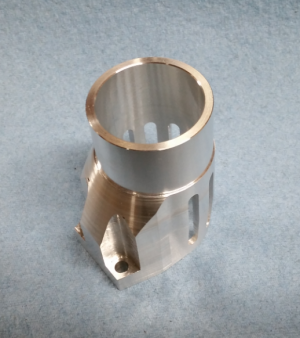
This is the vent slots on the barrel guard mount. To index in HSMWorks I had to create an individual tool path for each slot. That's just a matter of duplicating the first tool path and editing it for the correct orientation and contour of the next slot.

I decided error on the side of caution and run a test part before committing the actual part to the last operation on the 4th axis which I am still getting used to. I turned a piece of stock the same diameter as the finished part and set the offsets for the actual part so if it was successful then the actual part can be ran with no other setup needed other than orientating the part in the 3-jaw.
Success! (and no the chuck key was not in during the machining)

Here is the actual part mounted in the fixture in the 3-jaw ready to machine.

Machining completed!

That was the last operation for this part so it is now completed.


