Hi,
I am a novice (mini) lathe user and live in the south of The Netherlands near Eindhoven. I own a Hobbymat MD 65 which hasn't been used for over twenty years. Apart from some flash rust everything still runs smoothly.
Now I have an problem with the saddle of my lathe. This plate where you mount the toolholder has a tiny crack and starts at the beginning of the saddle through the two threaded holes, which hold te toolholder, and a little further (11 mm from the second hole)
I took some photo's and and want to ask weather or not this can be restored. Repaired maybe.
The first two photo's are an overview of the whole assembly (just to avoid mistakes in the names of the parts)
As the other photo's will show the crack extends to 11 mm over the second thread hole. Total crack is therefore some 35 mm. It appears that the crack on the top is 11 mm longer than the bottom side one.
I don't know how the crack came to life. Maybe too much pressure then fastening the tools in het toolholder. I don't think the crack started with adjusting the gib.
(the gib is alright btw).
Of course there is the possibility of doing nothing and let the saddle as it is. But then I don't know what happens when tightening the tools in the toolholder. And I don't know what will happen if I start machining rods for instance. Because this will give some pressure too.
Second, I can drill a small (3mm) hole at the end of the crack (top side)
I also don't know what material is used for the saddle. Just plain steel, cast iron or cast steel. The thickness of the saddle at the crack position is about 8 mm. The bed itself of the lathe is flattened cast iron I think.
Anyway my original plan was to widen the crack from top to bottom and then weld it. Mig/mag. But that seems pretty drastic, especially the flattening on top and the bottom and 'repair' the threaded holes.
I could also have a sheet of metal say 3 mm and attach this firmly with screws on the top of the saddle. But then I have to consider what happens with the tools to bring them in line with the center.
Maybe metal glue could do the trick (after drilling the hole at the end of the crack). But to get the glue into the crack I think I have to widen mechanically the crack for a moment. Don't exactly know how to do that and also I don't know what glue to use. Loctite?
Some people with broken (cast iron) stuff suggest brazing. I don't know (yet) how to do that. What kind of brazing and how to start and with what.
So it is obvious that I really need some advice about this problem.
Is there someone who could help me on this or think a little on the do's and don'ts.
I will use this lathe only for hobby purposes. Don't want (yet) to make difficult workpieces. I don't need a thousands of mm of accuracy so to say.
Ok, any help will be very much appreciated.
Peter/Rosita
Attachments
-
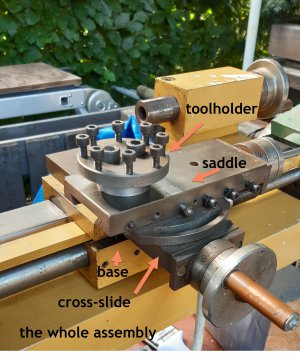 whole assembly - 20210813_170137.jpg986.6 KB · Views: 72
 -
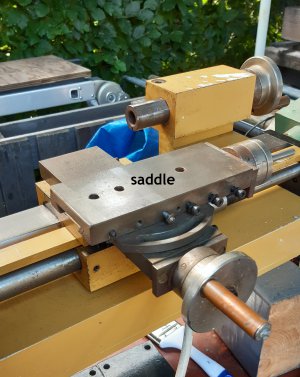 saddle overview - 20210813_170147.jpg967 KB · Views: 74
 -
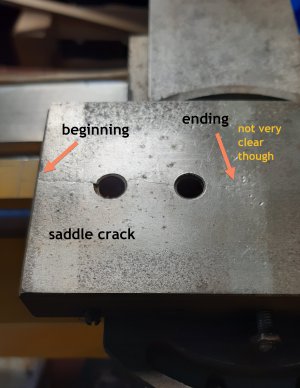 photo 3 - saddle top - crack - 20210813_170158.jpg1,009.3 KB · Views: 70
 -
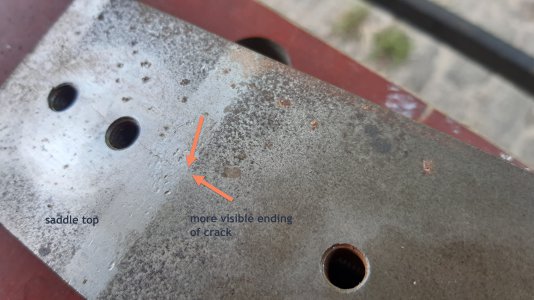 photo 4 - saddle top more visible ending of crack - 20210813_094734 (2).jpg1.4 MB · Views: 67
 -
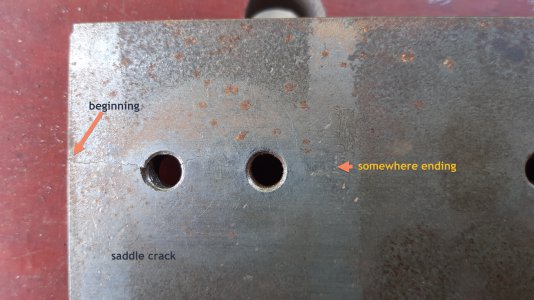 photo 5 - saddle top crack - top view - 20210813_094718 (2).jpg1.7 MB · Views: 55
 -
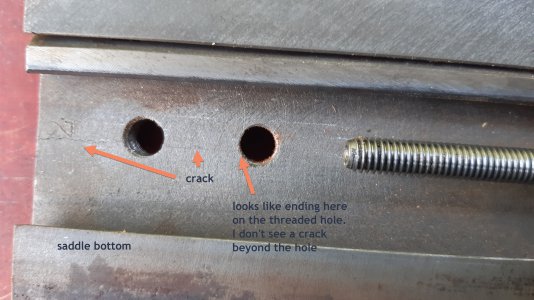 photo 6 - saddle bottom - 20210813_094809 (2).jpg1.6 MB · Views: 54
 -
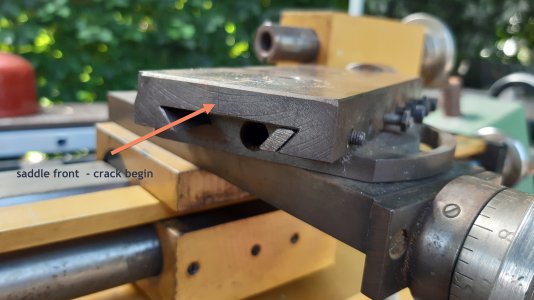 photo 7 - saddle front crack begin - 20210813_170546.jpg996.4 KB · Views: 66
