2021 POTD Thread Archive

After all the setbacks, today i finally had few hours to spend in the big garage. Started with changing all the LPG and coolant hoses, installing the intake manifold, changing the valve cover gasket. Then i began lifting the body shell with a jack to put it over the engine, i actually called couple of friends to help lift it, but couple after hearing car body i could hear "Ahh" in their vice others said they'll come but never showed up. This way with the rear shocks fully extended it was stable to move for one person bigger wheel on the jack would have helped but i managed to inch it over then lower it, put two bolts in the subframe and then lift it and put tires on it, i also bolted the shock absorbers and both engine mounts. I know this and the previous generation of cars very well, so no need to double check staff also is very simple.
IMG_20210812_175623.jpgIMG_20210812_175617.jpgIMG_20210812_183957.jpgIMG_20210812_190238.jpgIMG_20210813_183550.jpg
 
Made more progress with machining and putting together my accute sharpening system. The parallel arm / work head mount is all done now, and can be clamped to the table, and the feed slide ‘ stop is all together. For scale, the brass feed knob screw is M3 x 0.5. large scale engineering it is not. :)

89080A42-0981-4C4C-BD1F-A9A5816C70AF.jpeg9D267BB7-896F-470D-A467-2BA5434585A0.jpeg35507CCF-A15B-4EA9-8F71-BD44C596B534.jpeg
Of course, just as I was finishing Bozo turned up… I managed to make the stop on the slide (the block attached by the two countersunk screws) 1mm undersize on the width. No idea how I fudged that up, and I don’t think it will matter at all - but annoying none the less.
 
I've been awake for more than 36 hour but still had some energy in me to gets staff done. Started with working on the 206 engine, i connected all the hoses, links installed the battery box, ECU, radiators, at this point should have stopped. But i continued, started on the interior, did some more cleaning, than clean the dashboard and installed it, its plastic so it's not that heavy. Installed and torque all the bolts i don't want any rattles and then come the mind game which wire goes where, thankfully my mind is still working good, i managed to put all the electronics together and fire up the engine. Starting a raspy sounding engine at 2 o'clock at night probably not the wisest thing but my neighbors are awesome. I still need to tighten the subframe, install the steering column steering wheel. The next step will be to clean up the undernight it still has a rusty hole under the driver that i need to weld up and it needs some under coating.
IMG_20210813_183601.jpgIMG_20210814_195408.jpgIMG_20210815_174247.jpgIMG_20210815_192914.jpg
 
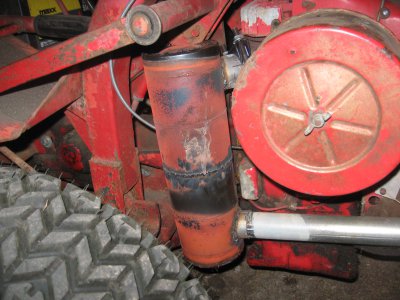
Made a muffler for my Gravely PM50, it took the bark out of the kholer 341.
Amazing how fast propane tanks rust, they were green before I started it up.
 

Attachments

  • IMG_2024.JPG
    IMG_2024.JPG
    2 MB · Views: 26
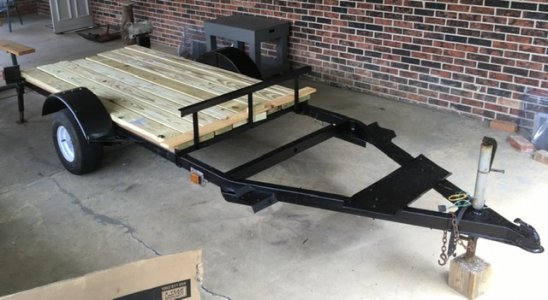
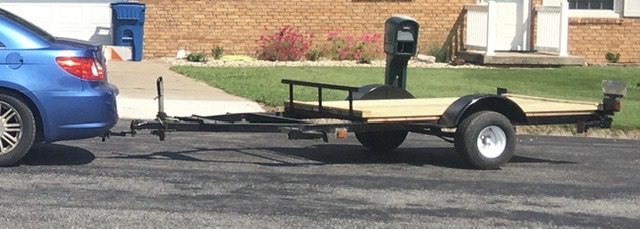
Not really IN the shop, but right out the back door. It took me all week to get my 1970 Apache pop up camper looking like it had a purpose again. I was within grabbing distance of a hoist to mount on it before I was shut down by my better half. Supposedly I shouldn't be buying anything I have to hoist onto the trailer. What a killjoy! Ha!
 

Attachments

  • 8CEC7C08-7372-4310-9D4C-3EA8C0D9A97A.jpeg
    8CEC7C08-7372-4310-9D4C-3EA8C0D9A97A.jpeg
    89.4 KB · Views: 49
  • A0BA08E7-94AE-498F-BB33-2C4F2B3BBE20.jpeg
    A0BA08E7-94AE-498F-BB33-2C4F2B3BBE20.jpeg
    67 KB · Views: 40
Couple of POTDs. First was cutting away some of the plywood base on one of my work benches. The storage lockers and maple top came from a local high school that shut down its shop. I wanted it to be movable without kicking casters hanging outside of the bench. I didn't show them, but used 1" steel balls used for material movement as low-profile casters. They're around $2 each from Harbor Freight; they call them roller ball bearings. I screwed a couple of rows of these under some 3/4" ply and mounted the lockers and legs to support the maple top. Problem was I couldn't "belly up to the bar" with my office chair. I used a Rotozip and a screwed down board for a fence to cut away a large portion so I can roll the chair up under the bench.


Cut away the 3/4" ply next to the lockers so I can roll the office chair up to the bench
20210822_145808.jpg

Used these ball bearings for casters under the plywood base
1629676325036.png


Now what to do with the 3/4" plywood cut out from under the work bench. . . I have a number of coils of band saw stock for my DoAll saw and hadn't come up with a good place to store them. I repurposed the 3/4" ply for sides of a storage cabinet for the coil stock. Nothing too pretty as the plywood used was all scraps. Frankly, who wants to buy any sheet goods at today's prices!!! The dado's in the sides have a 1" drop from front to back though this is probably overkill on my part. I didn't show it, but cut a couple of lengths of 1" angle iron that was screwed to the sides of the cabinet for a mounting bracket. The brackets were screwed to the wall with 1/4" lag bolts.


Used 3/4" ply from the work bench base for the cabinet sides, 1/2" scraps for the top/bottom/back and 1/4" for the shelves.
20210822_143046.jpg

Blade storage cabinet
20210822_164426.jpg

DoAll 16" saw, my blade storage cabinet and welded up stock hanging above the cabinet
20210822_164414.jpg


I have a buddy at work who picked up a lot of band saw blade stock from a closed shop. He presented me with a deal; cut the blades to length and weld them up for his Walker-Turner saw and we'd split the stock. I welded up around 40 blades for him, and was welding some for me but got tired of welding blades. I coiled up the stock cut to length, banded it with tie straps and tucked it in a few of the shelves.

Thanks for looking,

Bruce
 
The arbor press extension works!
4e27b82d43c60bea5cf374c06a0f2a72.jpg
35fad5e8ff5acb2aeec98a9e73bc6a6f.jpg
802316391bd90908b1f8c2f4ab3f636e.jpg


Sent from my SM-G892A using Tapatalk
 
Wowsers! Great accessory for broaching.
 
Yup, serious case of overkill, I know. And I know you can buy plastic ones from the hardware store that do pretty much the same thing. But, well, once you hatch an idea you just have to see it through…..

F8CAC2B4-BCDF-4152-836D-BD7C76E47DAD.jpeg
53510F43-1B69-4255-A6A0-539A4112E4C9.jpeg
 
Back
Top