2021 POTD Thread Archive

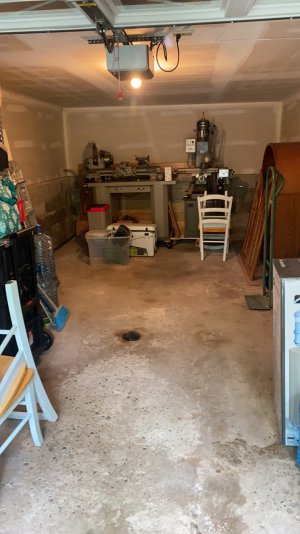
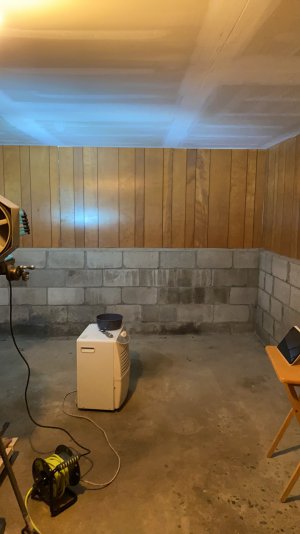
Ive been busy busy working in my garage the past 3 days. Moved my mill and lathe out of the way to do some paneling to take oil splatter and then caulked all around it to prepare for a paint job. I plan to paint the ceiling and the walls tmr and then do the floor on wednesday and thursday for a second coat. The floor i am going to do a can of epoxy paint.

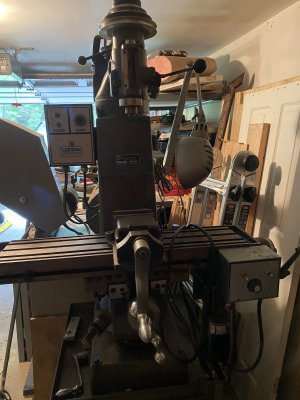
Side note i had issues with my mil that i could not get the x to travel at all. I then remembered that the drive gear for the auto feed was engaged and that is why i could not move the x. Move the x handle in to disengage the motor and now she moves. A BONUS that i found out and completely forgot is that the second control box is for a VFD. No belt changes to deal with in my future unless i need a different range or torque!
 

Attachments

  • 9B8F2906-CB6F-4CBB-9F10-B3AD8A225EA3.jpeg
    9B8F2906-CB6F-4CBB-9F10-B3AD8A225EA3.jpeg
    383.8 KB · Views: 36
  • 658FAC42-5A9D-4F31-A8CF-6E78E6AE7155.jpeg
    658FAC42-5A9D-4F31-A8CF-6E78E6AE7155.jpeg
    351.7 KB · Views: 38
  • 751FC3EC-D653-470B-8FF6-CCA218F7C209.jpeg
    751FC3EC-D653-470B-8FF6-CCA218F7C209.jpeg
    1.7 MB · Views: 43
I finished these fittings up tonight. They are for a fuel injector cleaning machine. I made them from a piece of 1" stainless steel all thread that I salvaged from work. These things used to adjust the conveyor on a 14' sander. Now they will be cleaning injectors on outboard motors at a local marina. The fittings on the upper right were the samples I had to work with. They wanted hose barbs to be free of the machines proprietary fittings. The best part is that I turned some scrap metal into $150!
20210615_001318.jpg
 
Nice. How did you thread up to the shoulder like that?
R
The threads terminate before the shoulder for an undercut o-ring groove. That groove was the tricky part. Here is the tool I ground to cut the groove. People put too much thought into the perfect tool geometry. I think that what ever works to get the job done is the right tool.
The threads were cut with a die.
16237689520167529763496022984335.jpg
 
I started making my orthopedic insert for my right shoe. I have been fitted for a carbon fiber insert, but they said that I wouldn't have it until sometime in July. I have been wearing a removable cast on my foot since the middle of March. The cast is literally driving me mad. Its about 1 1/2" wider than my left foot. I trip on everything, and have fallen and have gotten hurt several times. And, I have accidentally kicked both of my dogs in the head a bunch of times.
I have a torn tendon in my foot and have to keep from bending my foot when I walk or doing anything else.
So, my plan is to rough it out with a ball endmill. After that, smooth it out nicely with an angle grinder and a flap disk so that my foot fits into it comfortably. Then mill the flat bottom until it is as thin as possible while still being strong enough not to bend (I hope). Cut out the shape with my bandsaw so that it drops into my shoe. Then drop the insole back in on top of it.
I think it will work. Besides, I asked my doctor, he said I could.
16239065378112471235262385476773.jpg
To mark what needed to be relieved for the bottom of my foot, I used some Dykem. Dried it with a heat gun, then moistened the botom of my sock with rubbing alcohol, and made an impression. Now I have a blue sock.
 
Back
Top