2020 POTD Thread Archive

I've worked on the white elephant, replaced most of the front suspension, only used part i had to use, was the passenger control arm and someone has installed the big bushing wrong way, quick fix with a hammer, the old control arm was bent like a banana. Also very strange the steering wheel splines wear striped, so i had to change the steering wheel, i had to do some wiring on it, previous bad repairs and age damage.Only pictures i took was from the control arm because i was just trying to get it done, if some of you have mess with VW golf MK4 is the same vehicle under the skin.
IMG_20200909_185545.jpgIMG_20200909_185600.jpgIMG_20200909_190906.jpg
 
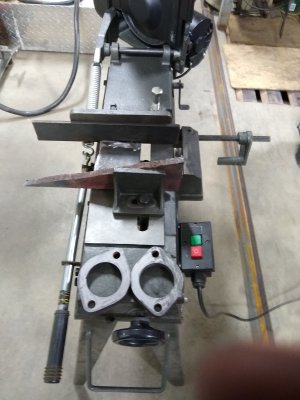
After my horizontal bandsaw did the shimmy, shimmy, shake as I rolled it across the floor I started cutting out pieces for a new stand for it.
Pics to follow.


Sent from my iPhone using Tapatalk
 
In the past few months, there haven't been many old machines to restore, so projects in the shop have been slow. I came across this old Hazet "Assistent" tool caddy at an estate sale. It was covered in rust and the bottom box was severely dented. The price was only 20 bucks, so it was worth a shot. I remember seeing some of these in a Volkswagen service shop when I was young and thought they looked cool. With a little bit of bodywork and some paint, I think it was worth the effort.
I did a little research on Hazet toolboxes and found out that new, these sell for about a Grand and that the vintage ones have a cult following. Mine turns out to be a 1960's model #161, so I restored it to as close as I could get to its factory condition. Like a motorcycle, Hazet has all kinds of expense farkels to customize your box. Mine is missing its locking bar and built-in seat. Any Assistent enthusiasts out there?
https://www.google.com/search?q=haz....5#imgrc=UX4VDR6KjpzVZM&imgdii=u3sLfl1DZUmJDM
 

Attachments

  • IMG_20200913_133218.jpg
    IMG_20200913_133218.jpg
    5.6 MB · Views: 43
  • IMG_20200913_133121.jpg
    IMG_20200913_133121.jpg
    6.1 MB · Views: 42
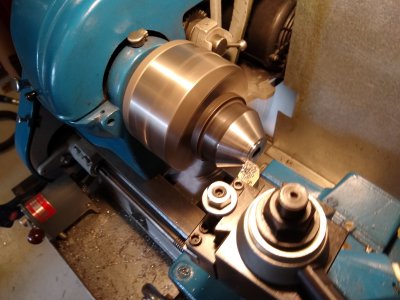
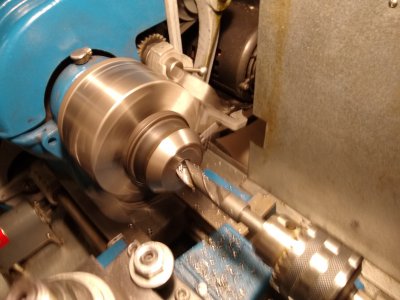
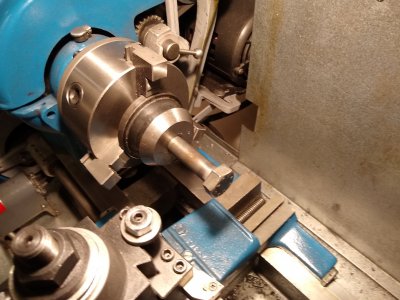
Today i did a quick project on the lathe, i needed a key for security lug nuts, it has 10 teeth, so i needed to cut a 5 angle key. Started with 17mm hex piece of C45, cut it down to 14mm and then parted it, i used my angle grinder to cut the 5 angles. Not perfect but not bad for 15min project, i'll order me a key this is more for testing then using.
IMG_20200912_200014_2.jpgIMG_20200913_123246.jpgIMG_20200913_123256.jpg
 
Moved this over from where I had miss posted it.
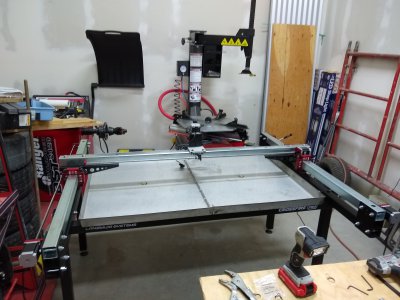
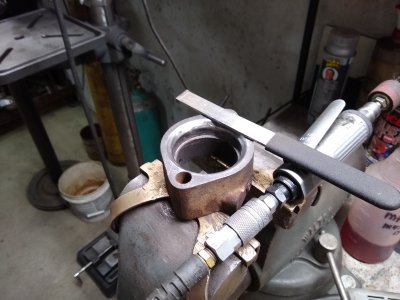
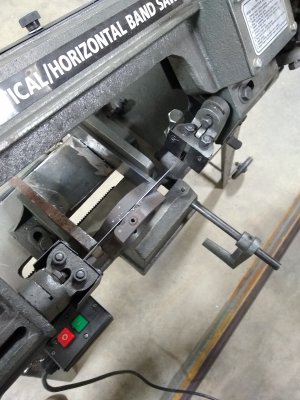
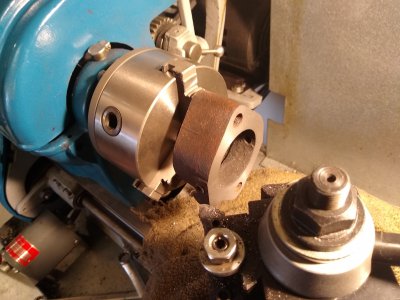
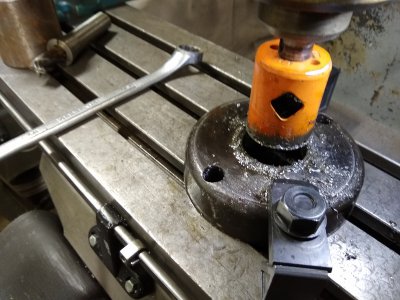
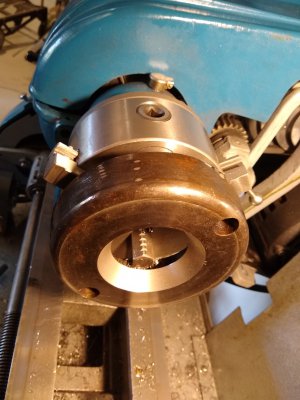
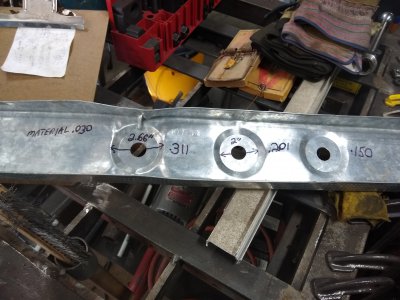
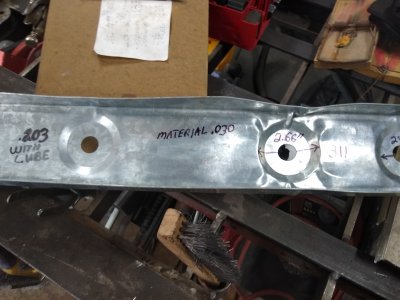
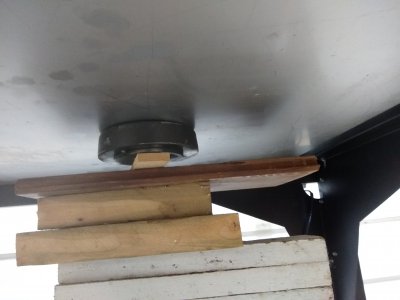
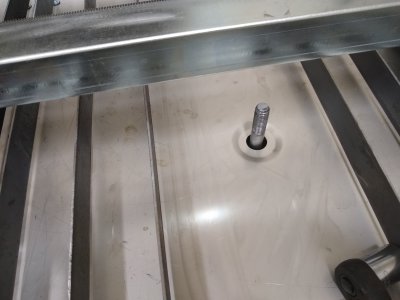
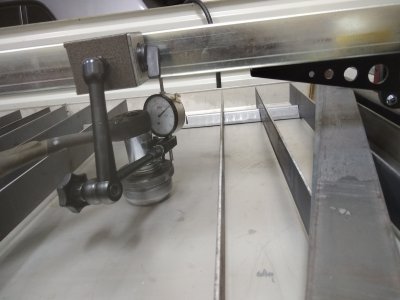
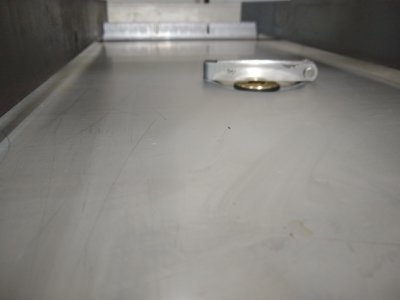
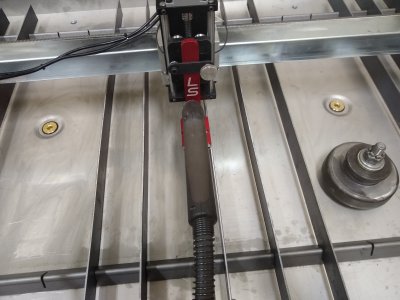
Spent the last couple of days days on this little project for the plasma table. The water table drain fittings are raised above the bottom of the pan, and prevent easy draining of the water table. So off to the scrap pile to see what might work for male, and female dies to create a recessed feature in the water pan. The first thing I came across was an old cast iron heat riser block which already had a tapered gasket seat machined into it. After cleaning it up with a carbide hand scraper and a sanding roll, I chucked it up in the 3 jaw and faced off the ends and cleaned up and deepened the 55deg existing taper. Then I put it in the band saw and cut it down to the desired depth, and refaced the cut end, which actually came out pretty close considering the Rube G. clamping setup. For the male die I found a mystery piece in the pile that looked like it would work, but might be hardened. The old Atlas was working hard, but with a carbide insert got the taper cut and faced off to about 1/2" depth, and drilled out the center hole for a 5/8" bolt. Tested it out on some .030 galvanized sheet metal close to the gauge of the water table (the water table appears to be stainless), anything beyond about .150 depth started to create major distortion in the metal surrounding the die. So I decided having a wider base on the female die, a little cushion for the pushing as it were, might solve the problem. Back to the scrap pile, and came up with the rotor from a motorcycle alternator. Tried using a 1.75" hole saw on the drill press to open up the center, but the drill press respectfully declined the task. Chucked up the hole saw in the BP, and using the knee to feed managed to knock out the center. Back to the lathe for the 55 deg seat, and then another test. Some what better, but two existing 1/2' holes in the die were causing issues so turned two plugs, welded them in and ground the welds off flat, also tacked a large/thick flat washer to the back of the die for the tightening bolt to pass through. Another round of testing and another incremental improvement. At this point I decided to give it a shot on the water table. set the dies up and used a indicator to keep track of the depth of the die as it advanced. Well, that stainless sheet was a whole different animal. Much more effort to press, but no distortion at all. I think that can be attributed to a larger surface area, and much stiffer material. Also thinking maybe less taper on the die may have helped considerably. All in all, pretty happy with the outcome, and learned a lot on the lathe as far as setup, and execution. Of course the evening I completed this I found a You Tube video showing another table mod, that uses bar sink (smaller diameter) drains, pvc pipe, filters, and a storage tank with a pneumatic pump to filter, and store water between uses, and return the treated water to the table when needed to help with evaporation issues, which is a pretty big deal with the dry climate here. I will upgrade to something like this down the road, but for now i just need to make sure everything works before getting back to work on the shop, which is what I should be doing, but hard not to play with new toys. Thanks for looking. Cheers, Mike

IMG_20200830_185849255.jpg IMG_20200908_122039985.jpg IMG_20200910_172151003.jpg IMG_20200908_173719955.jpgIMG_20200910_173357911.jpg IMG_20200910_122141897.jpg IMG_20200910_203517131.jpg IMG_20200910_204105927.jpg IMG_20200911_131005868.jpg IMG_20200911_142743955.jpg IMG_20200912_135431727.jpg IMG_20200912_135440409.jpg IMG_20200912_165553010.jpg IMG_20200912_170525832.jpg IMG_20200912_165544666.jpg IMG_20200912_173619370.jpg IMG_20200912_181226832.jpg
 
In the past few months, there haven't been many old machines to restore, so projects in the shop have been slow. I came across this old Hazet "Assistent" tool caddy at an estate sale. It was covered in rust and the bottom box was severely dented. The price was only 20 bucks, so it was worth a shot. I remember seeing some of these in a Volkswagen service shop when I was young and thought they looked cool. With a little bit of bodywork and some paint, I think it was worth the effort.
I did a little research on Hazet toolboxes and found out that new, these sell for about a Grand and that the vintage ones have a cult following. Mine turns out to be a 1960's model #161, so I restored it to as close as I could get to its factory condition. Like a motorcycle, Hazet has all kinds of expense farkels to customize your box. Mine is missing its locking bar and built-in seat. Any Assistent enthusiasts out there?
https://www.google.com/search?q=haz....5#imgrc=UX4VDR6KjpzVZM&imgdii=u3sLfl1DZUmJDM
Didn't realize I was an enthusiast, but maybe I am. Was given what I think is one years ago. The one I have is red, may have been painted, I fastened a chalk board to the back and use it as a lathe cart, works great.
Only photo I could find with it in it.
IMG_1688.jpg

Greg
 
Back
Top