-
Welcome back Guest! Did you know you can mentor other members here at H-M? If not, please check out our Relaunch of Hobby Machinist Mentoring Program!
- Forums
- THE PROJECTS AREA
- PROJECT OF THE DAY --- WHAT DID YOU DO IN YOUR SHOP TODAY?
- Project of the Day Mega-Thread Archives
You are using an out of date browser. It may not display this or other websites correctly.
You should upgrade or use an alternative browser.
You should upgrade or use an alternative browser.
2020 POTD Thread Archive
- Thread starter eugene13
- Start date
- Joined
- Sep 2, 2013
- Messages
- 5,417
I made fire in the shop, and seeing we are looking at -5deg tomorrow, none too soon. Installed a 120k, 96%, 2 stage Goodman condensing furnace. Had an assortment of duct work from over the years, and was determined to make it work. Required a bit of Neandrithal metal bending, with hammer, clamps, and a chunk of H-beam. Welded up two wall brackets for mounting, and rigged up a come-a-long suspended trom the trusses to lift it into place. Fabricated a filter support frame and hardware to fit inside the blower cabinet, and plug welded it into the furnace. Installed 30 ' of 2" pvc for cumbustion air, and exhaust vent through two attic spaces, and terminated outside. Ran about 30' of 3/4" black pipe with several capped T's for future use through the welding bay, Installed 2, two stage regulators, and temp line to a 500 gal. propane tank behind the shop. Checked and adjusted incoming line pressure, and both stages of the furnace valve. Wired a 15 power circuit, and ran a five wire T-stat cable to the furthest bay (machine shop), set the 12 dip switches on the furnace for fan speed, low burn run time, etc.,etc.. Soldered shut and redrilled six burner jets for altitude compensation, and plumbed in the condensate drain. Bled the the gas line, flipped on the breaker, set the T-stat to 65, and crossed my fingers just for luck. Fired right off, ran 10 minutes on low burn, per the way I set it up, switched to high burn, high fan, and ran for about an hour to bring 2100sf, 14'+ average ceiling height, from 50 deg to 65 deg. Runs very quiet, don't have to turn the stereo up, unless Pink Floyd comes on. Still have about 20' of ducting to run, but overall, very happy. Were supposed to get 1" of snow, 6" so far and still snowing. Cheers, Mike
,


,


- Joined
- Dec 6, 2015
- Messages
- 829
Suddenly, I want to see more of that white car in the shop. Looks like an early 50s Plymouth.I made fire in the shop, and seeing we are looking at -5deg tomorrow, none too soon. Installed a 120k, 96%, 2 stage Goodman condensing furnace. Had an assortment of duct work from over the years, and was determined to make it work. Required a bit of Neandrithal metal bending, with hammer, clamps, and a chunk of H-beam. Welded up two wall brackets for mounting, and rigged up a come-a-long suspended trom the trusses to lift it into place. Fabricated a filter support frame and hardware to fit inside the blower cabinet, and plug welded it into the furnace. Installed 30 ' of 2" pvc for cumbustion air, and exhaust vent through two attic spaces, and terminated outside. Ran about 30' of 3/4" black pipe with several capped T's for future use through the welding bay, Installed 2, two stage regulators, and temp line to a 500 gal. propane tank behind the shop. Checked and adjusted incoming line pressure, and both stages of the furnace valve. Wired a 15 power circuit, and ran a five wire T-stat cable to the furthest bay (machine shop), set the 12 dip switches on the furnace for fan speed, low burn run time, etc.,etc.. Soldered shut and redrilled six burner jets for altitude compensation, and plumbed in the condensate drain. Bled the the gas line, flipped on the breaker, set the T-stat to 65, and crossed my fingers just for luck. Fired right off, ran 10 minutes on low burn, per the way I set it up, switched to high burn, high fan, and ran for about an hour to bring 2100sf, 14'+ average ceiling height, from 50 deg to 65 deg. Runs very quiet, don't have to turn the stereo up, unless Pink Floyd comes on. Still have about 20' of ducting to run, but overall, very happy. Were supposed to get 1" of snow, 6" so far and still snowing. Cheers, Mike
,View attachment 341769View attachment 341770View attachment 341771View attachment 341772View attachment 341774View attachment 341775View attachment 341776View attachment 341777View attachment 341778View attachment 341779View attachment 341780View attachment 341781View attachment 341783View attachment 341784View attachment 341785View attachment 341786View attachment 341787View attachment 341788View attachment 341789View attachment 341791View attachment 341792View attachment 341793View attachment 341794View attachment 341795View attachment 341796View attachment 341797View attachment 341798View attachment 341799View attachment 341800
joe
- Joined
- Sep 2, 2013
- Messages
- 5,417
Wish I was, that's the forecast. Mike
That is awesome work on the furnace even though I know you are kidding about the -5.
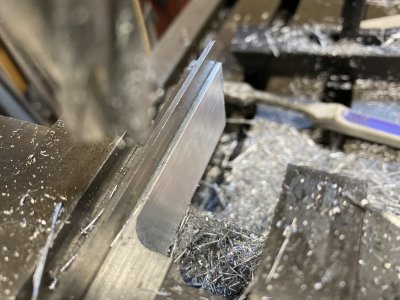
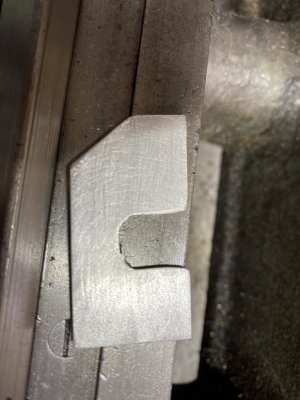
Since I ran the lathe for a while after the recent rear bearing repair... And it seems good, I decided it’s time to properly shim it. When I pulled the spindle out, the rear bearing on the headstock was somewhat scoured. I’m thinking that the cause was lack of oil. I did find that the spring wool wicking thing was almost cut in half on the rear bearing. I’m guessing that at some point someone forgot to hold it down and then they slid the spindle in. Because it was almost sheared in half, I guessing it lost its ability to wick oil to the spindle and that’s why the headstock cast iron bearing was messed up. I replaced both wicks and then attempted to shim it. The problem was I had to make a new shim which was 0.062
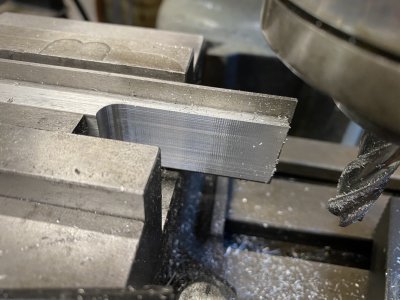
I purchased a sheet of the peal away shim but the was having trouble cutting it. After some googling I ran across Toms Techniques video. It worked real well. I used aluminum.... machined it around 0.0645
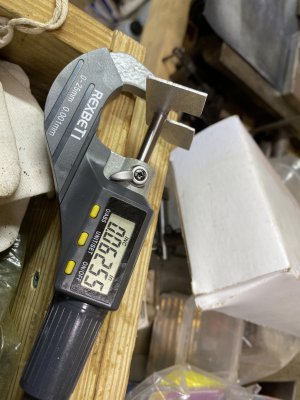
then I finished it with a file and some 220 sandpaper. Got it to a pretty uniform 0.625
i ended up with 2 thousands clearance when checking the spindle.
Attachments
Last edited:
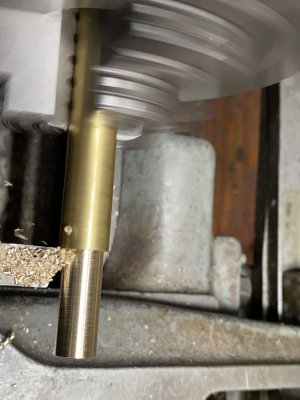
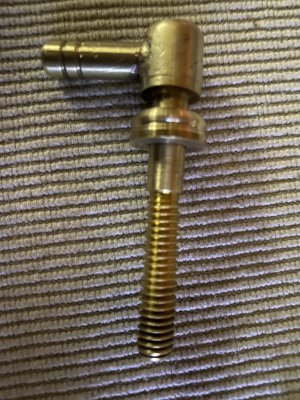
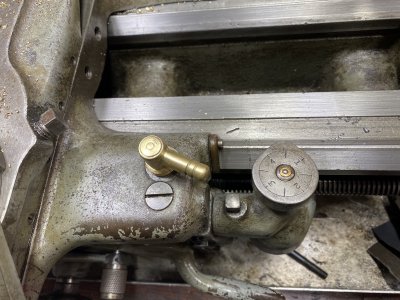
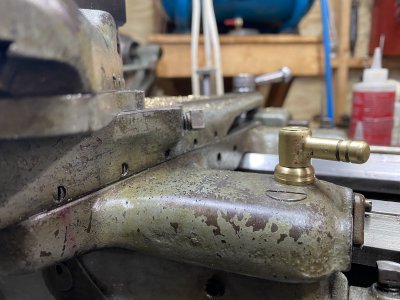
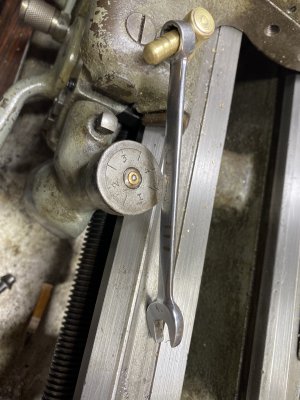
Got tied of looking for an Allen wrench to snug down the carriage bolt. So I made this little lock down bolt. I can get it somewhat snug by hand turning it and if I need it totally locked down the almost any box end wrench or and pair of plyers locks it tight.
Attachments
-
 202F34E2-9252-4E2D-8A15-B29A9CF3EBC4.jpeg1.2 MB · Views: 27
 -
 0CF015B8-F9C6-471C-AC27-607C1F36E06A.jpeg2.2 MB · Views: 26
 -
 F4533FC2-4DA7-4A3F-9C59-E851E65DD4EA.jpeg3.9 MB · Views: 26
 -
 90FF6384-50FB-4413-A798-7EBD75EB9F6B.jpeg3.2 MB · Views: 24
 -
 23E59619-4FE9-46E1-9553-864A797754D5.jpeg1.7 MB · Views: 26
- Joined
- Mar 25, 2013
- Messages
- 5,129
Got tied of looking for an Allen wrench to snug down the carriage bolt. So I made this little lock down bolt. I can get it somewhat snug by hand turning it and if I need it totally locked down the almost any box end wrench or and pair of plyers locks it tight.
That looks great. I cheated and bought mine. Is everyone aware of JC Winco? They make a lot of fasteners and parts that others mark up at retail.
Robert


