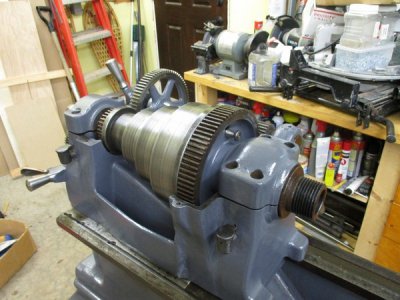
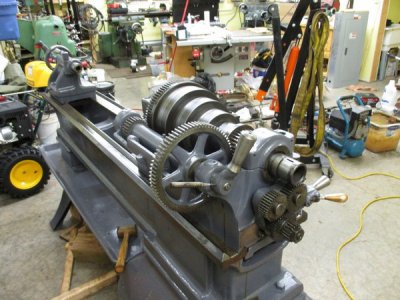
War Time South Bend Lathe

Hi HR,

Thank you for your encouragement... :) Yes, you are correct about the white lead. It's a wonder that I survived childhood.... ;) I'm pretty sure that we learned on South Bend 10" lathes back then.

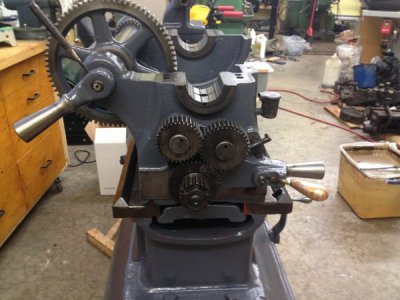
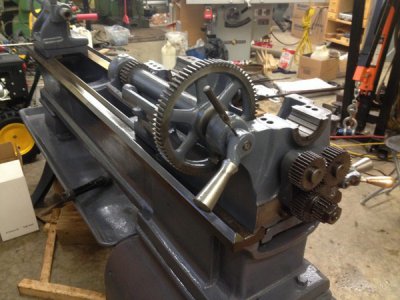
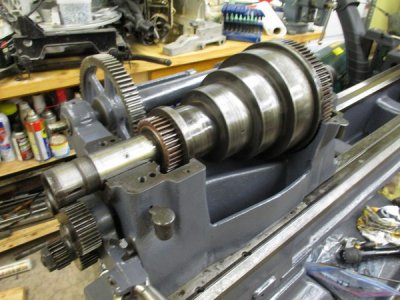
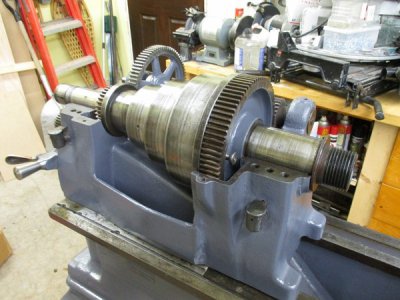
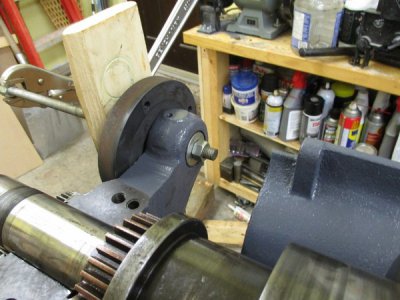
I got a little more accomplished, yesterday. I managed to get both the back gear and tumbler/reverse assemblies back on the lathe... all cleaned, painted, new felting, etc. ...

IMG_0710%20600x800_zps7kqk3f4t.jpg

IMG_0711%20800x600_zps8fknjxdu.jpg

IMG_0712%20800x600_zpsu1dwilkp.jpg

Merry Christmas to all of you... :)

Brian
 
I applaud your dedication to bring her back to life. Looking very nice so far.
Merry Christmas to you as well.
 
Hello Firestopper :)

Thanks... :)

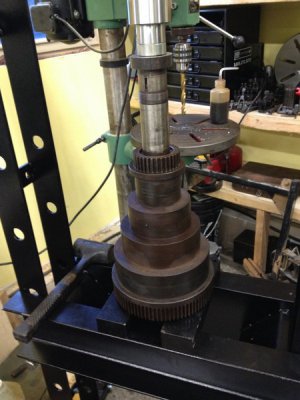
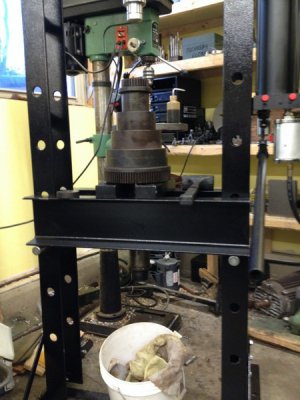
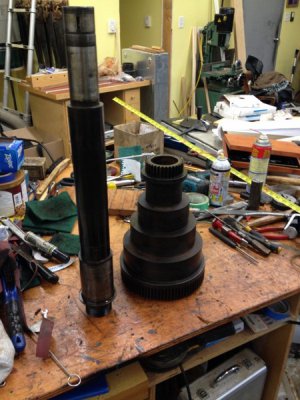
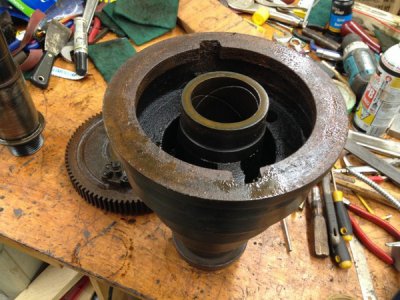
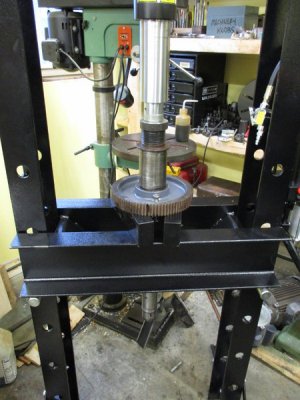
I had some additional success today. The cone pulley was completely frozen onto the spindle, and would not spin on it, whatsoever. So, after a couple of weeks of applying penetrating oil on it, I finally decided to try and press both the bull gear and cone pulley off of the spindle at the same time, as there was no other way.

I started slowly with 5 tons of pressure and left it there for a minute or so, then onto 10 tons, then 12 tons, and finally, at 15 tons of pressure, both the bull gear and cone pulley let loose with a loud "snap" !!

IMG_0713%20600x800_zpsiavxx2sa.jpg

IMG_0714%20600x800_zpsuanruhvn.jpg

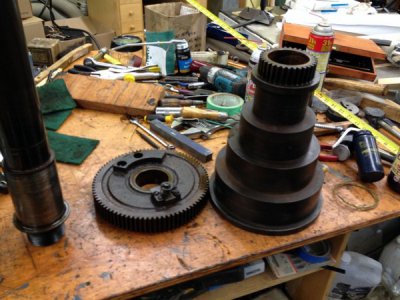
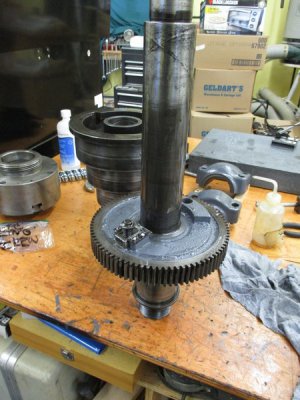
I then pressed out the spindle with relative ease after that. I was afraid that I would break something, but all went well.

IMG_0716%20600x800_zpsfnptoqqn.jpg

IMG_0717%20800x600_zpsnpxemtmg.jpg

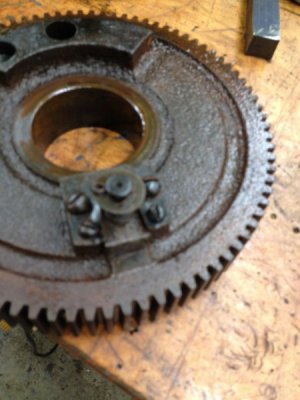
The bull gear will go into the electrolysis tank and the other parts will get cleaned, oiled and polished as needed.

IMG_0721%20600x800_zpsoaql86hs.jpg

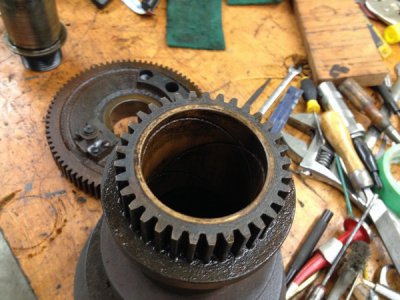
The bronze bushings look surprisingly good...

IMG_0718%20800x600_zpsonhaxwm9.jpg

IMG_0719%20800x600_zpsb96czlb8.jpg

I am very happy that I finally got the cone pulley off the spindle. Now, I am certain that I can get it back to working order again.

Cheers... :)

Brian
 
Well, the bull gear is out of the "brine" , cleaned and first coat of paint. All of the associated parts are cleaned and oiled. Now, the cone pulley is in the electrolysis bath. I am finding, that if the part being immersed in the "brine" has a lot of residual penetrating oil or grease, it doesn't work nearly as well. The oil seems to shield the process to some degree. I will have to look at my collection of plastic bins to find one the right size for the spindle. If all goes well, I might have the spindle/cone pulley assembly back together and installed by the weekend.

Brian
 
Make a mix with lye as it will attack anything organic.

Oil is organic...

Remember that when talking to "those folks" who think everything needs to be organic to be good for you.

So is high fiber natural drought friendly asbestos. ..

Sent from my SAMSUNG-SGH-I337Z using Tapatalk
 
Hello all, and a Happy New Year to you... :)

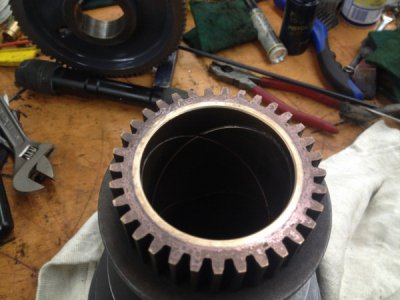
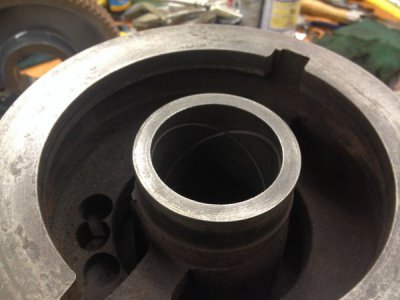
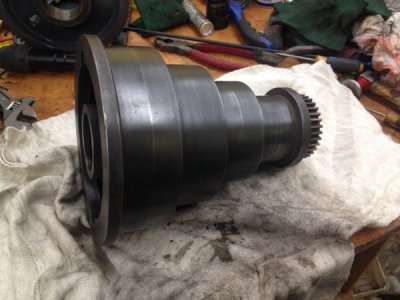
I have some further progress to report. After taking the cone pulley out of the electrolysis tank and cleaning it up, I noticed that the bronze bushing at the gear end is actually the gear and bushing all in one. Yes, the gear is bronze, and integral to the bushing. It must be a press fit into the cast iron bore and then it is pinned to the pulley. The other bore beside the bull gear is in the cast iron of the cone pulley. No bronze bushing there.

Here's a few pics after cleanup...
IMG_0723%20800x600_zps7tbq48lj.jpg

IMG_0725%20800x600_zpslzlxxjj2.jpg

IMG_0724%20800x600_zpsis37n8an.jpg

I then oiled the bores and spindle to see if it would go back on. It went into the cast iron bore with a very nice sliding and spinning fit, but would just barely begin to go into the bronze bushing and then suddenly stop and jam. I then tried to slide the spindle into the bronze gear end, and it would slide in and spin nicely, but only to a depth of about one inch. This is, coincidentally, the depth of the gear. Puzzled, I then decided to get out some measuring tools and see what was going on.

The spindle bearing surfaces were consistent to withing 2 tenths at all sides to 2.4982. The cast iron bore was consistent throughout at 2.5001. The bronze bushing bore was right at 2.5001 within the gear, but then became smaller to 2.4957 and then at the bottom, it was 2.4949. So it was about .005" too small. No wonder it took 15 tons of pressure to pop the cone pulley off the spindle.

This lathe has all of the signs of having spent some time outdoors in the weather, so I believe that there must have been water, laying inside the cone pulley in the reservoir between the bores. This then resulted in rust forming between the bronze bushing and the cast iron bore, causing the bronze bore to contract, and then becoming stuck to the spindle.

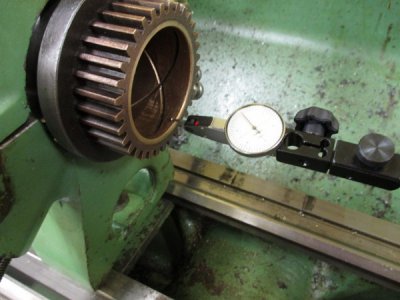
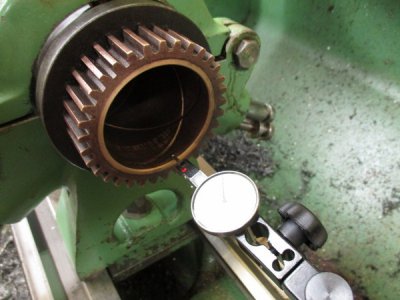
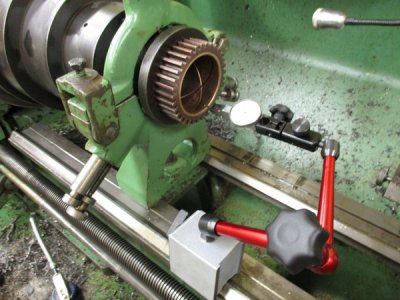
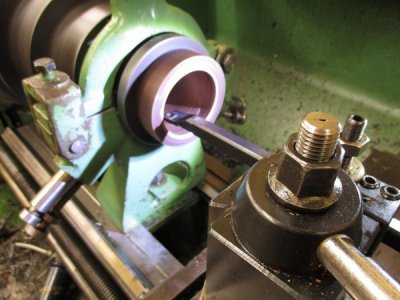
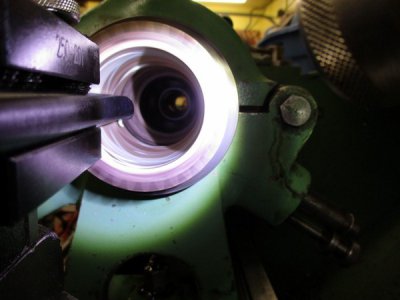
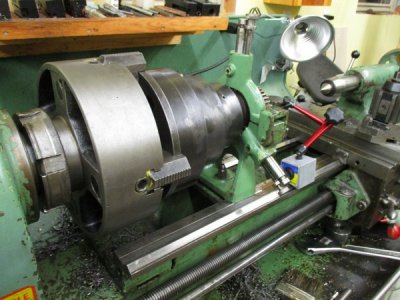
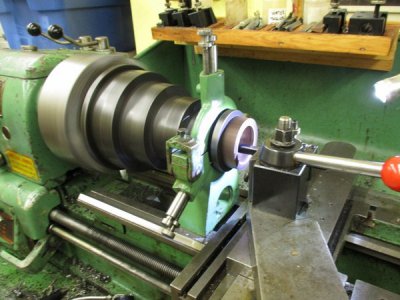
So, last evening, I decided to see if I could mount the cone pulley in my Colchester lathe and rebore the bushing.

Here's what I came up with ...

IMG_0423%20800x600_zpsyqfpyaew.jpg

IMG_0426%20800x600_zpsh6iiiag3.jpg

IMG_0422%20800x600_zpsuunrshpk.jpg

IMG_0421%20800x600_zpskzuhqi51.jpg

I took my time and ended up getting the bronze bore right on size...
IMG_0433%20800x600_zpsychf8ayw.jpg

IMG_0428%20800x600_zpsofs2qwlu.jpg

IMG_0435%20800x600_zpsszficbzd.jpg

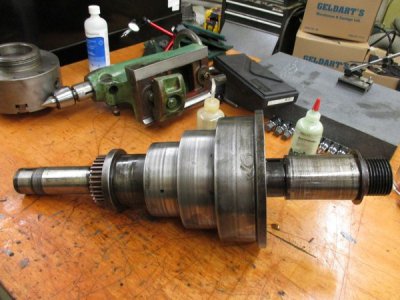
Before removing the cone pulley from the setup, I took the spindle to the work and did a trial fit. It was spot on. Here's the cone pulley back on the spindle with a lovely feel to the spinning fit.
IMG_0439%20800x600_zpsbiry44mv.jpg

Shortly, I will head down to the shop to take the cone pulley off the spindle and press the bull gear on. Then I'll put the cone pulley back on and continue building the spindle and putting it back into the headstock.

Brian
 
Dang,15tons worth of psi I would grit my teeth and turn my head.But what a recovery you made,nice fit and you did not have to fight it.You will have an awesome lathe once your done,definitely a candidate for Nels post "Show Us Your South Bend Lathe"
 
Hi Carrol,

Thank you for your kind words. You certainly can relate to the problems that arise when we take on the job of rescuing old machinery.

I managed to spend most of yesterday afternoon in the shop, and made some headway. To prepare for the installation of the spindle, I made and installed one of the missing oil return wires for the rear bearing, and then installed two new bearing wicks, holding them down with wires through the overflow holes.

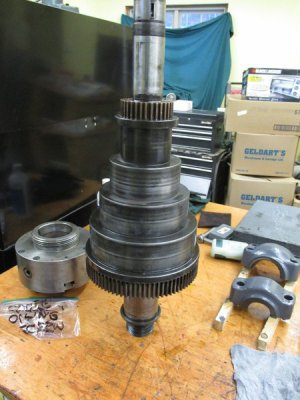
I then assembled the bull gear locking pin onto the bull gear and proceeded to press the bull gear onto the spindle.

IMG_0442%20600x800_zpsqvbesr08.jpg

IMG_0445%20600x800_zpsb0icnmdz.jpg

Then it was a simple matter of sliding the cone pulley back onto the spindle...

IMG_0446%20600x800_zpse1vtmkwf.jpg

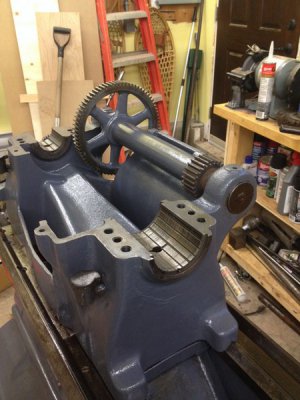
Next was placing the completed spindle into the head stock bearings and checking for mesh with the back gears...

IMG_0448%20800x600_zpsned3pfch.jpg

IMG_0447%20800x600_zpsh2pr8hvz.jpg

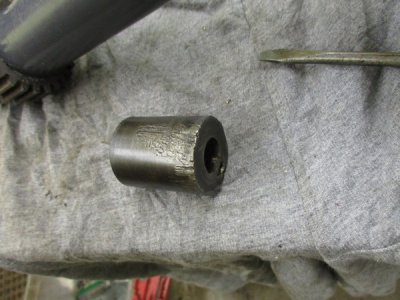
The mesh was not good at all. Only the tips of the teeth were engaging each other. I had noticed that the bushing at the large gear end of the back gears was all mangled looking on the outside surface, so I pulled the setscrew out and peered into the hole to see if there was a factory dimple showing. On the 16" lathes, gear mesh is set at the factory with the pointed setscrew engaging the factory dimple. Nope... no dimple showing. So, I decided to remove the bushing, in order to see the dimple to line it up and re-install it. It was stuck hard and wouldn't move very much, so I cobbled together this little press to remove the bushing.

IMG_0449%20800x600_zps12i4etg5.jpg

By the looks of the bushing, someone had a pipe wrench of vise grips on it at some point... :eek:

IMG_0450%20800x600_zpsqdpyp7er.jpg

So, I placed the bushing between centers and turned down the raised areas and re-installed it. Now the back gears mesh perfectly, the bull gear pin works very well, and the cone pulley turns easily. I placed the bearing caps on just to keep any dirt from getting into the bearings. They need another coat of paint.

IMG_0451%20800x600_zpsqsbj8o2h.jpg

IMG_0452%20800x600_zpsfbr1roc5.jpg

It looks like I have today to play in the shop. I think that the next items I will tackle are the apron and saddle.

Cheers.... :)

Brian
 
Thank you for the well documented rebuild, looking forward to the next episode!


Sent from my iPad using Tapatalk
 
Well done , looking like you'll have a very nice lathe , your doing a great job . You need to be proud of the rebuild. . Shoot I'm happy when I just cleaned and it works for me. I'm to screwed up now to do complete tear downs and rebuilds. But I like to see them done up nice. Look forward to seeing her do some cutting.
 
Back
Top