Tooling and Surface finish

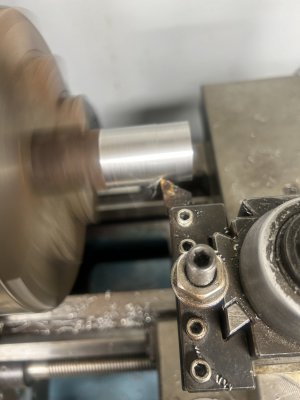
When the lathe & setup is not rigid enough for the force you put on your stock and tool, you will get a bad finish. To reduce the cutting forces, you can reduce the cutting depth, feed/rev and RPM.

2" stock is pretty large for a small lathe so you have to adjust your cutting conditions.
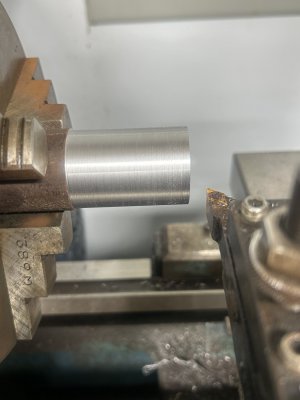
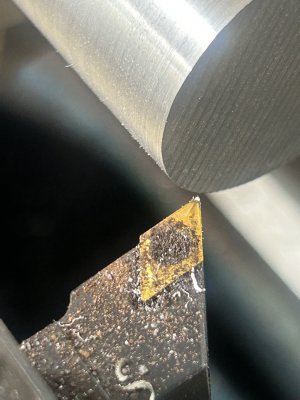
To get a good finish on my mini lathe using a HSS tool, I would run that stock at 200 RPM (32 m/min) 0.05 mm cutting depth and 0.05 mm/rev (0.1 m/min). For a carbide (insert) tool, I would run at twice the speed 400 RPM, 0.05 mm cutting depth and 0.05mm/rev (0.2 m/min). If that gives a good finish, you can try using a deeper cut and faster feed.

0.05 mm = 0.002"

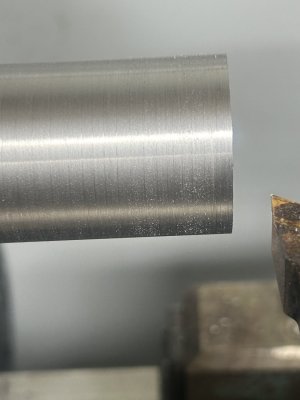
Reduce the tool stick out and stock stick out as much as possible for a more rigid setup.

You can use settings from a lightweight lathe on a heavy and rigid lathe with the same results. Settings from a heavy and rigid lathe probably don't work on a lightweight lathe.

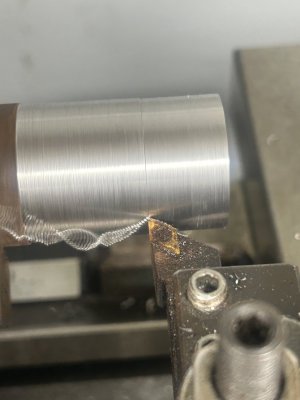
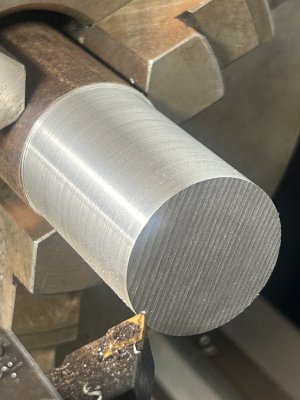
Turning is making grooves (like threading). The sharper your tool, the faster the feed (mm/rev) the more visible the grooves will be.
A radius at the cutting edge will give a better finish but also increases the cutting forces. On my mini lathe and on my bigger lathe, I use a 0.03 mm radius on HSS tools and a 0.04 mm radius on insert tools.
 
Can you post a picture of the results?
 
I have somewhere a video turning 10 mm (hot rolled) steel to 3 mm (bearing fit) on a lathe close to the chuck and with a stick out of 100 mm (10 d). It simulates the results of turning on a mini lathe and on a rigid lathe. It shows that when the turning conditions match the rigidity of the lathe & setup, you can get good results. The video is part of a larger video I am making.
I will look for it tomorrow, edit it a bit, upload it to YouTube and will post the link.
 
It's about near impossible to help, without the following info....otherwise, it's just guessing.

Diameter of stock, and alloy?
Spindle RPM?
Feed per/rev?
Depth of cut?
Cutter profile, nose radius, etc...?
Or if using an insert, what insert?
A photo of the surface finish in question would help greatly as well.
 
This is dialing in 10 thou per cut at 400 RPM, using carbide . Correction on the size of the stock. It’s 1 3/8 . The finish looks pretty decent till I go to clean it up with sand paper. Maybe it’s going to look like that with the way I’m going about this . Not sure so I figured I would ask the pros. I just see some guys that can get almost a ground polish look just by taking a cut like this. Figured I have to be doing something wrong. Far that matter probably several things
 

Attachments

  • IMG_1297.jpeg
    IMG_1297.jpeg
    175.4 KB · Views: 32
  • IMG_1298.jpeg
    IMG_1298.jpeg
    156 KB · Views: 30
  • IMG_1309.jpeg
    IMG_1309.jpeg
    159.7 KB · Views: 31
  • IMG_1310.jpeg
    IMG_1310.jpeg
    159.1 KB · Views: 32
  • IMG_1311.jpeg
    IMG_1311.jpeg
    239.3 KB · Views: 30
  • IMG_1312.jpeg
    IMG_1312.jpeg
    226.6 KB · Views: 32
So, the material used makes a big difference along with all the other factors mentioned.

Do yourself a favor and order a few different things from McMaster-Carr.

Get some 12L14 steel and run it at the correct speed and feed, try a few other known metals too so you can get a real feel for what to expect. Cut some 6061 aluminum, do it dry then with WD40.

Experience is the only way to get better, also don’t worry if you have to use a file and sandpaper to make it look like you want it to.

Finally, notice the finish on various products that have been machined. I bet you’ll see some of these same marks if you look close. Like every other material in the universe metal is made from atoms (crystallized ones) and they react differently when being deformed. Check out some microscopic machining videos on YouTube to see how a chip actually comes off the workpiece.

It‘s really fascinating stuff when you dig into the details.

John
 
This is dialing in 10 thou per cut at 400 RPM, using carbide . Correction on the size of the stock. It’s 1 3/8 . The finish looks pretty decent till I go to clean it up with sand paper. Maybe it’s going to look like that with the way I’m going about this . Not sure so I figured I would ask the pros. I just see some guys that can get almost a ground polish look just by taking a cut like this. Figured I have to be doing something wrong. Far that matter probably several things
That's a cutting speed of 144 SFM, which is very slow for carbide cutting steel. Try 800-1000 RPM, and see if it improves. Would also help to know the specifics on what looks to be a DCMT insert? .010" is a pretty light cut for carbide, especially at such a low cutting speed. Your feed rate should be set to what's appropriate for the nose radius of your insert. If you have the box the inserts came in, it may have the speed/feed spec chart on the back.
 
I appreciate the input and I will get some pics together. Not exactly sure what the material is. Just some 2” bar stock I had laying around. Looked to be maybe cold rolled but I have nothing else to go off of
A36 is tough to turn and get a good finish on and emery cloth or sand paper will not help a great deal with it. 1018 is not much better but will work for many tasks. Have you calculated your feed and speed? If your feed is to slow it'll look like a shallow fine thread, especially in a gummy material.
 
McMaster Carr has a great variety of metals. I use metals from them regularly. Speedymetals.com has a good variety at much better prices, especially 12L14 a 6061.
 
Can you post a picture of the results?
I did not find the video but found another one I made for some one that started turning on a small emco.
If you run an insert at the recommended cutting conditions, most of them give a decent finish. I have some inserts that I have to run far above the recommended speed to get a shiny finish. Inserts made for finishing (tool geometry and chip breaker) give a better finish at modest feed and speed.
 
Back
Top