Surface Grinder rookie

S5rx7

Registered
Registered
Joined
Feb 27, 2022
Messages
86
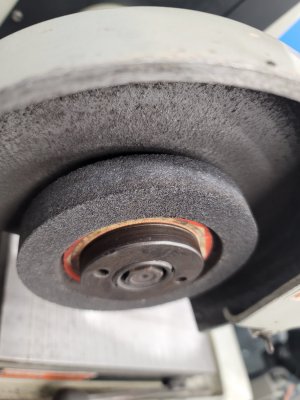
I have a Harig 612 surface grinder that I've had but never used. The time has come that I need it. When I first got it i tore the entire thing down cleaned inspected adjusted. I've got it leveled using my 199 and the oil pump/flow dialed in. Today I decided I would make my first mess and what better way to learn than to grind the chuck‍. The chuck is way far out. Large hump In middle. I made the rookie mistake of taking to much off at 1 time and got some hot spots. Luckily chucks have some material to work with because I'm going to need it

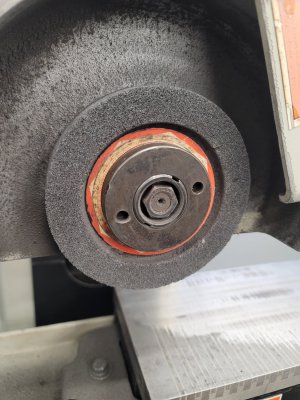
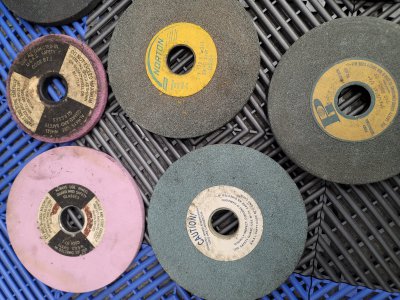
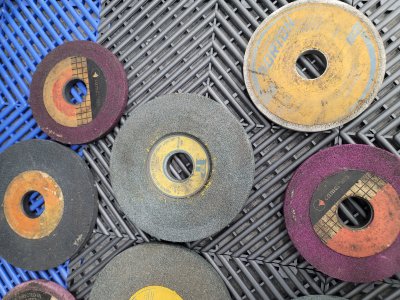
I have a few stones and wheel dressers. Im unsure what the grit or make up each one is. I dont know what stone I should be using. Any pointers on how to go about this? I think I need to rig up a coolant system on this unit first and formost.
 

Attachments

  • 20221215_221503.jpg
    20221215_221503.jpg
    219 KB · Views: 44
  • 20221215_221520.jpg
    20221215_221520.jpg
    334.3 KB · Views: 40
  • 20221215_221523.jpg
    20221215_221523.jpg
    235.4 KB · Views: 31
  • 20221215_221723.jpg
    20221215_221723.jpg
    547.7 KB · Views: 30
  • 20221215_221735.jpg
    20221215_221735.jpg
    863.7 KB · Views: 30
  • 20221215_221741.jpg
    20221215_221741.jpg
    857.6 KB · Views: 40
A mag chuck is about the hardest thing to grind expecially for a newbie. You are grinding a large surface that maxes out your machine axies.
Their are a lot of things to consider when grinding the chuck. You want to keep heat out of the chuck so coolant is highly recommended. You want to take tenths NOT thousandths. If you burn the chuck it could be garbage now. Trying to get the burn out will take a lot off the chuck.
You want to practice with the motions, get the feel of the grinder. See how it reacts before taking on such a big task. Your gonna want coolant a coarse wheel like 46 H,or I. You’ll want to ruff grind it to get it down to size. Then dress wheel and finish grind. This process will take hours not minutes. Research some videos on YT. Good luck!!!!
 
I watched Steve's video before giving it hell. I should have listened better . I'm going to get a coolant system and get a splash guard setup. Hook up my dust collector as well. Figure out if any of the wheels I got are the correct ones and if not I'll purchase one.
 

Attachments

  • 20221217_113931.jpg
    20221217_113931.jpg
    231.8 KB · Views: 32
  • 20221217_114137.jpg
    20221217_114137.jpg
    162 KB · Views: 32
Theirs a lot of finesse when it comes to grinding. You said you cleaned her up. How did the table surface look and the bottom side of chuck? If rusted or corroded you want to clean those surfaces up. You want to stone both surfaces. Lightly oil both surfaces and their is a procedure to tight the chuck to the table. You tighten one bolt snug and leave one just seated with light pressure so the chuck has room to expand with heat.
When grinding the chuck you want to lower the wheel and traverse the whole chuck to check for high spots. You want to bring those high spots down slowly to the rest of the surface. Unless you have the proper wheel I’d buy a new one so you know your good.
Suburban tool has a lot of how to videos on grinding along with solid rock. I’d suggest spending some quality time watching some videos. And ask any questions we’re here to help.
 
Another Harig 612 rookie here. Your machine looks like a beauty! Lots of good advice already given, and will throw in what little I've learned. Like you, I ignored good advice and made grinding the chuck my first project and screwed it up. No coolant, too large of cuts, heated it up, and wound up with a dip in the middle( the heat humped it up in the middle, which I ground flat, and when it cooled.....it sunk! ). I added a mist coolant, and a porous 46 grit wheel, and used this video as a guide.


Cuts were only a tenth or less, and took big step overs( .400" or two cranks on the cross feed ). Once it was flat, I made a number of spark out passes, and using a variety of step overs, full turn, half turn, quarter turn, etc....Frequent wheel dressings as well, and only a half tenth cut on the last pass. Also, as already pointed out, be sure the table platen, and the chuck bottom are clean, flat, and stoned. With just a little oil, the chuck should darn near "ring" to the platen, and be rather difficult to remove.....the fit should be that good. Gradually increase the torque on the hold down clamps to 10 lb/ft, and then increase the torque on the left end only to 20. This, to allow the chuck to grow/elongate and somewhat minimize it developing a hump in the middle if it gets too warm. If it gets too warm, it's still going to distort, so don't let it get warm! Be patient, as one of the guys pointed out, it's going to take hours to complete.
 
Theirs a lot of finesse when it comes to grinding. You said you cleaned her up. How did the table surface look and the bottom side of chuck? If rusted or corroded you want to clean those surfaces up. You want to stone both surfaces. Lightly oil both surfaces and their is a procedure to tight the chuck to the table. You tighten one bolt snug and leave one just seated with light pressure so the chuck has room to expand with heat.
When grinding the chuck you want to lower the wheel and traverse the whole chuck to check for high spots. You want to bring those high spots down slowly to the rest of the surface. Unless you have the proper wheel I’d buy a new one so you know your good.
Suburban tool has a lot of how to videos on grinding along with solid rock. I’d suggest spending some quality time watching some videos. And ask any questions we’re here to help.
I did come down and touched off with a piece of paper. Slowly creeped up on it and scanned over the entire thing. Then when I was touching I thought I only went down .0001 but I guess I read the vertical wheel dial incorrectly ‍♂️
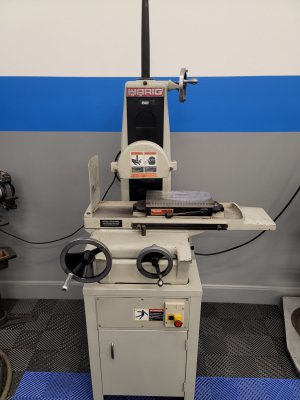
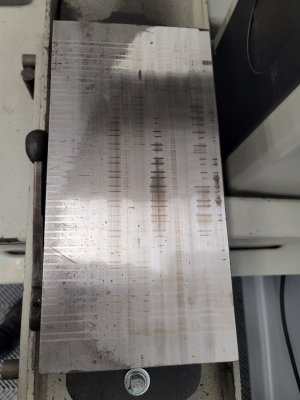
. I still don't know what the dial increments are . It don't have the little tenths wheel (wish It did). I need to add a dro and find the little tenths hand wheel setup for it. I had a bunch of chucks. I threw this one on it. There wasn't a chuck on it. The bed surface wasn't bad. I cleaned it up with a scotchbrite. I did tighten both clamps down. I'll undo one side. Although I may not have tinkered much on a surface grinder I'm not a complete newb to machining. A few Christmas ales, music cranked and let's grind a chuck just didn't work so well
 
Another Harig 612 rookie here. Your machine looks like a beauty! Lots of good advice already given, and will throw in what little I've learned. Like you, I ignored good advice and made grinding the chuck my first project and screwed it up. No coolant, too large of cuts, heated it up, and wound up with a dip in the middle( the heat humped it up in the middle, which I ground flat, and when it cooled.....it sunk! ). I added a mist coolant, and a porous 46 grit wheel, and used this video as a guide.


Cuts were only a tenth or less, and took big step overs( .400" or two cranks on the cross feed ). Once it was flat, I made a number of spark out passes, and using a variety of step overs, full turn, half turn, quarter turn, etc....Frequent wheel dressings as well, and only a half tenth cut on the last pass. Also, as already pointed out, be sure the table platen, and the chuck bottom are clean, flat, and stoned. With just a little oil, the chuck should darn near "ring" to the platen, and be rather difficult to remove.....the fit should be that good. Gradually increase the torque on the hold down clamps to 10 lb/ft, and then increase the torque on the left end only to 20. This, to allow the chuck to grow/elongate and somewhat minimize it developing a hump in the middle if it gets too warm. If it gets too warm, it's still going to distort, so don't let it get warm! Be patient, as one of the guys pointed out, it's going to take hours to complete.
I'm going to have to build a coolant rig. Got any pics of yours?
 
I'm going to have to build a coolant rig. Got any pics of yours?
I'll take a few today and post them up here. Also, since you don't have the fine feed adjust( mine doesn't either ) the graduations on your down feed is in .0005" increments. I ended up installing a DRO on that axis so I could better make fine adjustments. You should be able to find an owners manual in pdf format on www.vintagemachinery.org
 
Back
Top