Stuart Beam Engine

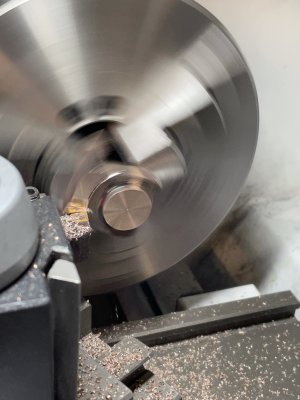
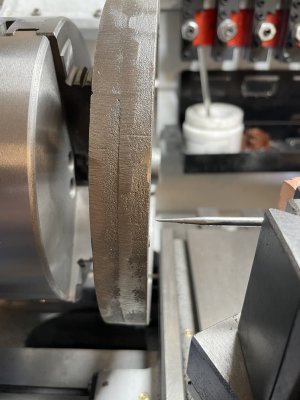
Time to make the Plummer blocks. Let’s try super glue
.0D27CDBE-4C41-4707-94AA-1C98ECA30645.jpeg
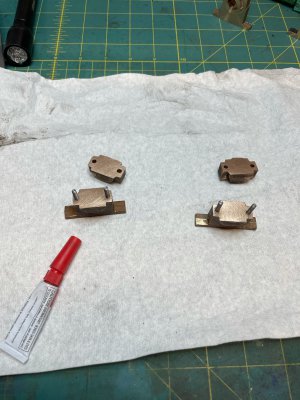
Well that didn’t work very well. You can see where the glue failed and the tool dug in. Should have listened to Joe Py.
1EE27540-B5F3-46D2-8CDA-BFCB56BCFECA.jpeg
Need to drill and tap so I can bolt the halves together,
49A5EA39-4B1D-43A7-8481-24E248BF2F44.jpegDA3C2269-83E2-4AB0-9DEA-FD9438652CAC.jpeg
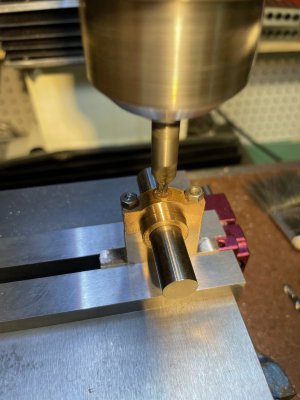
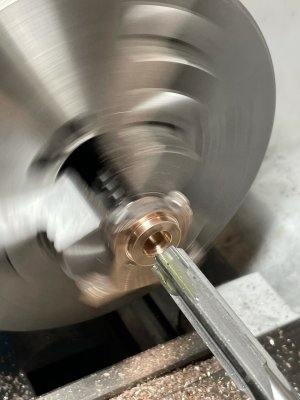
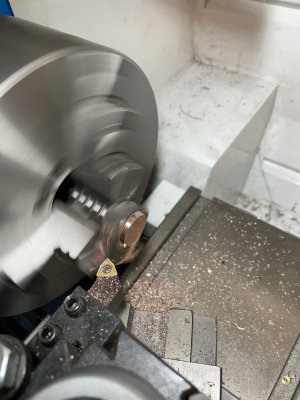
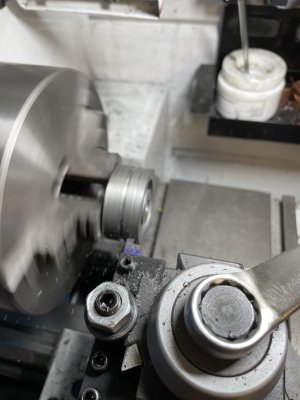
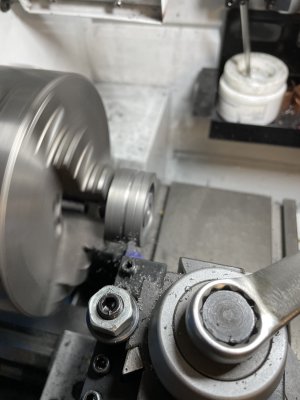
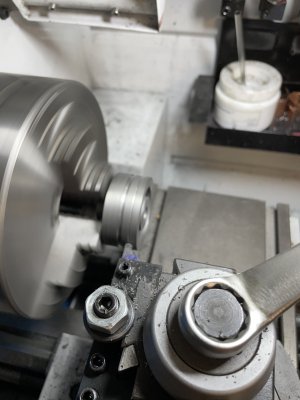
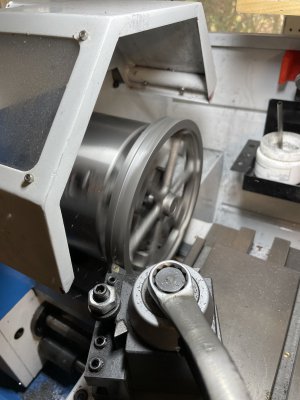
Now lets turn the faces.
B63C7D57-E5DA-4224-B93F-51711BA95C10.jpeg1C1DB78E-E130-4F27-95E2-EE61B2699165.jpeg
Much better. I tried boring them on the lathe using the ruined part shown above and learned that the red brass would catch the bits and reamer and leave a mess. So I decided to do the boring on the mill. Locate the base and center set the bore center
.C7C81DD3-D089-47D9-850A-54F12C2FD167.jpeg
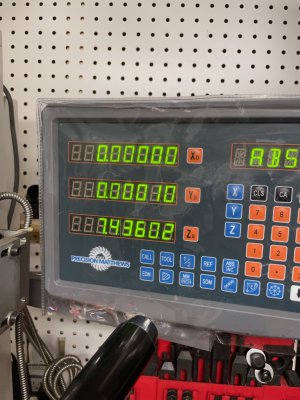
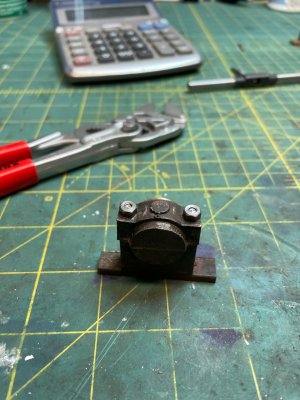
Drill and ream. Check with a gauge pin. Good fit.
705A90C1-081D-4F79-851B-9B959343EE73.jpeg
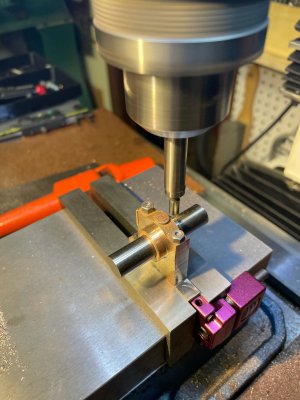
Use the gauge pin to check center and drill holes for the base and oil cup.
5B74CE53-F027-4354-82CF-0109CF3F0354.jpeg
Everything fits and the beam pivots without binding.
29CB8ACE-5AFC-4522-A4B6-AE29E3BE8816.jpeg
Next up the watts parallel motion links and miscellaneous parts
 

Attachments

  • 09238BEF-5E04-461D-8ACE-7DDE96489DAE.jpeg
    09238BEF-5E04-461D-8ACE-7DDE96489DAE.jpeg
    701.2 KB · Views: 12
  • 50699D41-AE5C-4AE0-8E72-867D96F3CB3B.jpeg
    50699D41-AE5C-4AE0-8E72-867D96F3CB3B.jpeg
    887.4 KB · Views: 11
  • B5EFFA9B-4187-416D-93ED-7815A6003770.jpeg
    B5EFFA9B-4187-416D-93ED-7815A6003770.jpeg
    757.2 KB · Views: 14
  • A14A7D4F-2B8F-4CA0-AB39-AFA7C09032EB.jpeg
    A14A7D4F-2B8F-4CA0-AB39-AFA7C09032EB.jpeg
    906.4 KB · Views: 11
  • B71FB544-C527-40FC-9ED5-021E98117DB9.jpeg
    B71FB544-C527-40FC-9ED5-021E98117DB9.jpeg
    755 KB · Views: 10
  • FE0D5E8A-1A50-4D8A-B22B-35553E666772.jpeg
    FE0D5E8A-1A50-4D8A-B22B-35553E666772.jpeg
    670.8 KB · Views: 9
  • EBBA065E-8E29-41A3-BF70-ECF67376BA7A.jpeg
    EBBA065E-8E29-41A3-BF70-ECF67376BA7A.jpeg
    631 KB · Views: 9
  • F4F0A38C-6789-4441-A58E-700663B68FA1.jpeg
    F4F0A38C-6789-4441-A58E-700663B68FA1.jpeg
    821.4 KB · Views: 12
Made a bunch of small parts for the Watts Parallel motion assembly. Register edge, drill holes and shape on the sanding belt
.E41E4561-90F7-460E-BA56-89FDDE1A1DCE.jpeg
Also turned the pivots and shafts. I need to work on my shaping skills on the sanding belt. Aesthetics is obviously not my strong suit.
1AB99B94-D2C8-4339-8BD6-3271B136827F.jpeg
Time to figure out if I should move on to the cylinder or work on the crank and valve assembly.
 
Been a while since I worked on the beam engine. First the holidays and then an interlude to loop around Florida by boat. When I got back to working on the beam engine I decided to work on the crank and pulleys. When I made the drive shaft I found a 3 thou taper in 4 inches. So I spent some time adjusting my lathe. And then I check my mill and found a 4 thou nod over 6 inches. So shim, check, shim, check.... Finally finished and both machines are tuned in to a few tenths. So I will be posting more as I finish up the pulley and other components on the drive shaft.
 
As stated above, it's been a while since I worked on the beam engine. I figured if I was going to make a mess machining Iron I may as well get it all done at once. So here goes. Let's start with the pulley, face off and turn to diameter

IMG_4125.JPGIMG_4124.JPG

Need to make a form tool to machine the grooves so I got to spend some quality time with my grinder.IMG_4127.JPG
Actually, turned out pretty well, I'll just call it a happy accident.

IMG_4131.JPG
Drill and tap the grub screw(watching too much Kieth Appleton) and done.
IMG_4134.JPGIMG_4135.JPG
If you didn't notice I also turned the eccentric. Pretty straight forward off center turning project. Had it done before I remembered to take pictures.


Now on to the flywheel. How do I hold it so it doesn't chatter and wale like a banshee. Hint, this isn't the way.IMG_4141.JPG
This worked much better, but I had to turn registration surfaces so I could turn it and dial it in(it isn't out by 3 thou!).
IMG_4152.JPG IMG_4151.JPG IMG_4153.JPG
Turn the surfaces, drill and ream.

IMG_4155.JPGIMG_4156.JPGIMG_4157.JPG

Crank will be up next.
 

Attachments

  • IMG_4128.JPG
    IMG_4128.JPG
    1.5 MB · Views: 5
  • IMG_4129.JPG
    IMG_4129.JPG
    1.5 MB · Views: 4
  • IMG_4130.JPG
    IMG_4130.JPG
    1.6 MB · Views: 6
  • IMG_4139.JPG
    IMG_4139.JPG
    2.1 MB · Views: 5
  • IMG_4140.JPG
    IMG_4140.JPG
    2.1 MB · Views: 5
  • IMG_4154.JPG
    IMG_4154.JPG
    1.5 MB · Views: 5
Last edited:
yes, I am living in the town salzburg). ...as we see the world is very small:)
 
yes, I am living in the town salzburg). ...as we see the world is very small:)
My son spent a month working on a farm in Salzburg a few years ago. Enjoyed the family and the beautiful scenery.
He is 32. There are vineyards there correct?
 
No, this is more in the east in lower austria "weinviertel","wachau", south of vienna, burgenland (near hungary), styria where the climate is mild and the landscape got no mountains - only hills.
 
Back
Top