Stuart Beam Engine

5tmorris

Registered
Registered
Joined
Jun 17, 2020
Messages
45
Starting a Stuart Beam Engine. Finished the machining the base and the crank support(pictures below).

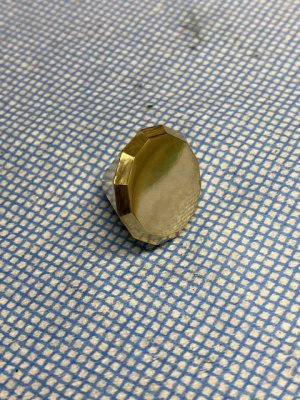
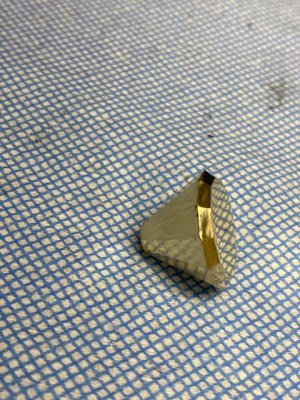
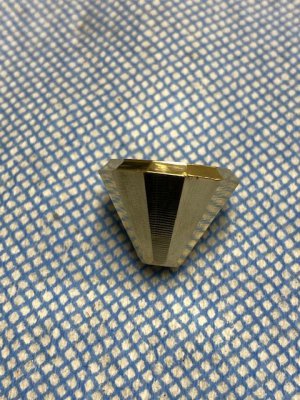
On to the column. I am in a quandary on how to set everything up and order of operations. I figured I would turn the column between centers, but my first attempt to find center using diagonals from the corners of the base and column capital was a spectacular failure. Wasn't even close to concentric with the column. So, machine .376" cast iron to go into .375" holes and start again.

This go round I used my surface plate and transferred a line that was tangent to the column to the underside of the column base and capital. Better, but still between 20 and 30 thou of runout. I know the casting shouldn't be a registration surface, but I want to at least make it so it looks somewhat concentric.

OCD kicking in I guess. Glad this is a hobby. I would go broke in short order if I was doing this for a living.

Suggestions for setting the centers for concentricity?

Now to the real problem. The column supports the bearings for the Watts Parallel Motion assembly and piston rod. These components mount to the entablature beams supported by the column. Therefore, the entablature beams must be parallel and equidistant from the piston centerline. Working backwards then the column base bolts must be normal to the major x and y axis on the box bed to make sure the column capital and entablature beams are properly aligned.

How do I insure I reference these axes properly when I set the bolt holes in the base of the column?

3Y9A0759.JPG. boxbed.jpg
Align the base, deck the surface to spec, check the first hole location for sanity then use the DRO to set all the other holes in proper relation.
 
Do you have the book that is available for this model? If I understand you correctly, I think I would find what I believed to be the center of the base and locate everything from that. Or pick whatever point you think is the "center of the universe" and go from there. My guess is there is considerable tolerance for error. When these designs were new there were no DROs... This looks like a fun project. A lot of the fun for me is pondering all the possible sequence of operations. But I always have a plan and stick with it (until it proves to be unworkable!).
Good Luck and have fun
Dave
I do have the book, but it is very light on details. Even the Stuart folks told me it was of limited use when I ordered it. I agree with finding the center of the base and going from there. After I drill the center holes and turn the base flat and before I remove it from the lathe, I am going to mark a bolt circle so I have a concentric reference. Still going in circles(literally and figuratively) in deciding how to reference the square bolt pattern to the entablature orientation on the scribed circle.

I just finished a 10v and it is amazing how forgiving and "tolerant of error" they are to a poor machinist like me. Picture below.
IMG_3736.jpg
 
" Still going in circles(literally and figuratively) in deciding how to ... " been there, done that!

" how to reference the square bolt pattern to the entablature orientation on the scribed circle. " doesn't your DRO have a bolt circle function?

Drill the holes in one part, mate them and transfer the holes to the other.

I like to cover the area with Dykem and scratch in where the _______ will be and see how it looks...
 
Last edited:
Sometimes you just have to dive in, so... I used a surface plate to transfer tangent lines from the column to the top and bottom surface. Center drill and turn between centers. Make a jig so I don’t destroy the base.4E3D39AE-2314-4387-9FEA-81751E5ACEDE.jpeg550B3471-D5BA-4F90-B284-96CDF8E7EBBB.jpeg
Spec calls for 6’ column height.
2F8998FB-30B4-4338-9EBD-565853ED9EC9.jpeg I’ll take that

Pop a .125 pin in the hole used on the lathe, indicate the surface flat, locate the pin and set DRO to 0 and mill the entablature mounting surface

5A22502E-8CA1-4817-A870-758A19851215.jpegBB70F1F0-8BA2-4815-807F-F9E8232A86FA.jpeg

Now with a little help from Pythagorus and finding a proper calculator that uses RPN(= button on a calculator confuses me), translate the bolt circle to coordinates, center, drill and tap the holes for the beam support blocks.
A17AAE5C-5A89-435E-ABF3-5D527DAF4AF2.jpegC42273E0-30AC-4C06-A2C6-1A16BF676D68.jpeg40FF21C8-F7DE-4411-82AC-1ACFF6D49A30.jpeg
Milled surface finish turned out ok for such a long unsupported length. Light cuts were the order of the day.

Next the base anchor bolt holes and the entablature mounting surface and mounting holes.
 
Last edited:
Boy can I relate.
Keith Appleton is an expert on the subject.
He has a series on the beam and, Learning Turning, has a video on his beam.
It’s interesting to see the differences between model builders and machinists.
Joe Pieczynski of Austin Texas goes about his builds with his DRO and he makes special one time jigs. Very scientific.
Model builders use super glue and mandrel.
Getting there is all the fun.
I’ve been watching Joe Py and Blondihacks building the same PM Research engine too. The different approaches are interesting to see. Watched the Kieth Appleton series on rehabbing the beam engine numerous times. He definitely uses a practical approach to his work. Proves that there is no replacement for experience.
 
The different approaches are interesting to see
No doubt.
They all end up with good results in the end. Blondie adds a bit more drama to the experience but she is very good.
It really pays to study the instructions, come up with a game plan on where to start and how you will set-up and hold your parts. Working from castings is all new to me.
I'm building the PM Research #7...slowly :)
Post pictures!
 
Look in the model section. I have finished the base and one cylinder. I need to get back into it. I just don't have the time, my energy goes in all directions.
Todays session.>>
 

Attachments

  • IMG_5743.jpg
    IMG_5743.jpg
    87.4 KB · Views: 16
  • IMG_5744.jpg
    IMG_5744.jpg
    84.9 KB · Views: 18
  • IMG_5745.jpg
    IMG_5745.jpg
    81.3 KB · Views: 19
Back
Top