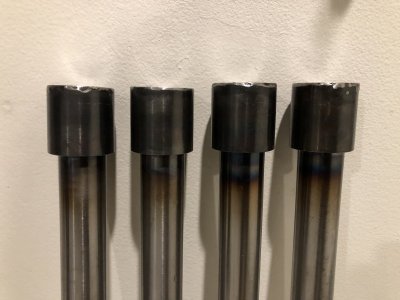
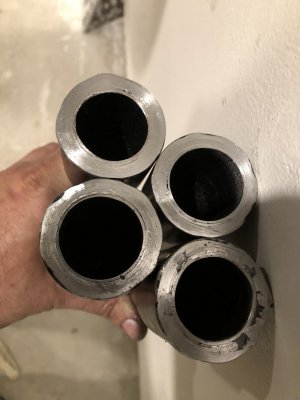
R8 & 3/4” Shank Tooling Holder

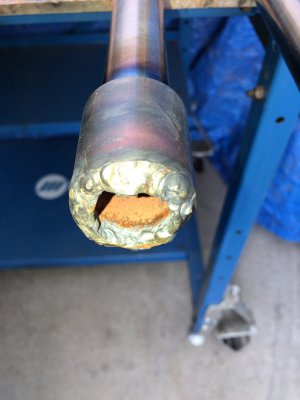
Here is a tack weld made with the fresh cylinder of Argon.

2947CCBB-EF94-4C02-AEE9-407D277A6191.jpeg
 
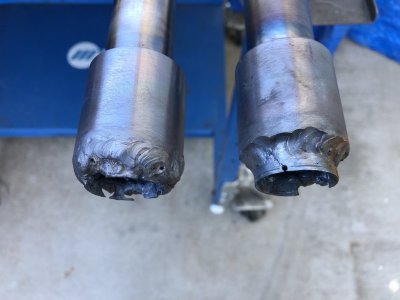
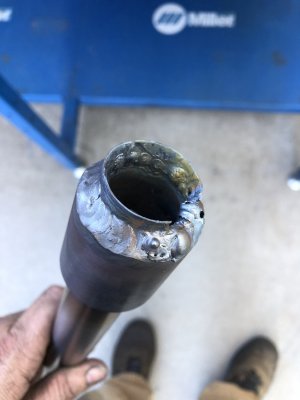
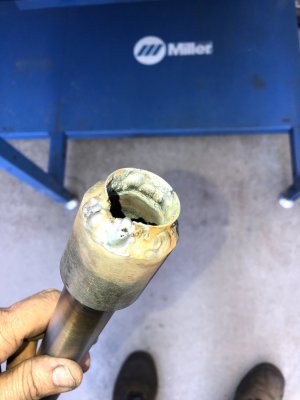
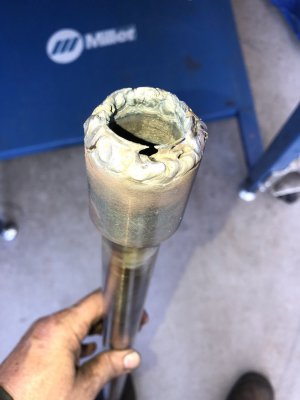
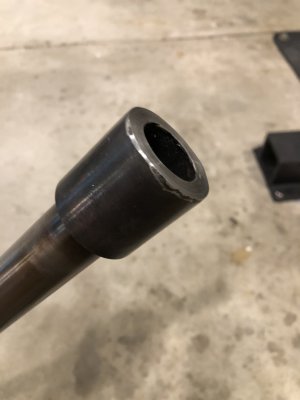
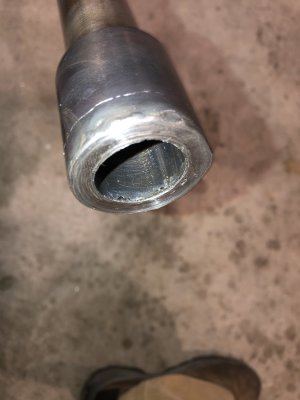
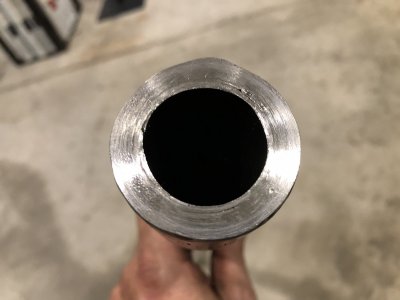
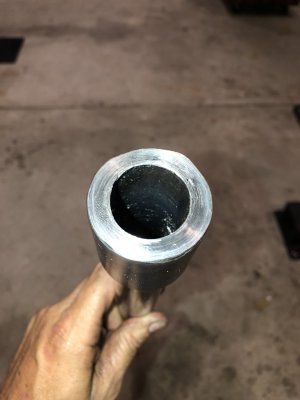
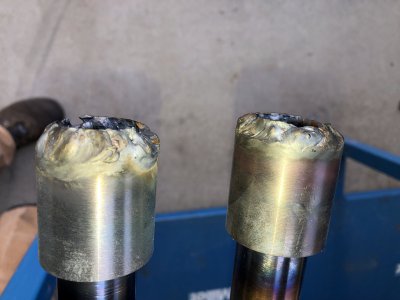
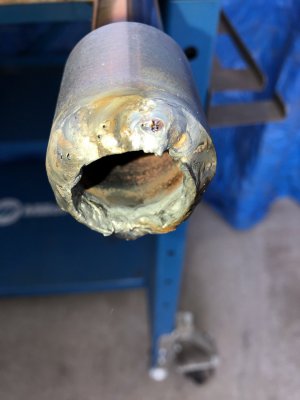
Here are photos of the 2 most presentable sides of the first 2 leg/feet assemblies. Also, photos of the penetration (or lack thereof) that I got on the inside.

The tubing is about .035” & the walls of the feet are about .250”.

47F39D3B-1343-4154-9BA7-B31D369A20E6.jpeg
F806EEF5-71E8-4A1B-9B00-D3A434ECA0AD.jpeg
AA81933E-B04D-4AA8-A363-9B168D5B9616.jpeg
DD98FE17-BAC4-43B8-AD07-4DD011F2905C.jpeg

Now we see why I machine down my welds. I like to machine them down to flush, so I need full pen everywhere.
 
There is almost always a second round of welding which serves to fill in the low points (i.e. underfill).
 
That should work out, Erik. You've created some unusual assemblies leading to unusual techniques, which is great for practice. It's a tool storage rack, which is the metal shop equivalent of a birdhouse or a cutting board. It's the right place to experiment and try stuff, because if it works out, you'll have something cool to show for it.
 
That should work out, Erik. You've created some unusual assemblies leading to unusual techniques, which is great for practice. It's a tool storage rack, which is the metal shop equivalent of a birdhouse or a cutting board. It's the right place to experiment and try stuff, because if it works out, you'll have something cool to show for it.

I made this project 10 times harder than it needed to be! A great example of this is these feet that I am welding on: these could have simply been press fit. Not that this has anything to do with the feet, but I was broke when I started this rack, & I had to use my scrap on hand for materials. 95% of my scrap is steel.

I wanted aluminum for the shelves so that the shelves would not scratch the collets or shanks. I knew that it would take me a few weeks to make the legs & frames, and by then I could somehow afford 3 sheets of thick aluminum. This was before I knew that aluminum could be a participant in galvanic corrosion.

If I were to do this over again, the whole thing would be made out of aluminum. It would involve no welding. It would just be 3 plates and 12 rods (not tubing—aargh!), all connected with tight slip fits. To save money, the feet could be press fit so you wouldn’t have to turn down the bottom leg so much.

Come to think of it, that sounds like a *really* fun machining project!
 
Last edited:
Welding the last two feet on their legs went way better than the first two. I had taken a break, had some dinner & family time, plus water & a quad espresso. I was very wired on the caffeine.

I have worn 2.5X glasses in tandem with the (2.5X ?) cheater in the hood for all welding today, so I had the best in person view of welding that I have ever had in my whole life. I had 9 tungstens at the ready, & I used 4 of them for the last 2 feet.

These welds aren’t pretty, but they will have far fewer defects than the weld beads posted above. The rollout wheel is definitely one of my top five favorite tools in the shop. If you weld, I strongly recommend a rollout wheel. I welded at between 11:30 and 2:00 for all four feet, so gravity was my friend for shielding gas & dropping keyholes.

D84DF010-283C-465F-A29B-F6A8A4ABE1B3.jpeg

Pen:

BF1F57D3-A705-427A-A2A2-5E579121204E.jpeg
C6AF1716-B557-4CA1-BF85-0D3019BD4BAB.jpeg
 
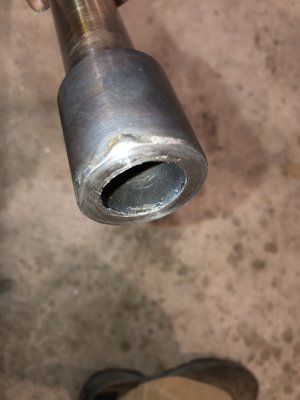
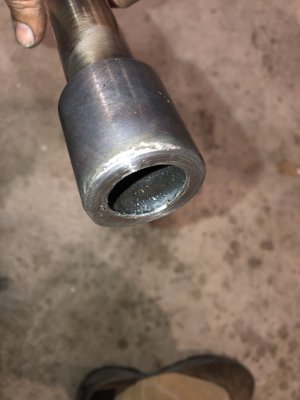
I machined the first foot down until I saw the weld seam between the tubing & the bushing. If I machine it down more, I would surely have to weld on it again (to get full pen on the seam). As it is, I could get away with it because (1) it is up against the floor and nobody is going to see it, and (2) the very worst thing that could ever happen is that the bushing would spin loose.

Regarding the OD, even though I faced off .265”, there is still undercut on the bushing. I can either (1) *face* it down more to machine off the undercut or (2) build that back up with weld metal (as you would with undercut).

I would not choose to put anything other than the minimum chamfer on the foot because, being a foot, it is expected to have the maximum footprint. A chamfer would be a counterproductive Band-Aid.

I included a lot of photos of the remaining penetration at the weld seam.

I’m sure I will end up fixing all of the above issues with weld metal. I have found this type of welding (i.e. buildup and repair) to be good welding practice.

I need to machine the other three feet before I do any welding so that I can make sure that all of the feet end up being the same height.

I sure wish I would have just gone for a press fit here! Maybe I like spending time in a welding hood.

4AD70449-7A19-45BE-8F54-0E61351C01C1.jpeg
79437F05-FD2D-42FE-B78B-8069F8A6E552.jpeg
BB6D6A64-CB48-4247-BEB5-A2E12C332D1E.jpeg
69D4193A-A3AB-4CD8-92FF-64A25B30BA12.jpeg
A537EB86-0DCF-439C-B81F-E28A29ABA756.jpeg
6C98FCE4-556E-48DF-ABEC-E3DD7010FC7E.jpeg
 
Last edited:
All four ended up about the same, save one weld seam which is very weak & quite exposed.

I can skip building up the bushing (i.e. fixing the undercut) by doing the following:

(1) choose the standard foot height as decided by which one needs the most facing to remove all of it’s undercut,
(2) weld all 4 seams really well since I have full access to the seams,
(3) face all 4 feet to the standard foot height,
(4) minimal chamfer,
(5) check that the seams are all hunky dory after the .090” or so facing ops,
(6) Emery cloth to make them match the tubing.

12AABB7F-A427-4171-ADCB-0A216C2A9305.jpeg
7685FDC9-566E-401D-A761-8CB3CF35E2B8.jpeg
 
Since it's not structural, you could have run a fusion weld with no filler along the inside edge. Just heat the interior corner until it melts and fuses, then chase it around the inner circle. Should take about 5 seconds. No raised bead, small weld, not much heat input. In other words, if you're going to grind it off, you don't need a big 1/4" fillet weld there.
 
Since it's not structural, you could have run a fusion weld with no filler along the inside edge. Just heat the interior corner until it melts and fuses, then chase it around the inner circle. Should take about 5 seconds. No raised bead, small weld, not much heat input. In other words, if you're going to grind it off, you don't need a big 1/4" fillet weld there.

Perfect timing for telling me this. I’m just about to head out there and do this now.

I am going to have to switch to gas welding on this project because there is an Argon shortage.
 
Back
Top