Precision Mathews PM1440E LB lathe

Hate to tell you this but, Matt's given me dibbs on an overstock of 1440 ELBs -with DRO installed no less...


Ray
Hi
No problem i live in the UK, but the 14x40 is looking good, it is on my list
after a Mill. LOL
 
A few more items for the record:
P1000620.JPG
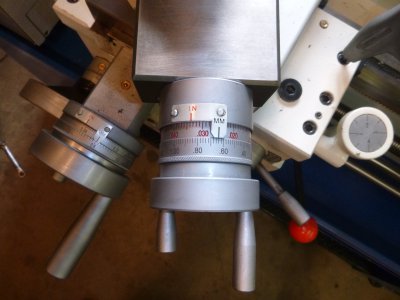
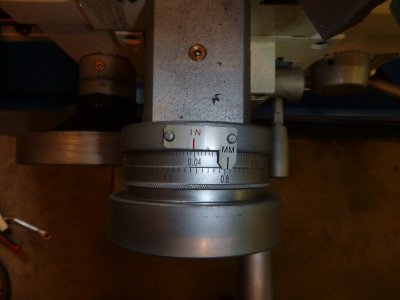
The cross slide reads reduction of the diameter.

P1000621.JPG
And the compound reads radius (depth of cut).

P1000624.JPG
P1000623.JPG
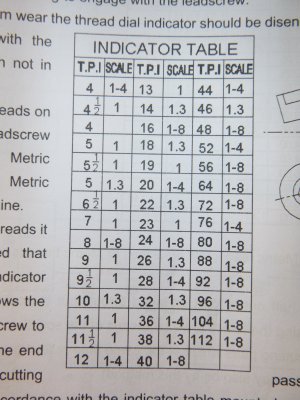
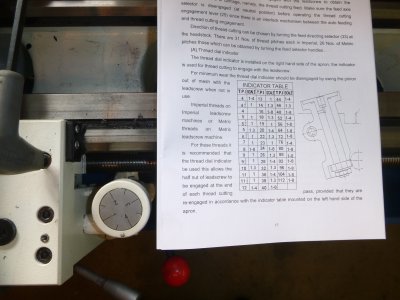
The threading dial chart is not on the lathe. This is from the owners manual. According to Matt, the hashes between 1234 are 5678 so 15263748. and where the manual state 1.3 is 1 or 3.

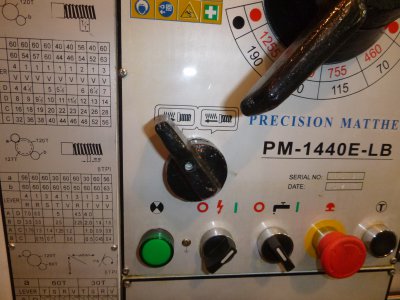
An idiosyncrasy I noticed is the carriage feed direction lever label.
P1000622.JPG
In this picture the lever is set to feed the carriage towards the spindle, which makes sense, but the label doesn't really make any sort of sense to me. In the manual the picture of the label shows the direction arrows the opposite way, which makes more sense to me.

P1000619.JPG
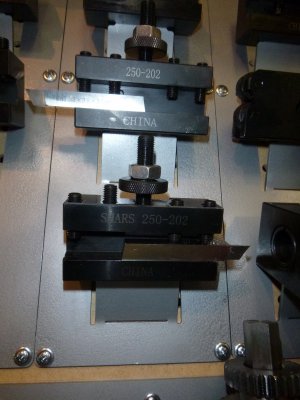
For comparison, the top tool holder came with the lathe, and the bottom one I ordered from Shars. Other than the lettering they match. I ordered a box of set screws to replace all the tool holders from mcmaster #91390A147.

P1000620.JPG P1000621.JPG P1000624.JPG P1000623.JPG P1000622.JPG P1000619.JPG
 
Nice write up on your lathe purchase. I have the pm 1440elb on my list of possible lathe choices. My main concern with lathes in this weight class is the stability and the width of the bed. I am presently using an enco 1340 lathe (it is an 11 year old machine and i aquired it from a medical research facillity) and it was quite a challenge setting the machine up for vibration free operation. Love to hear more about the operation of your machine if it is possible.
She sure looks great! Now get her all dirty

Rich
 
What the HECK?! Mine didn't come with a badass little toolbox...I'm gonna have to talk to Ray about that!

Congratulations on the fancy new toy...I believe you are going to enjoy it, I sure do like mine! As for the backwards wiring of the power lever and the backwards-ness of the carriage direction, mine were also shipped like that. My cross feed dial was also the wrong one, I'm sure you would have noticed that by now, but just in case!

Glad she landed safely in your shop, good luck on making chips!

I miss my machine being that clean...
 
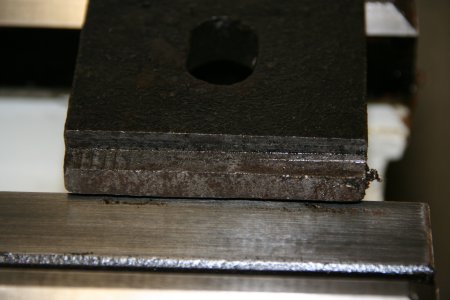
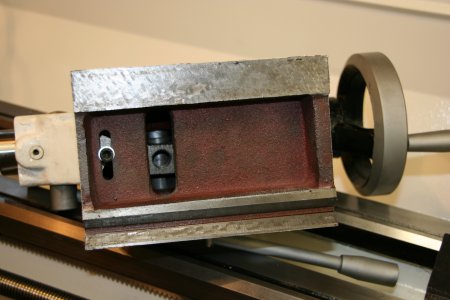
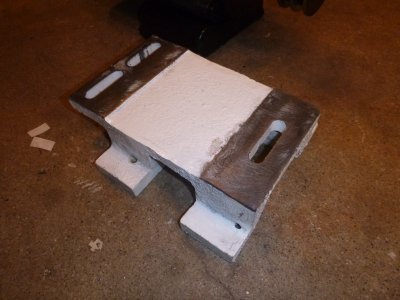
To me the tail stock seemed to slide when locked way too easily, so I investigated. The clamp block under the ways was not clamping flat with only the diagonally opposite corners touching.
IMG_3189.JPG
Looks like a ADD beaver go ahold of the part.

IMG_3191.JPG
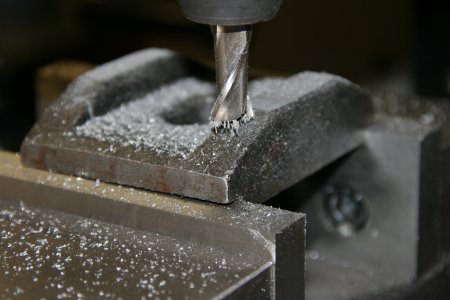
I clamped the block inverted with the misalignment split between both sides and made just enough of a pass to give a reference surface.

IMG_3192.JPG
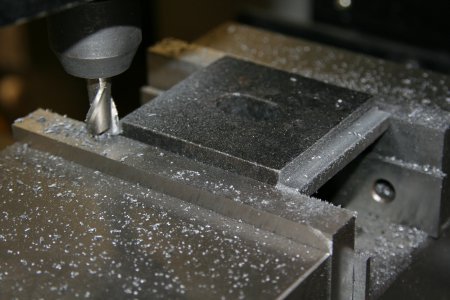
I then flipped the block over and set the fresh ref surfaces on parallels. Again taking just enough of a cut to get through the mess. That seemed to have helped a bunch.

IMG_3190.JPG
The bottom of the tail stock is another matter, it is scraped true.

IMG_3189.JPG IMG_3191.JPG IMG_3192.JPG IMG_3190.JPG
 
The only other "issue" I ran into is vibration from the motor. Well, that is not exactly accurate. The problem is really that there is a very tight window of belt tension that the machine likes. I chased my tail a bunch trying to add dampening between the motor and machine only to come to the conclusion that is was all hinging on the belt tension, and that was a real bugger. Supporting that heavy motor while trying to reach the bolts to adjust the tension only to have the bracket not move when I wanted it to, and then overshoot an instant later.
P1000651.JPG
I determined the paint was the culprit, so I pulled the motor and bracket and used a sanding disc on a cordless drill to remove the paint from the machined surface where the bracket mounts.

P1000650.JPG
Did the same for the mating machined surface of the bracket, and broke the razor sharp corners at the edges of the bracket.
I wiped a very thin coat of grease on both with my finger before reassembling.

I also changed to Dayco AX34 gold label synthetic made in usa belts that I got from AutoZone for $6.99ea. The AX belts are the only style rated for the 2.2" approx pitch dia of the pulley on the motor. They are rated to 1.58 hp each. I took a stiff wire brush on an angle grinder to both pulleys to take the paint off the surface the belts ride on as well. So far she's running smooth.

P1000651.JPG P1000650.JPG
 
I am soo jealous, i been wanting one of these lathes since the first time i saw it on QMT website. Keep up the good pics and posts!
 
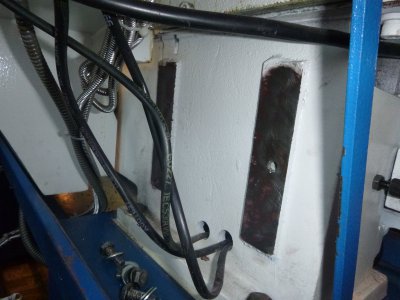
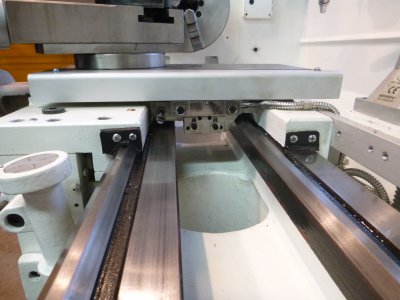
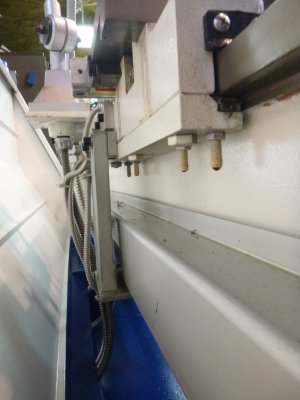
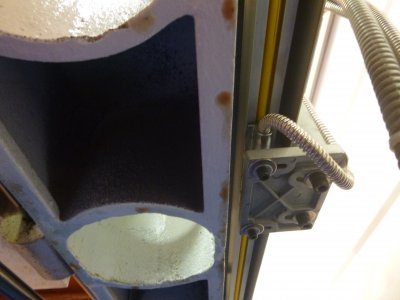
I didn't really get into the DRO yet did I? Well let me tell you, this is a big deal. No, you all already understand why a DRO is handy, I mean the fact that it was delivered installed and set up. I have supervised similar installations on a mill and lathe. I don't think most of us could do this install in less than an entire Saturday. The Easson DRO looks decent and has good documentation. I could barely fit my point and shoot camera behind the bed to get a pic of the mounting, glad I didn't have to try to reach in there!
P1000677.JPG
Cross slide viewed from the tail stock end. X on the DRO.
P1000683.JPG
Long axis (Y on the DRO Z to CNC guys) viewed from the headstock end.
P1000687.JPG
Bottom of the Y scale.
P1000681.JPG
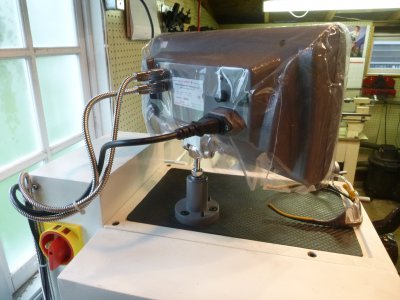
DRO head unit with wire routing. The base was bolted to the top of the lathe, I just had to thread the head on and plug in the wires.
P1000694.JPG
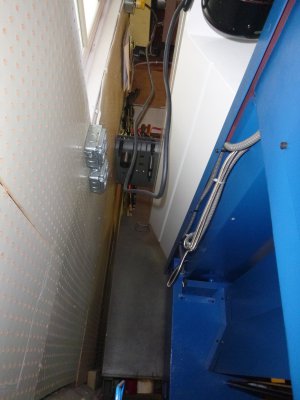
Wire routing under behind the machine. Wires were laying in the chip pan when I received it, but I like them hanging behind better. The pan does not quite pinch them.

P1000677.JPG P1000683.JPG P1000687.JPG P1000681.JPG P1000694.JPG
 
One thing I have done to a couple of Taiwan lathes,is get rid of those cheap looking sheet metal cursers for the dials. I made up new ones with long,tapered,hollow ground(sort of) very thin needle tips,rather than those fat inked marks. It's easier to split thousandths with a nice,fine tipped needle to look at,which is no thicker on the ends than the width of the markings on the dials. Make them nice and close to the surfaces of the dials to eliminate parallax,and to not get anything caught on them. I have never caught anything(like clothing or a rag,on mine,yet,they do not actually touch the dials and scratch them.

Another thing I do is get rid of the too hard to move springs under the dials. I drill and tap a hole in each dial,and make a knurled knob. When the knob is loosened,the dials rotate effortlessly to reset to zero,etc,without nudging the crossfeed or compound feed screws.
 
I don't think most of us could do this install in less than an entire Saturday..... I could barely fit my point and shoot camera behind the bed to get a pic of the mounting, glad I didn't have to try to reach in there!
4 or 5 bolts, and the sheet metal backsplash comes off, giving you all the access you want or need...

....assuming you didn't back the lathe up against a wall.

Another thing I do is get rid of the too hard to move springs under the dials. I drill and tap a hole in each dial,and make a knurled knob. When the knob is loosened,the dials rotate effortlessly to reset to zero,etc,without nudging the crossfeed or compound feed screws.

Nice tip. I sweat every time I go to zero the cross slide, using both hands to try from bumping it out of adjustment. Guess I have some drilling to do...
 
Back
Top