Let's build a 4 cylinder

I started on the connecting rods so I could check for any interference problems.

Here they are with a Harbor Freight tape measure for a size comparison.
IMG_2725.JPG

Thanks for looking
Ray
 

Attachments

  • IMG_2724.JPG
    IMG_2724.JPG
    347 KB · Views: 6
Drilled the holes in the connecting rod ends and they even ended up in the right place.
IMG_2727.JPG

Then cut the ends off at the crank bearing center line with a little hand saw. There must be a better way but I persevered.
Enlarged the holes in the rod end caps for some #4 screws.
Threaded the rod holes 4 X 40 and didn't break a single drill bit or tap.
I made some brass bushings for the piston end of the rods and pressed them into place.
It doesn't look like much was done but when you are doing 4 of them it takes some time.

IMG_2733.JPG

Next will be the crank shaft bushings.

Thanks for looking
Ray
 
I am going to try something I have never done before but I have seen other builders talk about it and have seen the results so why not give it a try.
I have always made my rod bushings for the crankshaft end from round stock and sawed them in half or close to in half as I could so they would fit around the crank journals. This leaves things a little less than desired where the half's come together and the halfs are not always the same size.
So here goes.
I started with a couple of pieces of hard brass 0.312 in thickness and about the same size.
IMG_2736.JPG

Over to the mill to square them up and make them the same size in height and width. This gives me a 0.625 square piece about 2" long with a split going down the center.
IMG_2737.JPG


I then sanded the mating sides and super glued them together.
After 5 minutes it was over to the 4 jaw and I dialed them in to run as true as possible.
IMG_2742.JPG

I turned the outside diameter round and it ended up about 0.610 which was fine.
Using a parting tool I cut the flanges for the depth and width of the connecting rod and started on the center hole.
I was afraid the two halfs would split apart when I started drilling the center hole for the rod journal but that didn't happen. Things went remarkably well with no problems.
Back to the parting tool to finish cutting the bushings off. I made two bushings at a time in case this didn't work I wouldn't waste too much material on my first try.
IMG_2743.JPG


Here are the first two right off the lathe.
IMG_2746.JPG

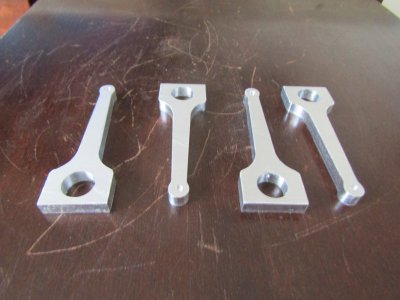
And installed in the connecting rods.
IMG_2749.JPG

The first two bushings took me over 3 hours to make but the second two took only about 45 minutes.
This is a much neater and a more accurate way of making rod bushings so here they are all installed..

IMG_2751.JPG

Thanks for looking
Ray
 
Thanks Boswell
I do like this way better than the way I was making them before and will probably use it from now on.

Ray
 
That looks so cool with those bearings in there!
Thinking about what you said about using “the little hand saw”. What about a slitting saw — would that do the job with less frustration? Can’t remember the actual size of these rods so maybe it’d be too dicey but just thought I’d mention it.
 
I don't have a slitting saw thin enough to cut the rod caps francist but it would make the job easier.
heli_av8tor to answer your question earlier I ended up with 0.01 clearance between the connecting rod and the cylinder liner. Happy Days

I worked on the pistons today but forgot to take most pictures.
I did take this one showing drilling the hole in the piston for the wrist pin.
I had already bored out the inside of the piston for the connecting rod end.

IMG_2753.JPG

One piston and rod assembly next to a bic lighter shown for size comparison.
IMG_2758.JPG

All four pistons are mounted on the rods and installed in the engine.
There were no interference problems.

Thanks for looking
Ray
 
Not too much done today I made a couple of riser mounting sleds in order to gain some height and more stability.
I will probably work on the piston o-rings next and the risers will make that easier.
IMG_2759.JPG

And the shop had a good cleaning today also.

Thanks for looking
Ray
 
Not too much done today I made a couple of riser mounting sleds in order to gain some height and more stability.
I will probably work on the piston o-rings next and the risers will make that easier.
View attachment 472975

And the shop had a good cleaning today also.

Thanks for looking
Ray

That’s looking really cool. Looking forward to seeing it finished.


Sent from my iPhone using Tapatalk
 
Back
Top