Lathe leveling - do you do it with the lathe fully dressed or just the headstock and ways?

I'm voting with the 14 to 26 gauge sheet steel camp and pop rivets. :)
Steel is going to be much more stiff than plywood, and the connections will also be stiff. You may want to go up to 10 gauge or 1/8"-ish on the sides if you end up wanting to attach drawers or shelves directly to it.
BTW, you wheel lowering rig is slick! Good thinking there! I assume you got it close to the balance point?

Sent from my SM-G892A using Tapatalk
 
It's interesting to think of all the factors. Mechanical rigidity is one issue. Vibration damping is another. Mass is a third. All three impact the quality of the lathe work.

Metal will add the most rigidity. Vibration damping is helped significantly by dis-simalar materials as the resonances are different. Mass helps when dealing with any off-center turning.
 
The existing toolbox is pretty much full.
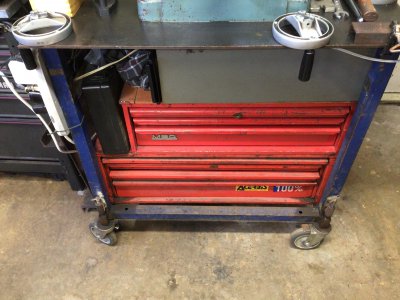
I was talking about one or two mid stack top boxes. I’ve added two of them under my mill/drill. They are great because there is no top lid like a top box and they usually have shallow drawers, perfect for machinist tooling. My old SnapOn I picked up for $35 and the other was $60.
 

Attachments

  • 7FC3741D-F84D-4C01-95C1-64126DF008A8.jpeg
    7FC3741D-F84D-4C01-95C1-64126DF008A8.jpeg
    1.8 MB · Views: 11
I was talking about one or two mid stack top boxes. I’ve added two of them under my mill/drill. They are great because there is no top lid like a top box and they usually have shallow drawers, perfect for machinist tooling. My old SnapOn I picked up for $35 and the other was $60.
I will look out for something like that. Seems like a good idea. Don't want to make a toolbox at the moment, I'd rather make stuff with the lathe!
 
I'll echo the plywood option. It may not only be less expensive, it might also be the easiest to work with. In that, it might be easier to acquire and use a circle saw than find a metal shear. Bolt it on. In the same way you might fab drawers or shelves with sliding doors. Drawers could be fancy with dovetails, or just butt joints.

This hobby doesn't need to be expensive to do good work, be safe and have fun.

Daryl
MN
Definitely will have a plywood bottom. Might go sheet metal for the back. You are right about the ease of cutting wood. I had to cut up some plywood to protect the kitchen tile flooring, using my old Skil saw, so I do have 3/4" thick, 24"W CDX plywood available. Don't have a metal shear in the shop so cutting 24" of steel would be a challenge with a 4.5" grinder. I'm getting a quote on some sheet steel cut to size. If the steel pricing is "reasonable" I will go with it for the sides. If the steel is unreasonable, it will sport all plywood sides.

Don't have much talent in the woodworking department. But I can hack something together. I did repair the stairs to the basement, which was a very necessary first step to getting the lathe there.

Thanks for the reminder that one doesn't have to spend a fortune to do good work. Brings us back to reality!
 
If you already have the wood….
 
I would use cross bracing for the diagonals. 1/8" x 1" steel strap bolted into diagonal corners and bolted together in the middle. A single diagonal will tend to buckle under compression but be fairly rigid in tension. The cross bracing will afford tension to combat racking in either direction. Sheet metal can buckle under compression unless it is thick enough.

My preference is to not use wood for machine stands because wood will change dimension with temperature and/or humidity.

I have the G0602 lathe which is the non VFD version of your lathe. My stand is welded 4" channel with 3" channel around the perimeter of the top and a length of 7" channel running under the lathe,covered with a fully welded 18 ga. skin and 2" x 1/8"bracing below. The whole affair weighs in at around 200 lbs. When leveling the lathe, I experienced bending of the stand which led me to making these modifications:
 
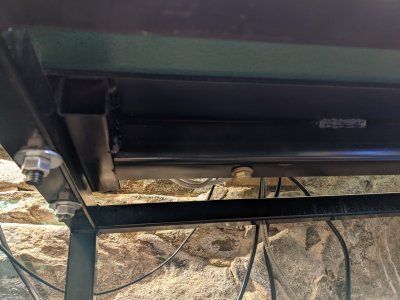
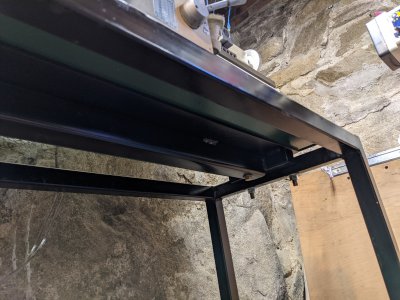
I Totally agree with RJ and stay with Steel. I would also remove the rubber wheels or are they pads and make the stand a 3 - Point or 3 legs (tripod) on one end and use the outside legs as stabilizers. ( Most modern precision made lathes set on 3 pads, Hardinge - Monarch EE ) Put a 1/2 thick x 4 x 4 plate under the leveling screws that could be hex head bolts with jam nuts screwed in upside down. If your worried about vibration, then cut some old leather boots up and slide a 4 x 4 piece under each plate. Once you get it leveled on the ways say with-in .0005" then set the level on the flat top of the cross-slide. (right angle to the bed) Use a feeler gage if needed under the low end of the level, then crank the saddle back and forth. using the level this way follows the tool path. It is an Asian lathe, so if you get it better then .001" to .0005" then your good. You don't tell us or show us how you have it attached to the frame. RJ must go into this. How about some close ups of how you have it. You can also do the final test using what is called the 2 - collar test, by taking test cuts on an 1 1/2" aluminum shaft. We can tell you how if you need it.
 
I Totally agree with RJ and stay with Steel. I would also remove the rubber wheels or are they pads and make the stand a 3 - Point or 3 legs (tripod) on one end and use the outside legs as stabilizers. ( Most modern precision made lathes set on 3 pads, Hardinge - Monarch EE ) Put a 1/2 thick x 4 x 4 plate under the leveling screws that could be hex head bolts with jam nuts screwed in upside down. If your worried about vibration, then cut some old leather boots up and slide a 4 x 4 piece under each plate. Once you get it leveled on the ways say with-in .0005" then set the level on the flat top of the cross-slide. (right angle to the bed) Use a feeler gage if needed under the low end of the level, then crank the saddle back and forth. using the level this way follows the tool path. It is an Asian lathe, so if you get it better then .001" to .0005" then your good. You don't tell us or show us how you have it attached to the frame. RJ must go into this. How about some close ups of how you have it. You can also do the final test using what is called the 2 - collar test, by taking test cuts on an 1 1/2" aluminum shaft. We can tell you how if you need it.
Thanks for weighing in on the subject. Very much appreciate your input.

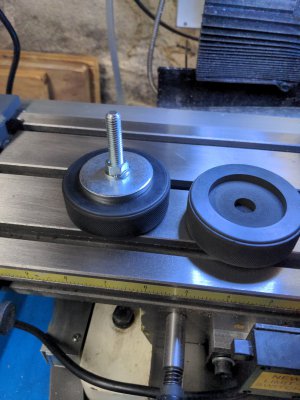
It's become apparent, there's a bit more to this than I had anticipated. But thanks to everyone's input, I can muddle through this. The lathe stand has four feet. Currently the feet are hockey pucks. (3/8-16 bolts, with 1/4" thick washer to spread load onto puck.)
IMG_20211108_143155_01.jpg
The floor is old (ca. 1875) and a bit crumbly, so I wanted to reduce the contact force. The regulation pucks apparently have too much give to them for this sort of leveling application. I will modify the stand to a 3 point support, add the reinforcements recommended, and make new foot pads.

I can provide more detailed photos of it as it is now. Don't have pre-assembly photos, as I didn't take them. What makes this more challenging (for me) is the lathe is in an old basement with restricted space. Makes some of the simpler tasks, a lot harder. (Like lifting the lathe!) Guess it is the curse of being new and inexperienced at this sort of thing. Been a learning experience so far!
 
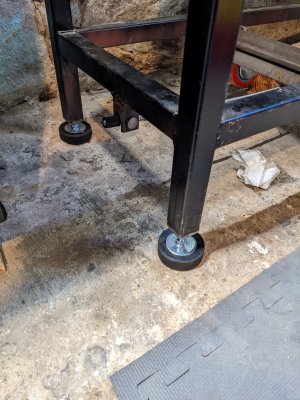
Headstock end feet. Tailstock feet the same.
PXL_20211116_152432701.jpg
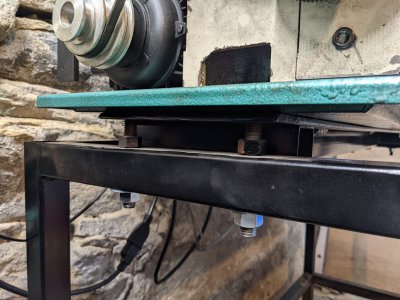
Headstock end. Mounting and additional leveling screws.
PXL_20211116_152506250.jpg
1/4" plate welded to 2x2. Can see bolt that attaches lathe to assembly. Headstock end.
PXL_20211116_152550867.jpg
Tailstock end is similar.
PXL_20211116_152602728.jpg
 
Back
Top