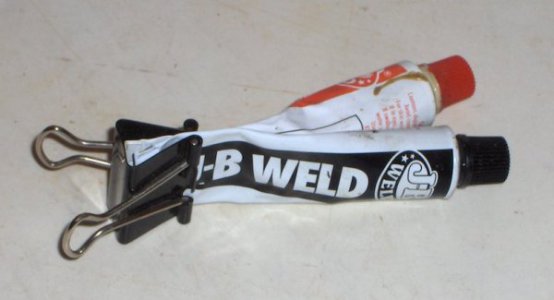
JB Weld

I made a complete set of dentures, upper and lowers. Worst part was holding them in place on my gums until they cured but the fit was perfect. They worked great but I did look like Hell. ;););)............................Bob
Did it taste bad, or burn? A former co-worker tried to reline his dentures with RTV, he said it did both.:fatigue:
 
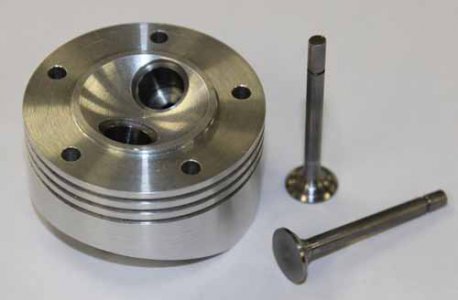
Coincidentally, some model engineering forums I follow have been showing examples of bronze valve cages 'glued' into aluminum heads with various adhesives. Before you load the verbal assault rifles (LOL) some background info. We actually know what we are doing! Well... kind of. These are fussy little buggers. The typical 45-deg valve seat is only 0.010-0.015". So pressing them into the heads with any kind of interference is usually a recipe for distortion, ovaling = valve leak, maybe a junked head - a real headache. Yes the seats might be re-cut & re-lapped, but its much more desirable to establish the seal beforehand, then insert the cage stress free retained with a thin annular film of adhesive.

Where was I? Oh ya, JB weld. Some folks have subjected coupons to fire & fury tests with a blowtorch & wrench, simulating combustion chamber conditions & exhaust port couplings. Apparently JB is standing up better than most of the high temp Loctite's & HT retaining compounds, observing all the gap widths & cleanliness. This was interesting to me, so I intend to repeat. The metal filler is probably helping, but I've had some experience with true high temp resins & they inevitably have to be post cured. So story to be continued.

One thing I can pass on from my RC model days & probably have mixed 10,000 epoxy batches. The smaller the quantity, the harder it is to get the correct 1:1 resin/hardener mix. They are a little bit tolerant of misproportion, but not much. I know when it comes to laminating epoxies like composite structures, even 5% misproportion can cause problems, improper cure or not attaining full strength. So image 5% of a 2 dots of JB. What I find helps is to squeeze them out in parallel lines beside one another so you can eyeball volume better. I use a clean sheet of notepad paper, no used materials especially if they are dirty or greasy.

Another thing is to very thoroughly mix the 2 components. Don't just give it a few swirls & call it good. Don't run yourself out of application time of course, but I would mix for at least 30 secs to a minute, again with a clean stir stick. Some folks have tried gentle heat & post cure heat, but I haven't seen any tangible specs (on JB). For sure this is a known thing in laminating resins.
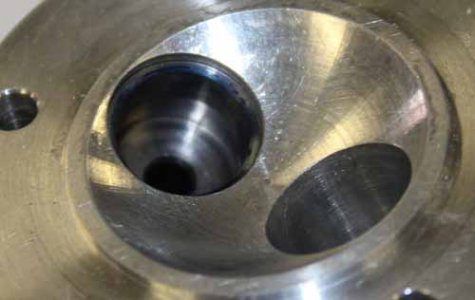
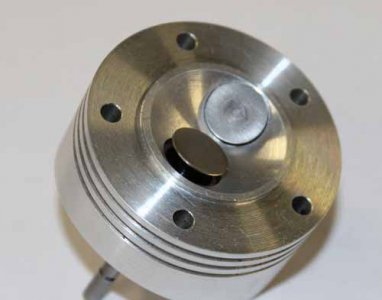
IMG_0577_edited-1.jpg

IMG_0603_edited-1.jpg

IMG_0605_edited-1.jpg
 
Needless to say the vehicles weren't worth the cost involved and in almost every case... the owners were scraping by week to week, barely paying their rent.
A customer and friend of mine is a great gal, but about as mechanically minded as her cat. She drove the Subaru she has until the throwout bearing grenaded like nothing I have ever seen. The snout the bearing rides on was chewed up bad, and integral to the tranny case. No way she could afford the correct repair. JB Weld, applied 3 times, smoothed and polished :confused 3: after the third. Still going, 3 years and 48k miles later.
Repaired the pitting in a Chevy two-piece intake manifold (Dex-Cool is NOT forever) with the stuff too.
Thanks for the tips to extend shelf life, and curing:grin:
 
I made a complete set of dentures, upper and lowers. Worst part was holding them in place on my gums until they cured but the fit was perfect. They worked great but I did look like Hell. ;) ;) ;)............................Bob
That is f-ing hilarious! Thanks!
 
Some how the tubes get separated and can only find one or the other when need them then have to go get a new batch. Gremlins in the house/shop. Never though about it for shoe repairs.
kHPIM5722.jpg
 
I just did a repair on the wifes 2000 Dodge Ram with JB.
The window glass came out of the clips that hold it to the regulator.
I drilled 3 spaced holes through each clip to help keep the epoxy from pulling out after cure.
Then applied the JB epoxy in the clips, attached them to the regulator and shoved the glass down in them.
The epoxy squeezed out the holes and each end. Rolled the window all the way up to cure. I told the wife to not use it for a few days as the temp was in the 40's.
That was a week ago and I asked her today how the window worked and she said like new.
So I got the window fixed and made points with the wife. :grin:
 
Just remembered, two repairs on my 97' Jeep Cherokee: filled and repaired a moderately pitted thermostat housing, and also reattached the rear-view (after roughing up the glass with some fine sandpaper). Held the button in place with masking tape till cured.
mark
 
I have used JB Weld for over 10 years now to seal up transmission housings. Haven't had a failure yet in over 500 conversions.
 
Our little Miller single cylinder welder fell off a truck while driving up the ski mountain. Broke a carb manifold ear off the head. I formed an ear with layers of JB Weld (using masking tape as a form) and installed a Heli-Coil in the bolt hole. Was still running years later when we junked the welder for other reasons.
 
Back
Top