HSS or Carbide inserts fot lathe turning????

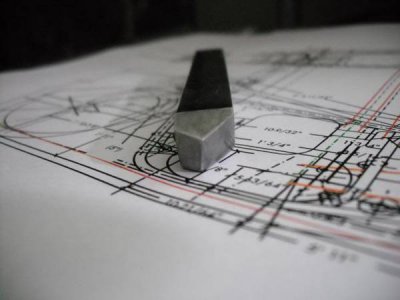
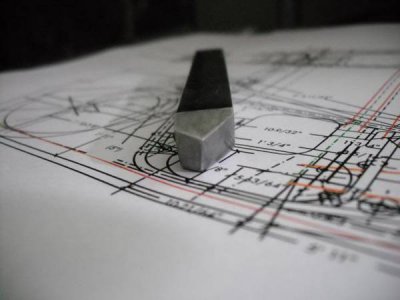
I suppose this is a little better but after looking at TomG's pic again I still see I'm way off. I used a belt/disc sander. I think I have better results with that. Here's a pic of what I did this time.
005_zps612daa54.jpg

Bernie. I'm trying to cut a piece of CRS 3/4" round stock. I'm blown away with some of the guys "first projects". I've only been able to make 2 weld in bungs for mounting a gas tank for my bike. I'm glad I'm not making anything else right now.

005_zps612daa54.jpg
 
Ok. Don't be put off by anyone's "first projects", since it doesn't mean it was their first part! :) Most of us scrapped MANY of the first parts before making ONE good one. I didn't even try making parts before I was just running metal though the lathe to get a good finish.

Were you able to go down my list there? And most importantly, as David said, a razor sharp honed edge. There are other things to easily check besides the list I already gave you. I just want you to check them first and let me know before moving on to other, less likely things.

Do you have any other material to cut right now, just to try it out? Any aluminum, or different steel? Just to eliminate the material as being a problem.


Bernie
 
First, as Bernie mentioned, is the piece in the chuck the same pin that was giving you trouble? If so, take it out and put in a piece of mild steel, aluminum or even plastic. Getting your lathe tool to cut cleanly is your first goal.

Tom's diagram should make understanding the sharpening process a lot easier. Keep in mind that you're looking at the tip of the tool from the work piece's point of view.

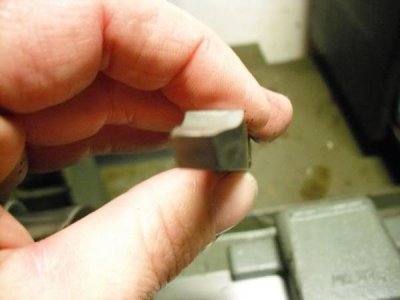
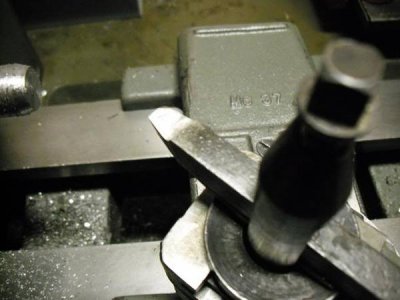
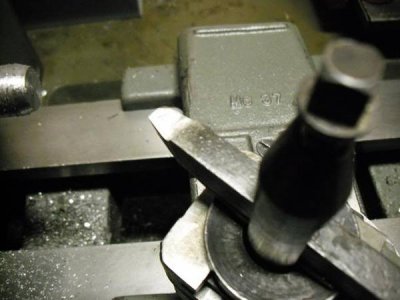
One question on the third photo - Is the tool in the same position that it was when you did the cutting? If so, the cutting tip of the tool isn't touching the work first. The right-hand end is trying to do the cutting, but isn't made to cut. Again, that's if the tool was in that position while you were cutting. If not, ignore this paragraph. :))

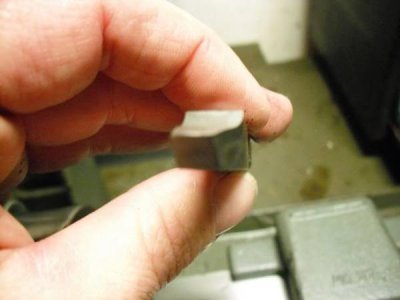
In the first photo, it looks to me that the top surface of the ground area slopes down as you move toward the camera. As seen in Tom's diagram, it should slope up to a point. I see you have a lantern-type toolholder. When you tighten the bolt, is the top cutting surface sloping up to the point? And, as mentioned, the cutting tip must be on the lathe centre-line (same height as the spindle and tailstock centres). BTW, I used a lantern toolholder when I first got my Hercus. Sometimes, under heavy cut, the tool would be pulled down or swivel sideways. Consider getting or making a better style of toolholder.
 
It could be the lighting and not a very clear picture, but the highlights on the bit you show look like they are dubbed over rather than a sharp edge.

Relax and review the basics. There are two angles that are really the basis of a cutting edge. In the leading edge of the cutter, you need something less than 90 degrees for most materials. Nearer to 90 for harder material down to 30 degrees or so for something really soft like wood. Most metals will be in the range of 80-90 degrees. This plane is called the cutting angle or sometimes bevel angle depending on what kind of tool and how it is oriented.

Now, behind the cutting edge, you need to clear out the metal under the cutting edge so the cutting edge is the lowest part. Mostly to account for the tool deflecting a bit under cutting load along with some springing action of the material being cut. Also it allows some freedom in orienting the cutting edge. This face is usually 15 to 20 degrees or so away from parallel to the work behind the cutting edge. This is referred to as the clearance angle.

The standard lathe cutting tools have two sets of these angles because the lathe is cutting on two surfaces at once. One is along the length of the piece and the other is towards the center of the piece. Get these two angle sets right and it *will* cut. You also want it cutting more along the length than towards the center of the piece so the work doesn't deflect as much. It is much more rigid along the axis of rotation than towards the center of the work.

Beyond that, you can do some modifications. One is to set up some secondary angles to direct the chips where you want them to go (this is referred to as rake). The other is to play with the angles more directly to account for the behavior of what you are cutting. Brass is a perfect example. You cut brass with a much steeper leading angle to keep the cutting edge from digging in and catching. The last is you can set up some barriers so the chips will bend too much and break as they come off the cutting edge. This is called chip breaking.

The last part is to make the sharp corner of the intersecting cutting edges have a bit of radius rather than coming to a sharp point. This makes the finished surface much smoother as the edge spans 2 or more cut grooves that would otherwise look like a fine screw thread.

All cutting edges will have this geometry. You just orient them differently for cutting in different directions and controlling the amount of material you are taking off at one time. You can also play with them a bit to make the cutting edge more durable. Along with directing the chips, you also direct the heat. Yes, this sounds a bit weird. You are not really moving the heat, you are just making the cut directed so the bending and other deformation that generates the heat is on the waste chip side of the cutter rather than the work piece side.

The rest of it just is a trade off between the hardness of the cutter and how fine an edge you can create. Carbide is harder than HSS but it is more brittle. You can put a sharper edge on HSS but it won't last as long. Carbide also can tolerate more heat without losing hardness.

The biggest reasons for people moving to away from carbon tools to HSS and carbide (and beyond to some of the more exotic) is both economic and to be able to work materials that are not as workable because of hardness or amount of heat generated. Carbon steel is not used as much on machine tools any more as it is much less tolerant of heat. With HSS and carbide, you can take bigger cuts that generate more heat without losing hardness. Less time sharpening and more time cutting. Insert tooling even more so. Less sharpening skill needed. Just changing to a sharp edge is much faster than stopping to sharpen.
 
Pipehack,
Are you out of 597? I am a Ironworker from 63.What side of the city are you on? I seen you are in chicago I am in NW Indiana. I will look at your pics a little closerand post any help or hints.
 
Pipehack, I would check the list that Bernie sent then we will know it is not slop or off center. setting at center is very important. If you do not have a center you can pin a thin flat piece of steel between the part and the tool (Think feeler gage, or 6" ruler.). It should sit straight up and down if it leans one way or the other you need to ajust the tool.
Also if you can bring the tool in closer to the tool post to help keep it ridged. with the carbides breaking I tend to think you have a set up issue. Have you checked the way ajustment on the crossslide, and compound.
Again let me know where in the city you are.
Mark
 
Pipehack,
Assuming you are cutting with the tool set to center height and your tool is held perpendicular to the work then the key problem seems to be that you are using negative rake on your tool. Negative rake means the top surface of the tool slopes down from the back of the ground part of the tool to the very tip. This results in very high cutting forces. Negative rake tools work but require a rigid lathe and more horsepower than an Atlas has, and you will have much better results with a positive rake tool. The bottom line is that your tool geometry is off and will work fine once you fix the rake angles.

The are two kinds of rake: side rake and back rake. Side rake provides a path for chip clearance and forms one half of the critical side cutting edge. Back rake determines where the cutting forces are focused; the greater the back rake is the more the forces focus at the tip. Like the relief angles, rake angles vary with the material being cut and can be found on any standard cutting tool table. These rake angles are important in reducing cutting forces and cutting temperatures. Like the relief angles getting them right is more important than most folks think when using a smaller lathe.

Go back to your belt sander and be sure the relief angles are 8-10 degrees. To do this, set the angle of the work table to 8-10 degrees relative to the belt and grind the side and end to the angles you want. For a general purpose tool mark off 60% of the width of the bit and grind the left side of the bit to take off that 60%.
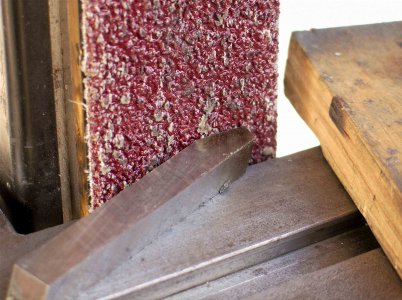
SCEA2.jpg

Then grind the end of the tool so that the angle formed at the tip of the tool is just under 90 degrees - say 80-85 degrees or so - this will allow you to cut into corners without the end rubbing.
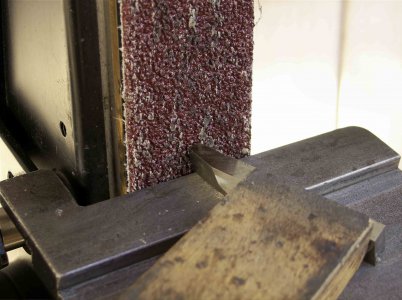
GRIND-ECEA.jpg

Now, without touching the table angle, turn the tool bit onto its right side; the side cutting edge will be facing up. You will now grind the rake angles. Angle the bit so that it is about 10 degrees to the belt, then just push it straight into the belt. Be sure to maintain the 10 degree angle and grind until the top of the tool is ground clear to the top edge, then stop.
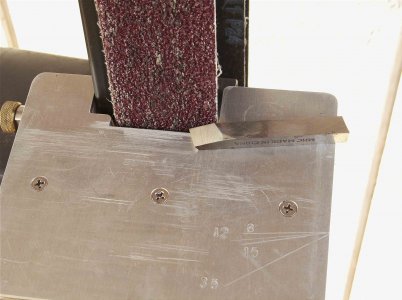
RAKE.jpg


Now form a nose radius of about 1/64" - 1/32" and be sure the nose radius follows that angle formed between the side and end faces of the tool tip. Use a diamond stone for this if you have one. Finally, hone the side, end and top surfaces and you are ready to cut.
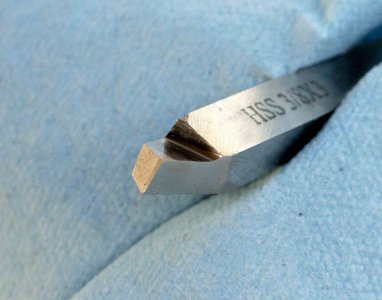
TOP-FINISHED.jpg

Put the tool in your post and align the tool so it is perpendicular to the work being cut. It should cut just fine. If you need to cut deeper and encounter chatter then angle the tool a bit toward the chuck a few degrees. If you want a better finish then angle the tool a few degrees toward the tailstock. All of this is basic lathe work and you'll catch on very quickly.

Stay with it. HSS on your lathe should work extremely well once you get the hang of grinding tools.

SCEA2.jpg GRIND-ECEA.jpg RAKE.jpg TOP-FINISHED.jpg
 
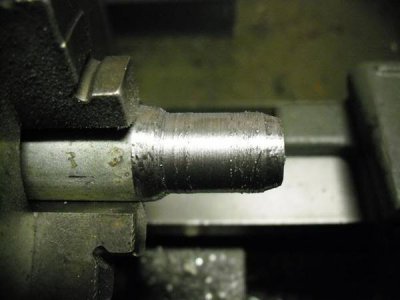
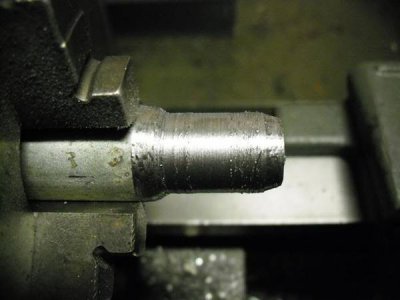
Here's some pics.. I picked up several honing stones at an estate sale today. My cuts still look horrible and I'm hardly taking big bites. I really thought the carbide inserts would be the cats meow. The tool grinding is making me want to put this thing in the corner. Like I said. The compound swivels and the tool post swivels.... That makes no sense to me. Too many variables. It's embarrassing.

004_zps920bb855.jpg
003_zps6fa2610d.jpg
002_zpsb6100389.jpg

These are 3/8" HSS. If I try and put the tool post at any angle it just chews the metal and chatters. Hardly any feed. YUCK!!!! That's not what I really said, but you get the idea.

is that cutting tool made of hss ? I have some black coated blanks that are a steel that needs to be hardened after shaping.

Someone else may know better about the tool steel thing as thats about all i know on it.

Stuart

004_zps920bb855.jpg

003_zps6fa2610d.jpg

002_zpsb6100389.jpg
 
:panic:Someone local mail this man a ground tool bit so he can get to work!
 
If the second pick shows the machine as you were using it, your cutting on the back corner of the tool. The bevel at the end of the cut sort of confirms that.
Swing the cutter about 45 degrees so the leading edge is cutting and the end of the tool has slight clearance to the right.

Greg
 
Back
Top