HF 4x6 band saw

Next up was filing down the sharp edges. I did one edge all the way around then I did the opposite edge all the way around. I would turn the gear a little bit then make a few mild brushes with the file in each position as well as while I turned it. I didn't go super light, but I didn't really crank down on it, either. Just a firm amount of pressure.

First 2 pictures are of the shavings still on the gear. Third is after wiping with a rag.
 

Attachments

  • 20210504_162508.jpg
    20210504_162508.jpg
    8.6 MB · Views: 38
  • 20210504_162727.jpg
    20210504_162727.jpg
    4.4 MB · Views: 30
  • 20210504_162845.jpg
    20210504_162845.jpg
    4.5 MB · Views: 29
Once the shavings were wiped off I flushed the gears running the motor for a bit. I put the belt on and put it in high speed. I ran it for about 1-2 minutes total I'd say. This way the oil was circulated and any sediment/shavings left in the gears would be washed out to the reservoir. You can see a bit of milkyness to the oil in the third picture.

Then I dumped the oil and soaked up the last bit with a rag and refilled.
 

Attachments

  • 20210504_163955.jpg
    20210504_163955.jpg
    2.4 MB · Views: 24
  • 20210504_164000.jpg
    20210504_164000.jpg
    2.2 MB · Views: 18
  • 20210504_164036.jpg
    20210504_164036.jpg
    1.8 MB · Views: 22
  • 20210504_164501.jpg
    20210504_164501.jpg
    7.2 MB · Views: 19
  • 20210504_165940.jpg
    20210504_165940.jpg
    8 MB · Views: 32
After messing with the gears and the oil I swapped blades. That took me a bit to figure out.

You lock the saw in the vertical position. Then there is a small panel on what is now the bottom of the saw. There is a hand crank knob that lets you loosen it. You have to pull that bottom panel up all the way to get the blade cover/door open. It isn't just the one phillips screw on the edge of the door that you need to pull out - the bottom panel has to come up.

Once inside the door there are 2 other guards you have to pull to access the blade. The first is what is going to be on the top. It is a red guard. There are 2 screws that hold it in place. I took the bottom one out and left the top one in, just very loose so I could swing the guard around and steer the blade through it. The second guard is on what would be where you mount the table used in the vertical position. There are 2 phillips screws holding that guard in place. There is a guard that extends down below where the screws are a good 4-5 inches.

I will see if I can get some pictures of all that later.

Once the new blade was in (lenox diemaster 2, 10/14tpi) I closed everything back up and was going to work on the lever/tab that kicks the power switch off. It was starting to rain then so I packed everything in. I'll mess with that another time.

I also didn't get the belt shroud on. I left it off with the work I was up to today.

When putting the saw away I did tilt it back too far and lost balance. So I ended up dropping the motor on the ground. The motor plate pinned the power cord against the ground so I am hoping it still works and I didn't chop any of the conductors inside. We'll see. If I did - fairly easy fix, just not a fix someone should be doing with a brand new machine... Crap happens, though.
 
One rather odd thing I did find is it looks like the outer bearing on the top pulley (non-drive) is corroded. Any idea on what this is or what caused it?
 

Attachments

  • 20210504_171148.jpg
    20210504_171148.jpg
    1.3 MB · Views: 29
The shutoff tang is slotted. Loosen the screw and you can adjust it to trip the switch.
 
The shutoff tang is slotted. Loosen the screw and you can adjust it to trip the switch.
Its max'ed out.

The other bit of info is the bend in it is so the part that is supposed to push the switch tab (too short) clears the switch body when the switch flips. When I straightened the tab it wouldn't clear the switch body.
 
Sounds like you did a careful job on the worm. You might want to stick a strong magnet to the inside of the gearbox lid (off to the side), so that it can catch and hold any stray metal filings you might have missed.

I've had trouble with the shutoff tang and the cheap toggle switch they put on these saws (I own and use two, and have refurbished a bunch more). In one case, the tang pushed on the toggle just enough to "kinda" break contact, without pushing it over center. That switch fried itself because the contacts arced when nearly but not quite open.

In a couple of cases, I replaced the switch tang with a block of aluminum, threaded for a 1/4" hex head bolt. The bolt allowed more (and more precise) adjustment range, and the arrangement was a lot sturdier than the crummy sheet metal tang. As many others have pointed out, these 4x6 saws are actually "kits" as sold You gotta do a bunch of tweaks, but you eventually get a good saw.
 
I'm on my second saw. (sold the first one because of relocating). Between the two I have at least 15 years with these saws and never a failure. When I use it vertically I sit on the saw bed. It's relatively comfortable and the saw doesn't move under that ponderous load!
 
What a PITA.

That explains my day in a very accurate few words.

To expand on the conundrum -

I thought I was off to the races pretty quick today. I made a test cut in 3" OD 1/8" wall square tube and the saw wasn't cutting too bad. I did end up switching out the switch tab/tang for the original. I had to drop the down stop some to get the saw to cut all the way through the work and that extra drop took out the slop in the push I needed to trip the switch. However - that was only the beginning of what turned in to around 6 hours of head banging.

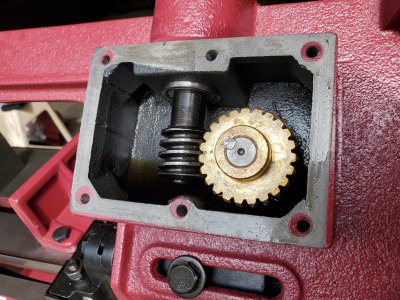
After the stops were adjusted the first cut adjustment I made was to bring the twist of the blade in so that top to bottom it cut square. In that process I managed to get things set in such a way that the blade wouldn't make it 1/4 of the way through the work before running off the pulleys.

The other day I did happen to find this document:

that describes a lot more detail on setting up these saws. That was an invaluable read-through as it turned out.

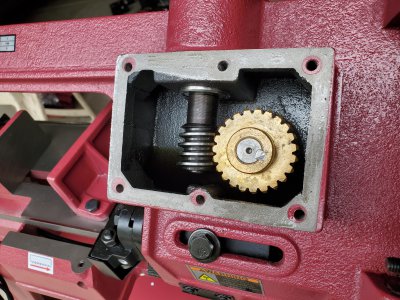
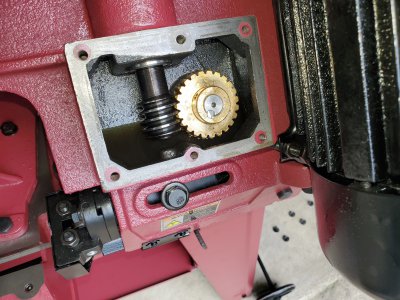
I read through some of that document and got the gist of the adjustments etc then went to town on the saw. Without adjusting the guides I was able to get the blade to stay on by tilting the upper pulley (in the vertical position). However, what struck me odd was I was never able to get the blade to seat on the rims of either the top or bottom pulleys. It was always about 3/32" from the rim.

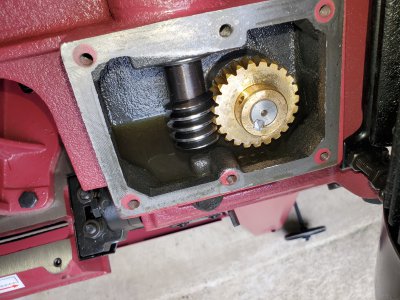
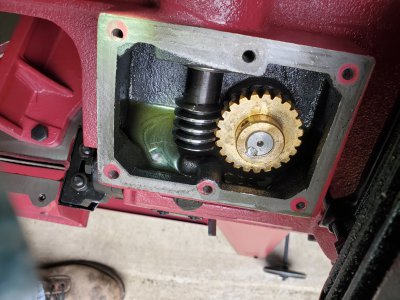
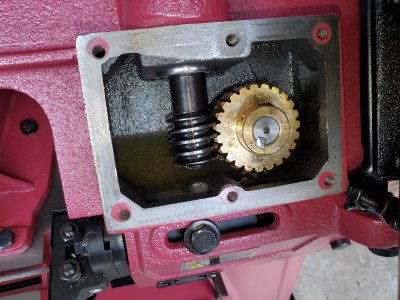
So I went back to the guides and played with them a bit. I found the bearings that ride on the smooth edge of the blade were putting a lot of pressure on the blade. So I backed the guides off so that those bearings weren't rolling = no contact with the blade. At that point I went back to the tilt adjustment in the upper pulley and found I could very easily get the blade to ride on the rim. So I tuned the tilt to where the blade just made contact with the rim. At that point I went back to the guides. They were all out of whack.

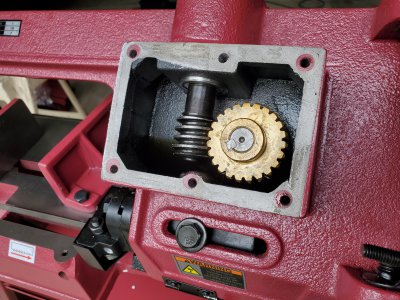
Going back to the switch and the tab/tang that turns it off - there were a few problems now with this after the adjustment in the guides. First up - the frame and blade guard door/housing were bottoming out on the saw table by the switch assembly. So there is no way to get the saw to drop any further. With the guides where they were there was no way to get through the work - the saw would bottom out with about 1/16" left to cut in the work. So I went back to the guides and dropped them (made the bearing that rolls on the smooth edge of the blade push down further to hold the blade in a "deeper" position). Guess what? The blade went right back to rolling off the pulleys!!

I added a 1/4" plate under the work as a riser and tried to tweak everything as best I could there. I am not having much luck. I was able to add tilt back in to the upper pulley to get the blade to stay on, but I am right back to where I was at the start. Since I put the riser plate in what I have not done yet is to loosen up the guides and go back to the beginning of those not adding any down pressure to the blade. So when I get back to the saw again tomorrow I hope I will do that first thing and get the blade to seat on the pulley rims then work with the guides.

So far I have not been able to get a square cut. With the fence in its furthest back position at 0deg I still need to go a bit further. I started trying to account for that with the guides but I figured I'd pack things in and call it a night. When I do take all the adjustment out of the guides tomorrow that will reset all of that anyway....

Again, a very accurate few words is this is a PITA. OK, scratch that... Its a ROYAL PITA. :burned up: Did I mention I keeled the saw over on its motor a 2nd time trying to roll it around? This time it went over sideways at the bump where the garage floor meets the base where the garage door seal rests - about 3/4" drop. I tried to drop one wheel at a time off and lost balance. It bent the bracket holding the axle. I think a new cart is in order for this thing. I beat it in to submission with a ball peen hammer for the time being.

I will say, though, for all the cutting I've done in the past that would have been better off done with a band saw I am OK with battling this one out. I can already tell how big of a help this will be - the end result will be worth it.
 
It does sound like it’s making things difficult. If I remember correctly, you don’t necessarily want the blade hitting the pulley flanges, because you want the teeth off the pulley. If the teeth ride on the pulley, it can take the set out of one side and then the blade will no longer cut straight.
 
Back
Top