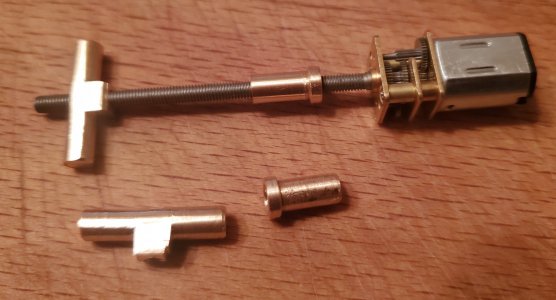
Converting my old pneumatic retracts to electric.

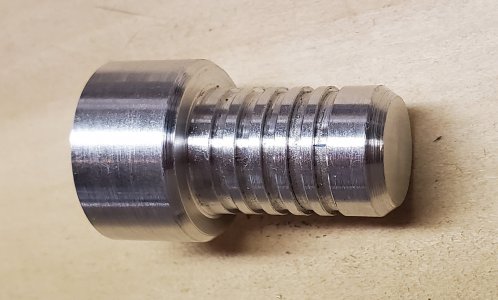
HA! Got the second part to this same point. the first one took about 8 hours of shop time for the machining and tool making and fixture making. The second part took 15 minutes. On the second one I even left the end a bit long so that I could machine off the center drill to make it prettier.
 
First part done. The Drive pin.

It even threads onto the M3 motor shaft just fine. The bushings fit the ends perfectly, they move freely and have zero perceptible slop.

The setup on the rotary table was not difficult but did take same time.
First mount the rotary table then indicate it in to the machine.
Then set the 5C closer on the RT and have to tap it in until it is on the same center as the RT. This was the time consuming PITA part. I even tried the chuck up a dowel pin in the closer, then put the closer into the chuck on the mill to align it to the spindle but that was off about .003 every time I tried.
3 hours to set up and machine the first part, 5 minutes to machine the second part.

The Drilling and tapping was very simple (so no pics). Just used a single parallel to hold it with the square tab just above the vice jaws, indicate center spot, drill, c'bore the big end, and tap thru. Rinse and repeat. Time for both parts about 15 minutes total including setup and tear down.

Rotary table with finished part still in it.
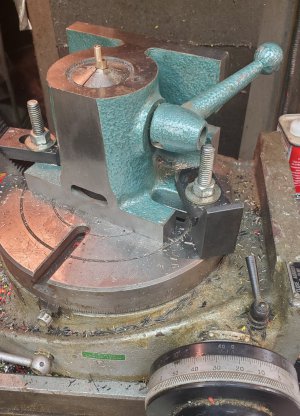
20240203_143551.jpg

The 2 finished parts one threaded onto the motor shaft.
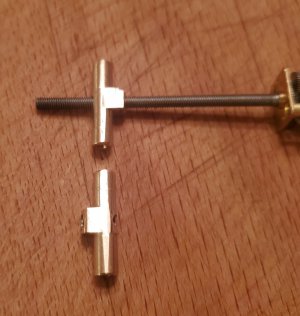
20240203_151509.jpg

Now I think I will do the easiest part. The collar to adapt the M3 motor shaft to the ball bearing that will be in the end of the motor housing.
No progress pics since it is just turn to size with a small shoulder, Spot, drill, tap M3 and cutoff. This will be out of the same bronze as the drive pin.
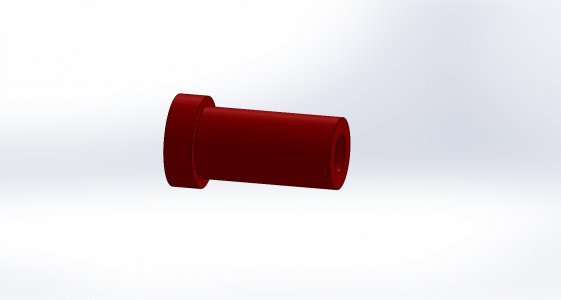
Drive nut.JPG
 

Attachments

  • Drive nut - Sheet1.pdf
    44.8 KB · Views: 2
Good weekend of work.
I just finished the 2 drive nuts. the 2 took about an hour and that includes the time for the one that I screwed up by turning it .010 to small and faced off into chips.
I will still need to polish in that last .001 or so once I get the bearings in hand to check the actual ID of the bearing. I do plan to use green retainer loctite to hold the Drive Nut from spinning or sliding in the ball bearing. I will also use green loctite (the type for putting on an adjustment after the parts are assembled and adjusted) to lock the threaded shaft to the nut to hold that position once set. I am planning to use the ball bearing to take up the thrust loads for both in and out. The loads will be small, less than 1 pound, but the motor has no provision for thrust loads. The loads will be well within the capacity of the bearing. Its only 300 rpm with next to nothing for side loads.

All that is left is the motor housing (the hardest most complex part to make), the cap/bearing holder for the housing to hold it all together. and modifying the trunion for clearance of the motor drive screw. I have still not decide if I will mod the existing trunion's or make new ones out of stronger material. The slot to clear the drive screw will weaken the trunion and the existing trunion is machined from extruded AL so I am guessing it is either 6061 or 6063. The AL bar that I have for the housing is 7075 and is plenty big to make the trunion's as well as the other parts. If I make new trunion's they will move up the list as the most difficult part to make. Lots of tricky cuts at weird angles.


I am done for this weekend, now need to order the bearing and other parts that have been living in my McMaster cart since I started this project.

20240204_123904.jpg
 
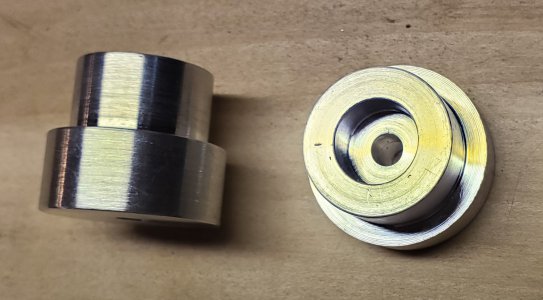
Well I got a good start on the main housing. All of the exterior turning is done for both parts. While the lathe was set up I also roughed out the exterior of the covers.

20240219_193355.jpg

The exterior of the covers with the bearing pocket to final size.

20240219_193420.jpg

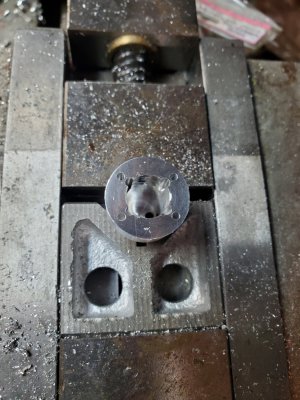
I have the first part set up in the mill for doing the internals. I have all of the internals done except for the rectangular clearance for the motors gearbox. This is the part that will have to be cut out 7/16 deep using a 3/32 end mill. Sloooow and steady will win the race. I have the 4 corner holes drilled for the internal pocket. The holes were intentionally made .010 outside of the pocket dimensions so that the tiny end mill will not hit a full length cut in the corners. Once that pocket is milled out then I have to tap the 4 M2 holes (already drilled). that hold the cover on. If I can pull that off with out trashing the part by breaking off a tap. Then it is a simple run the mill around to make the rectangular outside shape.

20240219_193332.jpg

I got this far over a week ago, have not been back in the shop since. Stupid heart acting up again kicked my but and put me into couch potato mode. I hope to be back up to speed to finish the current step next weekend.
 
Well that part in the machine in the above pic....
I now have the outside milled to its rectangular shape and the inside rectangular pocket to depth Ready to do the very last step of tapping the M2 holes in the 4 corners.
BUT I had a brain fart. A big one.
Back when I drilled the 4 corner holes for the M2 screws I had grabbed the clearance drill instead of the tap drill.
Went to tap them today and the tap fell right through the hole.
Oh Fuzz Balls.........

So first thought was to just slap in some M2 HeliCoils. Easy fix. Looked it up on McMaster and it was $250 for just the STI Tap and another $210 for the install tool and another $40 for a package of 10 HeliCoils. I ain't paying $500 to fix 4 holes. I did find it a bit cheaper from other sources but still way to much. I will start the part over (I have plenty of material left) before I spend that much to fix this one.

So I looked at screw in thread inserts, that will work and they are ONLY $10 each. A bit steep but I do have a lot of work invested in this part. The inserts have an external thread of M4. Laid it out on my CAD and the tips of the tap will break thru to the outside of the part. So That ain't no good either.

I have a plan to save it though since I have 3 weeks of work into making that one part. I have drilled and tapped it to M3x0.5 I have ordered some M3 aluminum screws, I will install the screws using JB Weld as the thread locker, machine off the heads and then can drill and tap using the correct drill bit for my M2 thread. You will have to look very close to spot it once done. If I put a 3mm chamfer on the hole you will never find it. These 4 holes are all that is left for this part in this setup. Then I can do the second part as long as it is all set up. Then just have to do the cross hole and these parts will be finished. I did have to ponder this one for a couple of days.....

I did test fit the motor and gearbox into the hole and the fit is great. The gear box fits .001 proud of the holder and that is how much clamping force it will get to hold it in position when I screw the cap on.
You could make a few inserts.... You do have machines...
 
I hear ya with the random brainfarts. I try to be charitable to myself and say “well, the project has to sit for weeks before I can get back to it…” But the last one was just a head shaker. My current Everest is this silly “frog clamp” I’m trying to replicate from a promo pic and it has a 4 link system. After the last hurdle of figuring out how to cut precision grooves for the E-clips I’m semi able to put it through its stroke and it’s not folding up in to full retraction. Started checking my crude drawings and I’d somehow mixed the center dimensions for links, doh! I also drilled the wrong size holes for main link attach point on the ram. I hate doing tiny parts somehow I screw them up way more than large parts.

My worst enemy is thinking I know something without checking the drawing. I am getting good at redoing parts though and them being small means I’m not out a lot of stock.
 
You could make a few inserts.... You do have machines...
That is essentially what I am doing.
I am just making the insert in place.
The insert will have a M3 exterior and a m2 interior.That will leave a .009 wall between the M2 major Dia and the M3 minor dia. That is why I an making them in place and setting them in place with JB weld. The install and JB will insure that they do not disintegrate during install and/or fabrication.
The 7075 AL screws are ordered and should be here on March 5.
 
The AL screws actually showed up early. Tapped the holes a few threads short so that the screws will jam tight in the holes. I installed them with red loctite so I doubt they are going anywhere. Got the new screws all installed, tightened until the heads stripped, and machined flat. I doubt anyone will ever notice the line. looks like it never happened.

Well the hole fix plan almost worked great.....
The AL screws are a much softer alloy than the 7075 of the housing.
The drilling and tapping was going good until the very last hole, I am not sure why but the drill bit snapped off in the hole just below the surface. This is a #52 (0.0635 Dia) drill. I used magnifiers and a tiny sharp pick to poke at it some but no luck. will not budge.
Because it is so tiny this will be tricky to get out without damaging the AL part.

Sooooooo back to the internet and ordered a 1/4" solid carbide spotting drill to get a dimple centered in the broken drill. I also ordered a 1/16 carbide tipped drill to try to drill out the broken bit. Because of the small size and that the carbide drill is trying to drill an interrupted cut, I am concerned that the carbide drill will want to walk off center. I also ordered some #52 solid carbide drills. I will use a lot of oil and go REALLY slow.

If neither of these want to drill straight, then the last ditch effort will be to use ammonium aluminum sulfate (ALUM) in boiling water to dissolve the drill bit out. I don't want to do this as it means loosing my zero in the setup and having to figure out how to re-fixture and pick up the center accurately. I also ordered some Alum. Murphy says that if I buy a plan B and a plan C that the plan A will work great.

New tools should be here by 10PM today. Hopefully I will not snap a solid carbide tool in the hole. I probably will not get back to this hole today. It will be sometime later in the week.

I sure hope that part 2 goes a lot smoother. On part 2 these M2 holes are going to be first to do so that if it dies I do not have so much time invested.
 
Woo Hoo I saved it.
I started with 1/4 inch spotting drill chuck up real short to avoid flex an spotted to a bit bigger dia that the broken drill.
I then went to the 1/16 carbide die drill. again chucked up real short for stiffness. I was able to go the full flute depth of about .15 deep It appeared to be staying on center.
I then went to the #52 solid carbide drill to finish clearing out the broken drill.
then it happened, tink, the carbide drill snapped off in the hole. Fortunately it snapped just as it was breaking thru the bottom side of the hole and it napped with about 1/4 inch sticking out the top. I was able to grab that 1/4 inch and pull it out by finger power alone. I am guessing the as it got to the point of the original broken drill a chip of that locked the carbide. I was able to push the broken carbide all the way thru or pull it all the way out. so it had to have broken right at breakthrough.
I then took a new #53 drill and ran it thru just to be sure it was all good.

Looking at the hole close I could see that the drill had walked off center a bit. and it looked like some of the original broken drill was still stuck to the wall of the hole.

NEW PLAN

How to fix the hole??????

Grabbed the 3/32 (0.093 Dia) carbide end mill and did a VERY slow plunge thru the hole. I could hear some hard spots that it was chewing thru on the way down. I only went about .015 at a time then pulled out to clear all chips and re lube. It was slow but I got a .094 hole straight and in the right location with no remains of the original broken drill. I then drilled to 2.5mm (.098) as the tap drill for the M3 thread. I was then able to tap the hole to M3 this time I went all the way thru with no imperfect threads left behind to jam the screw. This time I installed the aluminum M3 screw with the JB Weld since some of the threads near the top of the hole might be weird from tapping it twice. It is curing as I type. I will mill off the head of the screw tomorrow and once again try to drill and tap the M2 hole without breaking anything.

Wish me luck.
This is the last thing that needs to be done in this setup. I can then finally remove this part and give the second part a try. This part has been getting worked on for 2 weeks now.
 
Back
Top