Converting my old pneumatic retracts to electric.

I just had another thought, yea I know that is always dangerous.
Since these landing gear blocks are extruded they are probably made of 606x extruded aluminum. Especially since they are one of the lower cost units available, makes me doubt that they are extruded 7075.
If I make new ones I will be making them out of 7075-T6 for some added strength. especially since I have to cut an extra slot down the length to clear the drive screw.
But then I had this thought........ What if I make the new blocks out of Grade 5 Titanium?????
I have used G5 Ti on a different jet project and had no issues machining it. It was harder than AL but softer than Steel. The only issue seems to be finding an affordable source. the starting block for each piece will need to be 5/8 x 1 x 1-1/2. So far I have only found sources that are to small or very large blocks with equally very large price tags. I have found sources for grade 2 Ti fut that has strength similar to what the AL has, in which case it would be cheaper and easier to just use the AL. I think I just talked myself into making it out of the 7075......

The motor case and bearing block will be made out of 7075 either way.
The new drive pin will be made out of 544 bronze.
All of the rest of the parts will be reused.

The motor case will take the longest to machine by far with needing to go .437 deep pocket with a .093 end mill. LOTS of very slow very shallow cuts. The rotating block will be the most complex to machine by far with cuts from every face and not all the faces square to each other. Might require some 3D printed fixtures.
 
Well the orders for material and new tooling was placed today.
Unfortunately the 7075 bar will take the longest to get here and that is for the 2 most complex parts, it will take 2 to 4 weeks.
The bronze and all the tooling should be here by the end of the week so I can start there. There is just one easy part to be made from the bronze but it will give me something to do for a little while.

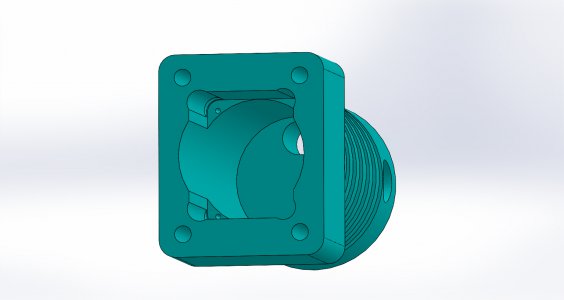
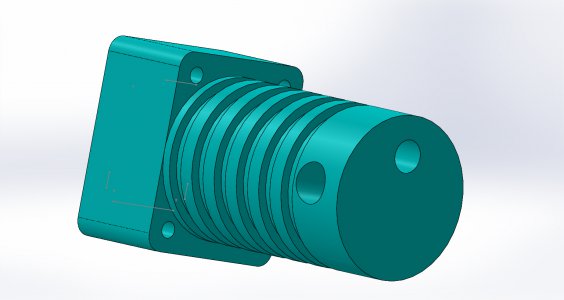
But then there is the engineer in me that can not leave well enough alone. I have made some changes to the motor housing by adding fins to the outside to help cool the motor and loose a small amount of weight as well as some cosmetic changes that will also shave a tiny bit of weight and add a bunch of complexity.


Cylinder002.JPG

Cylinder001.JPG
 
Well the orders for material and new tooling was placed today.
Unfortunately the 7075 bar will take the longest to get here and that is for the 2 most complex parts, it will take 2 to 4 weeks.
The bronze and all the tooling should be here by the end of the week so I can start there. There is just one easy part to be made from the bronze but it will give me something to do for a little while.

But then there is the engineer in me that can not leave well enough alone. I have made some changes to the motor housing by adding fins to the outside to help cool the motor and loose a small amount of weight as well as some cosmetic changes that will also shave a tiny bit of weight and add a bunch of complexity.


View attachment 473610

View attachment 473609
Sooooo…you going to print that, or? If machining where do you start?
 
Looks more complicated than anything on any of the 3 experimentals I built! :)
Aaron
 
It will be a bit tricky to machine. I have a plan to do it in 3 setups.
Setup one will be on the lathe.
With the full bar (30mm dia x 200mm long) in the 3 jaw.
1. Face
2. Turn the small 0.620 OD
3. Cut the 6 cooling fins grooves .063 wide x .045 deep.
4. Part to a bit longer than finished length.

Setup 2 on Mill
1. Mill parted surface to final dimension.
2. Mill rectangular shape to size.
3. Drill and tap 4 holes.
4. Drill 4 corner holes for the internal rectangle.
5. Starter drill for the full depth of the internal bore.
6. Open internal bore to final size with a 12mm center cutting end mill. This will clean out the drill point for a flat bottom and by predrilling the hole the mill should not want to wander much.
7. Drill the 1/8 hole thru the bottom for the wire clearance, and as a drain for cutting fluid and coolant.
8. Mill the internal rectangle to depth using a 3/32 dia x 1/2 cut.

Setup 3 on the mill.
1. With the part on its side drill the cross hole through.
2. Round off the corners of the top rectangle with a corner rounding end mill. well Technically would be one more setup to get the other 2 corners, but that is so easy I don't count it as a setup....
 
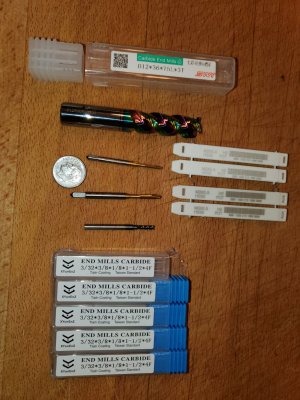
My 544 bronze bar showed up first along with some of the tooling I will need.
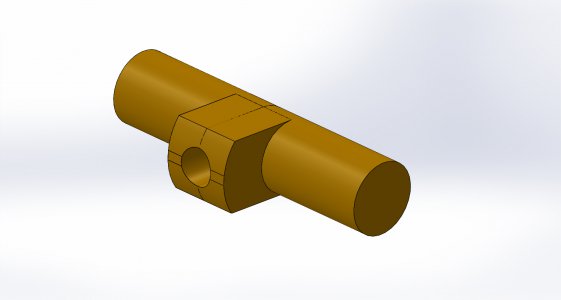
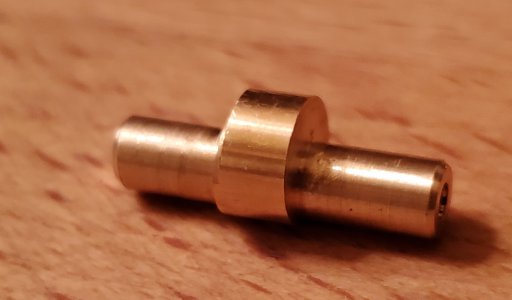
I may just start with that part. It looks real simple. but I have never had to make a part that would be offset in the 4 jaw nor have I ever used this material before. The 2 round parts must be very accurate to size (±0.0003) and concentric. I plan to turn both of the .1870 diameters in the same setup for the concentricity. That will leave me an off center rib in the middle. I will then set this up vertically on the rotary table and mill that rib to its required shape. Last step will be to drill and tap the M3 x 0.5 thread through the center of the tab. I bought .312 Dia material which is just enough to get the part out of, I could have bought bigger material and not had to mess with the off center turning in the 4 jaw, but it was a difference of $30 vs $100 for a 12 inch bar. So I get to learn something new, This part is only 0.807 long and I need 2 of them so I will get a few tries out of the 12 inch bar. I will have a tiny center drill in one end that will be left there as it will not affect form fit or function.
I am planning to use very sharp HSS tools for this part. I will experiment a bit to see what this material and my lathe and tooling like for speed and feed. The .187 ends do require a very good surface finish. I might even just get close and polish it to final size.


Drive Pin.JPG


Tools.jpg
 
Went to start on the first part tonight, the Drive Pin in post #26.

Mounted up the 4 jaw and found out the the jaws do not close far enough to grip my 5/16 bronze stock, let along grip it off center.

My thought at the moment is to machine a split collet of around 1 inch dia and bored for a snug fit on my stock. with a split down one side it should do a good job of gripping the stock and still have enough room for the needed offset.

Hmmmmmmm, have to ponder this a bit.

I will need to grind a left and a right tool bit to do the turning, I can start that while the gears between my ears are spinning......

The 7075 aluminum bar should be here next week.

I guess I will need to get a smaller 4 jaw (or at least pointer jaws for this one) for this type of project.
 
You could drill your stock by whatever offset you need then use your three jaw. No need to split the bushing, you can either press it in (and out) or make it a slip fit and superglue it in.
 
You could drill your stock by whatever offset you need then use your three jaw. No need to split the bushing, you can either press it in (and out) or make it a slip fit and superglue it in.
That's almost what I ended up doing. Took a piece of PVC stock about 1.5 dia and 2.0 long. Drilled a 5/16 hole thru, split it and stuck it in the 3 jaw. From a distance it looks like it will work.
Got it set up, put a small center drill in the end and got the live center in it.
Started turning down one end, but then bed time came. Might be weekend before I get back to it.
 
OK got the first setup of the Drive pin finished.
Next step is to mount the 5C collet closer onto the rotary table so that I can take the lobe down to final size and shape.
This means mount the rotary table and get it indicated in, then mount the collet closer and get it centered on the rotary table and indicated in then mount the part into the collet and have to get it oriented in the correct rotation.
The setup will take many times longer than the actual machining.
Setup will take 3/4 hours, machining will take less than 2 minutes.

Once this is done the the part needs to mounted horizontal to drill and tap the M3x.05p hole thru the center of the tab. That should be fairly painless.

My original plan was to make one gear complete to test it and then make the other one, Now I am thinking that because the setup on this is so difficult compared to the actual machining, I may just make the second part right away.


20240128_190923.jpg.
 
Back
Top