Cincinnati Toolmaster 1-A

Glad you got it going. Since I'm green with machining I error on the side of caution and make small cuts. I have no idea what it's capable of, I just know compared to the BP I've seen it appears to have more mass. I will have to check on the largest collet I have, I believe it is over an inch. I think I played with a 3/4" mill, I can double check that. I hate breaking things, parts aren't overly easy to find or cheap. Since I'm not production I figure the time it takes to make extra passes is much less than repair time and for me not worth the risk.

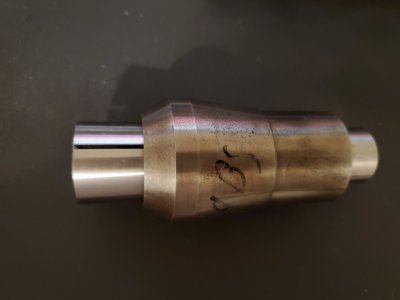
Edit, the picture says 1 1/4". I will double check.

I saw your post looking for collets after my last reply. I found some in eBay half way reasonable awhile back. I found a MT2 adapter since I have some MT2 drill bits that also fit the tail stock of my lathe. Luckily mine came with a small selection.

Hopefully someone else can give more information. I look forward to learning more.
Many thanks, I'll probably try to take small cuts - though I have to realign what "small" means on a 2300 lbs. knee mill, vs. using a 130 lbs. bench top mill. I'm used to 10 thou cuts, small now probably means 0.050" or 0.100", at least based on HP-usage numbers. I'm used to spending several weekends making one small thing, so I'll try not to lose that attitude entirely.

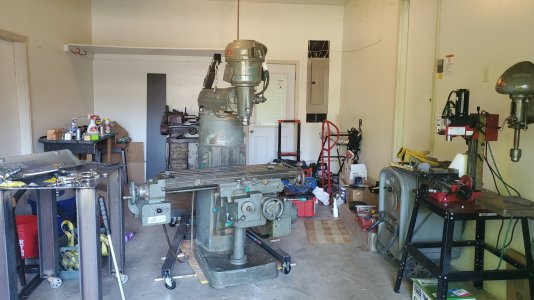
Nice tooling setup too! I have to make mine look better, right now just a few stray collets strewn about. I recently splurged for a monoset to BS-9 adapter and will probably just try to find the random odd sizes I need in BS-9 taper now. Would be cool to keep the rigidity that comes with only one collet and no adapters, but we have to forgo that for anything smaller than 1/2" anyway so nothing new.
 
Small is relative. Pick your relatives carefully . I'm sure I've done some .030 plus cuts with no issues. Just don't have the knowledge to know what the machine is capable of.

I did verify I have a 1 1/4" collet. Not sure what the largest you can buy.

That board was given to me from a estate of an old machinest. When I get a permanent location for the mill I hope to make a new one.

Really like your BS 9 idea. I'll have to keep that in mind.
 
Max Monoset collet size was originally 1". Later they came out with ones that run up to 1 1/4" That's the limit. While I have managed to collect most Monoset sizes, I still whittled up a NMTB40 ER32 collet chuck to fit the Monoset spindle. That stays in the spindle 90% of the time, only removed when I need the big collets.

As far as capability, don't be scared. The machine is far more capable than an equivalent BP.
 
Small is relative. Pick your relatives carefully . I'm sure I've done some .030 plus cuts with no issues. Just don't have the knowledge to know what the machine is capable of.

I did verify I have a 1 1/4" collet. Not sure what the largest you can buy.

That board was given to me from a estate of an old machinest. When I get a permanent location for the mill I hope to make a new one.

Really like your BS 9 idea. I'll have to keep that in mind.
Nice, 1-1/4" is huge.
My BS-9 idea was a huge stupid waste until I figure out how to make the attached pic less idiotic. That's a 3/4" BS-9 collet (threaded) I got for cheap to test it, sitting inside the adapter. It's tight at that depth, no going deeper into the adapter.

The BS-9 adapter isn't a collet chuck, just monoset taper OD to BS-9 taper ID, and it doesn't even fit a full regular BS-9 collet. And come to think of it, the nut won't retain the collet anyway, there's nothing keeping it on as the nut's ID is larger than this BS-9 collet's OD.
Maybe if I put a small washer in the main spindle nut at the bottom. But still, it seems the BS-9 adapter is sized for half-length BS-9 tapers, and without any radially clamping ability, it's not like the collet would close very well either.
I mean Cincinnati sold these taper adapters, they must provide enough radial clamping if there's a smaller washer which retains the inner collet from the bottom. Unless they were only meant for taper tooling, for instance a drill or endmill with a BS-9 taper ground onto it, which would make more sense to me in terms of being retained by the main nut.

Max Monoset collet size was originally 1". Later they came out with ones that run up to 1 1/4" That's the limit. While I have managed to collect most Monoset sizes, I still whittled up a NMTB40 ER32 collet chuck to fit the Monoset spindle. That stays in the spindle 90% of the time, only removed when I need the big collets.

As far as capability, don't be scared. The machine is far more capable than an equivalent BP.
Also a good idea, I am thinking I should turn something like that on the lathe. I have no facility for heat treating so it would just be plain 1018 or 4140 at best. Probably good enough.
 

Attachments

  • 20220701_005619.jpg
    20220701_005619.jpg
    175.9 KB · Views: 6
Start with a commercial ER32 chuck. 40 size. NMTB, ISO, BT, Monoset all use the same 7/24 taper. You have to shorten the top (drawbar spigot) to fit up in the spindle, then whittle down the drive dog area to register into the Cinci spindle nut. The main taper isn't touched, so you don't lose the hardened and ground surface.
 
Will return to your idea Randy, thank you very much.

Currently I'm out of the spindle and onto the knee, investigating to see if the 0.005" forward head droop is actually a 0.005" knee sag off the column. I wanted to lock the knee to see if that changed it, but discovered my knee lock doesn't work! It's the older 50's kind, a single splined handle under the knee elevating crank. I wanted to remove that panel on the left side of the knee to see if it affords a view, but it actually holds the crank elevating shaft. I'm hoping to not have to take the whole knee apart here, let's see what I find.
 
Are you sure that lock there isn't the Y axis, the Knee lock is 2 bolts (not sure what kind) at the knee itself. I have had the elevating crank out and that panel out that hold the bearing there, when I did it I thought I'd never get it back together but everything went right back together like I knew what I was doing... Not the case, but these mills are fantastic pieces of manufacturing, the fit and finish just stands to remind you what this country used to be. I cannot say enough about the people that made these machines.

I'd love to find a nice top tray to go in place of my Eisen 1236 but in Montana that's not going to happen...

Phil
Yes they are built really well, you can see that from far away I think. Top tray?? Never heard of that. I have a Logan/Ward 200 in rough shape but got it real cheap here in the rust belt.

As per https://www.practicalmachinist.com/...incinatti-toolmaster-mill.113144/#post-416991, the earlier (50s, not sure what the cutoff is exactly) Toolmasters used a single crank to lock the knee. I've seen in parts manuals that the 1-B's and later variants had two nuts close to the column, it's hard to find examples with the single lock at the front, just under the knee elevation crank. I think in one of my first pics in this thread you can see it. The picture which is looking into the garage at the front of the mill. It's just under the knee crank, with one of those nice green knobbed handles. I re-attached it here.
It's encouraging that all the chips I'm finding look like brass. Maybe if I'm lucky that means it couldn't have been ridden too hard, though it was a school mill and the table shows it.
 

Attachments

  • IMG-20220617-WA0001.jpeg
    IMG-20220617-WA0001.jpeg
    523.1 KB · Views: 12
With that many separate motors (envious) you're best option my well be an RPC. Then you can use all of the machines original controls, only losing the variable speed of the VFD.

For the VFD, on the wiring diagram ignore everything except for the five motors on the extreme right. Each motor has three lines xT1, xT2, xT3 where x equals the motor number. Now, in the electrical box in the back of the machine there is a long terminal strip on the right side. Each position is labeled. One side will go to the motors (on mine it's the right side), the other side goes to the contactors/controls. You need to disconnect the control side, then bring your VFD lines in and daisy-chain down the stack.

L1 -> 1T1 -> 2T1 -> 3T1.......

Same for L2 and L3 to the xT2 and xT3 positions.
While waiting for some collets to be able to tram the head properly (with H&W's nice tool for holding and removing the head), I picked up a cheap eBay VFD rated at 2HP (might really only be 1HP but that's more than enough). Wired a bird's nest together using these instructions but modified so that there's a nice Teco VFD powering only the spindle and then the eBay VFD powering both the table feeds (daisy-chained together down the stack). However, both VFD's are pulling off the same 220V dryer plug.

The two VFDs work nicely if used separately, but the moment you have pressed "run" on both, the eBay VFD errors out an Err 1 which corresponds to short circuit/current overload. The current overload trips are set at 12 A on the eBay VFD. Is all the current somehow being routed through the 2nd VFD when both are run simultaneously?

Edit: attached a doodle of the situation. In reality, the connections from VFD 2 to the mill aren't split in the middle, they're split at the connecting points inside the mill, i.e. daisy-chained.
 

Attachments

  • 20220723_173350.jpg
    20220723_173350.jpg
    228.2 KB · Views: 11
Last edited:
Back
Top