Bore Finishing On A 7x14

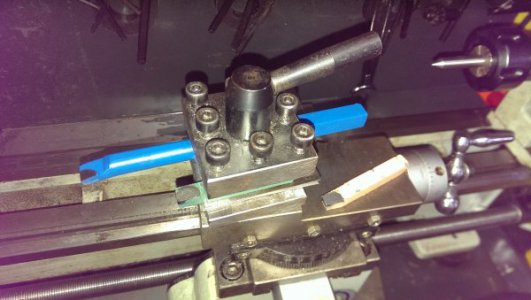
I use boring bars like this set. They come in progressive diameter range/shank sizes. They all use replaceable CCMT 21.51 carbide insert cutters. The shanks have flats milled on them so that they can be secured in typical tool post holders. You can get these boring bars quite inexpensively from a variety of tool suppliers, or Ebay, Aliexpress etc. Asian clones but I think they are fine. The inserts can also be found quite reasonably priced & come in a variety of nose radius, coated, uncoated etc. And I use the exact same inserts in conventional lathe cutting tools.

OTOH, there is nothing wrong with the classic boring bar that uses HSS bits. Cost wise, its almost getting to be coin flip these days. HSS requires you to grind & dress your own bits. But this assembly also gives flexibility to make your own cutter profiles. For straight boring I usually grab the insert style.

Drilling is a roughing operation intending to remove bulk material. Its not really all that accurate compared to boring. Big drills can push small lathes on a few fronts: power requirement, lathe/saddle rigidity, even clamping retention of small chucks. If the lips aren't ground accurately the hole can cut unequally & wander. Same goes for your tailstock alignment & chuck quality. Reamers seem like a great solution and they can be, but they can also get spendy in bigger diameters & also quite long with MT/tang configuration for small machines. And a reamer can only do one bore size. You can achieve very close to this finish & accuracy with these boring tools mentioned.

For model engine liners/cylinders, use the biggest, most rigid bar you can accommodate in the hole (with swarf clearance etc). As you approach the final ID, alter the traverse feed (so it resists tracking the previous cut) & take the same number of spring passes with carriage locked. Make sure temp has stabilized & then measure. The last thou on typical engines or so is best done with lapping tools for both dimensional accuracy & surface finish. Your O-ring seal is much more tolerant than typical ring-less 2-stroke pistons or conventional ringed pistons, but its not that much extra work to achieve a superior liner & it will run that much better. I can point you to some lapping links on model engine forums. Some pics of tooling & my radial engine build (my first engine so if I can do it so can you! :)

Thank you for your long and comprehensive response. Going on this I think I absolutely need to shell out a little more on a boring bar set and try all over again. I see in the images the boring bar is in a quick mount, I don't have one so am limited to std 8mm shank, 10mm tools I know sit the cutter above midpoint. Second investment may be tool holder upgrade(s). At this stage I am wondering still if the money isn't better spent on that 12x24 secondhand I have my eye on.

Maybe I should make this in a softer material, see how it all sits, I plan a number of changes anyway and it all comes apart easily so parts will interchange.

Very impressed by your images of the cylinder, nice cooling fin work too. Thanks for posting.
 
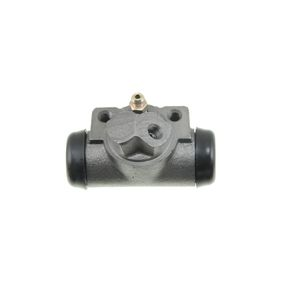
I had wondered about a used pneumatic or hydraulic cylinder like this one
Unfortunately I don't know much about them. Maybe research typical materials. If it was say cast iron, should be fine. But if hardened steel and/or chromed ID then cutting a length & facing & not chipping chroming might be more PITA than making one from scratch where you control the process & dimensions.

Another possible solution is to buy a replacement cylinder liner from an RC model glow engine, presuming the dimensions can work for you. They are inexpensive, perfectly lapped to specific dimension, typically nickel hard coated. It has to be a 4-stroke (solid wall) as opposed to 2-stroke (with ports cut in).
http://www3.towerhobbies.com/cgi-bin/wti0001p?&I=LXCL06&P=7
 
On tool holders, what exactly do you have available? There may be a way to utilize a larger bar than you think. You know we love pictures.:)
 
Unfortunately I don't know much about them. Maybe research typical materials. If it was say cast iron, should be fine. But if hardened steel and/or chromed ID then cutting a length & facing & not chipping chroming might be more PITA than making one from scratch where you control the process & dimensions.

Another possible solution is to buy a replacement cylinder liner from an RC model glow engine, presuming the dimensions can work for you. They are inexpensive, perfectly lapped to specific dimension, typically nickel hard coated. It has to be a 4-stroke (solid wall) as opposed to 2-stroke (with ports cut in).
http://www3.towerhobbies.com/cgi-bin/wti0001p?&I=LXCL06&P=7

My guess would be that a pneumatic cylinder would be an easier material than the hydraulic, often the pneumatic work at quite low pressures so don't require the chrome steels. We are surrounded by pressure piston cylinders these days, think office chairs, tailgate lifts, door mechanisms etc, repurposing some of these may be extremely hazardous if not lethal as they are often precharged gas sprung.

I don't need hard material, there is no significant pressure in a flame licker, all I need is good surface and the correct thermal transfer for sustained running.

The plan I have has bore 1 inch and stroke 18/16 (1 and 1/8). I'll look around for a 4 stroke liner to suit.
 
On tool holders, what exactly do you have available? There may be a way to utilize a larger bar than you think. You know we love pictures.:)

I see the shank on that bar is actually 10x10, but cutting is below that, same height as the 8x8.

IMAG0515.jpg
 
A wheel cylinder can be easily machined to a nice round shape leaving 2 very small holes that would be easy to plug. Hydraulic cylinders steel with hard chromed walls. pneumatic are either aluminum or thin wall SS


upload_2016-11-14_19-50-22.png
 
A wheel cylinder can be easily machined to a nice round shape leaving 2 very small holes that would be easy to plug. Hydraulic cylinders steel with hard chromed walls. pneumatic are either aluminum or thin wall SS


View attachment 139404
I'll keep my eye out for one secondhand. Things are v. different here in Australia in comparison to the US. Fewer people, fewer sources, longer distances between those sources.
 
Check scrap yards for chunks of brass rounds or something already close in size that you can grip with your lathe or make it able to hold it.

Get the cheap set of brazed boring bars to learn with and clamp it as in the photo above.

Cut SLOW AND GENTLE.

set thread gears for fine feed and take small cuts.

Make last cut 3 times as the small machines give some Nd repeating the movements of taking a cut without advancing the tool deeper often makes chips.

When finished use a brake cylinder hone to clean up the inside and use light oil as lube.

Make piston similar.

Make it AFTER as you need to make it fit well and proper fit will be oil seal and no o-ring.

Place your stock in the lathe and cut the rod past the piston on the Chuck side smaller than diameter as this will allow you to focus only on the actual piston.

Measure well with inside calipers then target that diameter plus 20 thousands.

Cut to finish grade then reduce diameter by 0.001 at a time until it fits.

This approach will give you plenty of practice as well as allowing you to sneak up on size.

It will not fit at all then barely fit and that is when you shift to sand paper to polish it.to get it to fit better.

The oil film between the piston and bore is plenty to seal it as there is little pressure and any added friction will fail the action.

Sent from my SAMSUNG-SGH-I337Z using Tapatalk
 
  • Like
Reactions: c60
Check scrap yards for chunks of brass rounds or something already close in size that you can grip with your lathe or make it able to hold it.
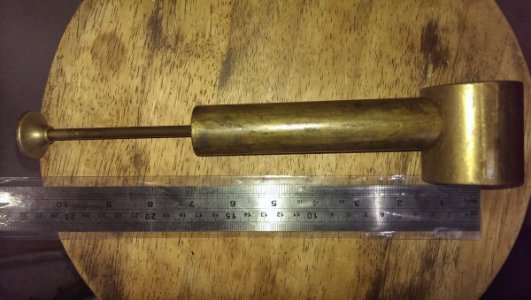
If going with Brass how about this? No longer seals so scrap anyways. Can't get the thing apart so will need to cut open.

IMAG0516.jpg
 
The "Centre" you see in my lathe image (in the collet) is actually a Hougen Pin. Just using it here as a centre point indicator. I'm guessing it is actually hard enough to work as a dead centre but tip angle is a bit over 60 so would reduce contact area formed by a centre drill. It has a fine slot running the length and top end is wider I guess the slot could hold a little extra tip lubrication, or provide a run in channel if it will work as a dead centre. Picked up a few of these at a sale for cents.
 
Back
Top