Bore Finishing On A 7x14

c60

Registered
Registered
Joined
Apr 4, 2016
Messages
72
Wasn't quite sure how to title this.
I've been toying with the idea of making a flame licker engine, not sure I'll ever complete it but I've made a start on some parts.
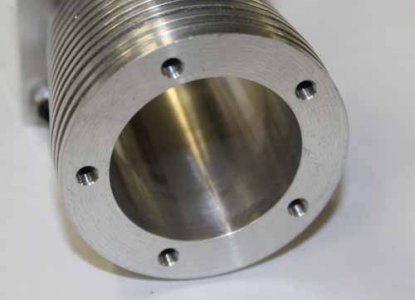
Because it isn't a serious effort and still part of learning what the lathe is capable of I'm just working with what comes to hand. In this case for the cylinder with a nominal I.D. of about 1 inch it was a length of old galvanised (gas or water?) pipe. Reading around it seems that cast iron has the best heat transfer properties for flame lickers, this pipe would be a steel. Sure I read somewhere that brass really won't give sustained runs.
Anyway outside cleaned up reasonably well and a second go now I have finer aspects of the turn nailed will be better still. For the interior I had a boring bar. This needed to clean about 2 inches plus up sufficiently well to make a seal with a high temp O ring. What I quickly discovered is that an 8mmx8mm tool projecting far enough forward from the holder for the depth flexes, bounces, and vibrates so badly that I can't even get a cut to commence.
My alternative would I imagine to be to drill and then if required possibly ream at the required size. My biggest drill is only 13mm so only ~ half required size. If I buy a larger diameter (probably would need to be an MT2, no tang) my question is a small lathe @ 400W or less up to running that diameter through steel or cast iron? Obviously I wouldn't try to drill this particular pipe, I'd be begging for it to jam on me so close to diameter.

Next lead off from this would be is there a tool holder out there that will hold larger size tools at the correct height for a mini lathe? Not applicable to boring bars I guess.

Cheers all.
 
I'd say you need to work out the boring capability you have rather than buy a big drill that you might not even be able to push. Boring for a nice finish can be done, it just requires that everything be just right. Even then I would suppose that the finish would still need, or should be honed for best performance in any sealing endeavor, whether static or dynamic.
 
  • Like
Reactions: c60
Cheers Tony. I think you summed up my concerns well there. I think my Mini Mill of similar power is able to handle 1/2 inch (chuck capacity aside) in steels. Anything greater would be an unreasonable and risky load. In this case for the lathe I am also using a steel.

Not sure if a flame licker will scale down, is there a minimum depending on a candle or spirit burner flame size minimum or is it down to power vs resistance killing a scale down?

Seems there is a lot of info out there about "how" but not so much about "what" on these small lathes. I see a greater and greater need for a bigger lathe here, the small one has been an interesting learn.
 
Had to read the OP twice. Did not see how deep the bore had to be. I have bored holes to over an inch in diameter and up to 3.50 inches in length with no problem on my 7x12 Homier. I start out with a 3/8 drill then up it to 1/2 then 5/8 and finally a 3/4 before I start boring. I then use a 1/2 inch carbide shank boring bar. I have done modifications to my lathe to make it tighter than factory though.
 
Had to read the OP twice. Did not see how deep the bore had to be. I have bored holes to over an inch in diameter and up to 3.50 inches in length with no problem on my 7x12 Homier. I start out with a 3/8 drill then up it to 1/2 then 5/8 and finally a 3/4 before I start boring. I then use a 1/2 inch carbide shank boring bar. I have done modifications to my lathe to make it tighter than factory though.

Wow , interesting.
I need to make at least 2.25 inches of good finish, so more for final trim. Boring bar I have came with the lathe and is just one of those painted blue body ones with a brazed on tip. Plenty on Ebay same.
You are right, there is more play in the lathe than I'd like for the harder materials. Not so bad on aluminium though.
See http://www.john-tom.com/MyPlans/Steam Engines/Oct08update/Candle_Engine/Candle_Engine.pdf
 
Make sure that the boring bar is not rubbing on the walls of the cylinder below the cutting edge. Use a Sharpie or something to mark it to see. That is a common problem. If that is the problem, either cut away the tool a bit below the cutting edge and/or rotate the tool to a more negative rake angle, which serves the same purpose of getting clearance in the bore. It actually works just fine as long as you don't overdo it...
 
Make sure that the boring bar is not rubbing on the walls of the cylinder below the cutting edge. Use a Sharpie or something to mark it to see. That is a common problem. If that is the problem, either cut away the tool a bit below the cutting edge and/or rotate the tool to a more negative rake angle, which serves the same purpose of getting clearance in the bore. It actually works just fine as long as you don't overdo it...

I had already spotted that one before posting and had gently ground a better profile below just at 1 side of the lower tip, only where absolutely necessary. Using a mirror at the bore entry I can see the clearance is now good. Not made any difference to vibration/bounce etc though.

Most of this tool is square shank so does not rotate in tool holder, I can angle it in as long as other side doesn't hit opposite wall of work.
 
Wouldn't an old wheel cylinder from drum brakes be good for that. They are cast iron and can be found with a 1" bore
 
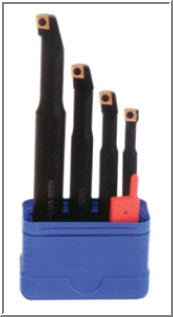
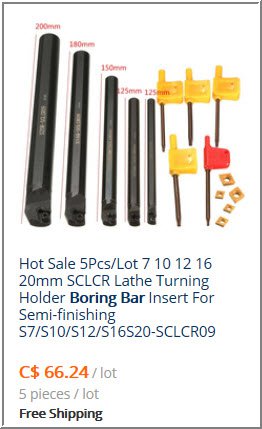
I use boring bars like this set. They come in progressive diameter range/shank sizes. They all use replaceable CCMT 21.51 carbide insert cutters. The shanks have flats milled on them so that they can be secured in typical tool post holders. You can get these boring bars quite inexpensively from a variety of tool suppliers, or Ebay, Aliexpress etc. Asian clones but I think they are fine. The inserts can also be found quite reasonably priced & come in a variety of nose radius, coated, uncoated etc. And I use the exact same inserts in conventional lathe cutting tools.

OTOH, there is nothing wrong with the classic boring bar that uses HSS bits. Cost wise, its almost getting to be coin flip these days. HSS requires you to grind & dress your own bits. But this assembly also gives flexibility to make your own cutter profiles. For straight boring I usually grab the insert style.

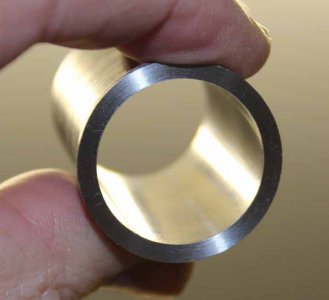
Drilling is a roughing operation intending to remove bulk material. Its not really all that accurate compared to boring. Big drills can push small lathes on a few fronts: power requirement, lathe/saddle rigidity, even clamping retention of small chucks. If the lips aren't ground accurately the hole can cut unequally & wander. Same goes for your tailstock alignment & chuck quality. Reamers seem like a great solution and they can be, but they can also get spendy in bigger diameters & also quite long with MT/tang configuration for small machines. And a reamer can only do one bore size. You can achieve very close to this finish & accuracy with these boring tools mentioned.

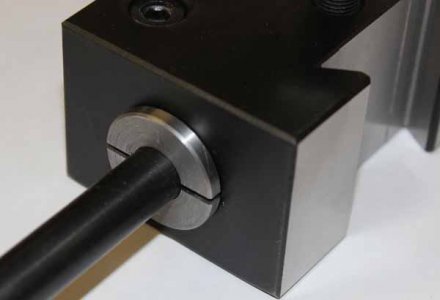
For model engine liners/cylinders, use the biggest, most rigid bar you can accommodate in the hole (with swarf clearance etc). As you approach the final ID, alter the traverse feed (so it resists tracking the previous cut) & take the same number of spring passes with carriage locked. Make sure temp has stabilized & then measure. The last thou on typical engines or so is best done with lapping tools for both dimensional accuracy & surface finish. Your O-ring seal is much more tolerant than typical ring-less 2-stroke pistons or conventional ringed pistons, but its not that much extra work to achieve a superior liner & it will run that much better. I can point you to some lapping links on model engine forums. Some pics of tooling & my radial engine build (my first engine so if I can do it so can you! :)

11-13-2016 0001.jpg IMG_0728_edited-1.jpg IMG_0914_edited-1.jpg 11-13-2016 0002.jpg IMG_0614_edited-1.jpg
 
  • Like
Reactions: c60
Back
Top