Anyone bought a Vevor Vise?

Make something like this to hold down the vise. I made these last January. Don't use socket head screws, they fill full of swarf, use a hex head instead. Make sure the screws aren't too long, or it could damage your table. For that matter, get or make tee nuts that a bolt cannot thread through.
PXL_20210205_213003481.jpg
 
what kind of mill?
I think most every mill will handle 4 clamps. Even my small Clausing 8520..
You are going to a 6" so you must have a bigger mill than mine.
I have a small combo lathe/mill.
I'm only going to a 6" vise because the cheap 4" vise I have has come up short a few times. I'm tired of bolting a mount piece to be able to machine something that's bigger than 4 inches.
Part of the reason my cnc build has taken so long is because I need to make some bigger pieces here and there.
I can, and have, worked around a lot of those limitations but this should make it easier.
 
@WobblyHand that's the solution.. easy peasy.
As far as T nuts, you can either partially tap using a gun tap and not go all the way
Or I just take a punch and peen the last thread so it can't go any further. I am assured of the number of threads that way.
 
Make something like this to hold down the vise. I made these last January. Don't use socket head screws, they fill full of swarf, use a hex head instead. Make sure the screws aren't too long, or it could damage your table. For that matter, get or make tee nuts that a bolt cannot thread through.
View attachment 390357
That's pretty much what I was working towards.
I've already had to make a couple T-bolts because the Smithy comes with really soft ones.
The big difference between what I want to do and what you've done is I want to have dedicated mount points. Hence the drilled holes.
 
@WobblyHand that's the solution.. easy peasy.
As far as T nuts, you can either partially tap using a gun tap and not go all the way
Or I just take a punch and peen the last thread so it can't go any further. I am assured of the number of threads that way.
Made the hold downs out of A36 1x1 stock. Took me longer to figure out what to do and draw it, then to actually make them. One can get tee-nuts already peened, or punch them, just like you said.
 
That's pretty much what I was working towards.
I've already had to make a couple T-bolts because the Smithy comes with really soft ones.
The big difference between what I want to do and what you've done is I want to have dedicated mount points. Hence the drilled holes.
Why dedicated mount points? They are incredibly inflexible and effectively permanent. If you miss drill, you have pooched your table. If you screwed up your calculations, you have pooched the table. If you need a different setup at an 1/8" offset, you have pooched the table. Effectively impossible to reverse. Please don't drill the table, it's almost never necessary. Just my humble opinion.

Setting up and tramming a vise takes me a couple of minutes down to tenths. Get it roughly in place. Tighten one bolt firmly, the rest not as firm. Tap to rotate in one direction (or the other, if you have gone too far,) checking tram. Tighten rest of bolts down and check tram again. Couple of more taps and done.
 
Mountains out of molehills

Measure twice, buy once.
I think some might be overestimating the size of my table. It turns out that the width of the vise will be exactly the width of my table.

This will be interesting.

Modifications will need to be made.

20211231_113629.jpg
 
Can your machining technique support rotating the vise 90 degrees? So the vise handle is over the edge of the table, rather than over the table itself? You can drill if you want, but usually there's a way to avoid it.
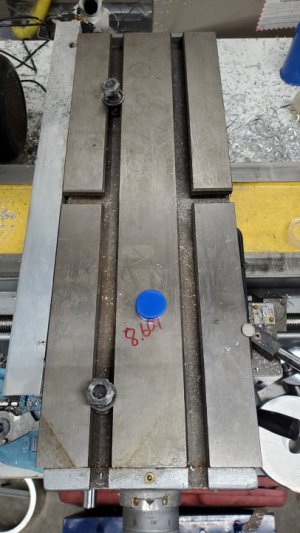
 
Can your machining technique support rotating the vise 90 degrees? So the vise handle is over the edge of the table, rather than over the table itself? You can drill if you want, but usually there's a way to avoid it.
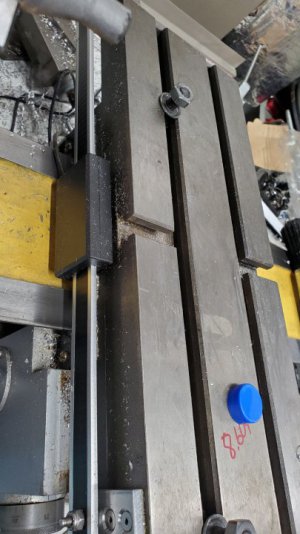
I could do that but it would be with great sacrifice. Every time I put the vise on I would have to remove the lathe tail stock and, frankly, it's a PIA to get back on.
 
Drilling won't be necessary

As it turns out, not only will I not have to drill but there wouldn't be an advantage anyhow.
The vise matches the dimensions of the bed almost exactly.

Here's what I have to work with.

20211231_175314.jpg20211231_175403.jpg


I plan on using the two T-slots on the side to lock the vise down on the sides.
The left one just barely clears the pickup for my DRO so it should be OK and not interfere.

What you can't see in the photo is the T-slots extend all the way out the back so I can use those T-slots for the back.
That will give 3 point lockdown with the majority of the work being done inside the triangle.
It also makes it easier to make the clamps for the vise as they will all be the same. The vise has mounting points on the sides and the back

Here's the layout of the table to help see where it would sit on the bed.

vise.png

The only real downsides to a vise this big on a "mill" this size is the vise handle is directly over the Y-axis feed and the thing weighs 50 pounds so it won't be fun to put it on and take it off.
 
Back
Top