9A renovation

SE18

Active User
Registered
Joined
Feb 26, 2012
Messages
758
I've begun the process of renovation. I'll post some photos and video later but I'm at a sticking point--literally. I'm trying to remove the right-side lead screw support bracket by removing the 2 slotted screws on top of the lathe bed in order to slide the bracket off the lead screw.

I can't get the screws holding the bracket to budge, despite using a very large screwdriver. I'm beginning to strip one of the screw heads as a large chunk of metal came off. Should I get a propane torch and heat the area? Pour Coke on it?

Any solutions would help me substantially.

I anticipate having a lot of other problems, as I'm not experienced in machinery. However, the machine looks really dirty and when I removed the oil plug below the carriage, no oil came out!!

So I'm thinking that despite my anxiety, it's best to continue and ask questions here, as I think I can get all the help and advice I need right here.

One other quick question. I want to start cleaning the parts I remove and painting them. The enamel paint only comes in a quart and a gallon, nothing in between. Would a quart do 2 coats of paint for the lathe or do I need a gallon?

Thanks!

Dave V
 
Last edited by a moderator:
Dave,
Clean off top of screws and spray with some kind of rust blaster, let it soak a little and use a impact driver and hammer or old screw driver with hammer, hit with hammer as you turn. If that don't work use a little heat on the lead screw bracket then try. One quart of rustolium was enough to do my lathe and metal bench top with some left over.
Paul
 
For the screws, I would soak with PB Blaster and give the screw a few surgical taps with a hammer while trying to loosen the screw. I would repeat this process several times over a 24 hour period until it hopefully breaks free.

For the paint, I just finished painting a Logan with a cheapie HF gun and I purchased a gallon of enamel. This was my first time painting anything with a gun so I am sure that I wasted quite a bit of paint. That being said, I have enough paint left over that I will probably paint every piece of machinery or exposed metal in my shop with the left over paint.

I hope this helps. I am very new to this type of thing, so I would take anything I say with a grain of salt. I have run into several stuck bolts over the last few years and there seems to be three common themes: 1.) Penetrating oil and impact; 2.) Heat; and 3.) Drill out the stuck fastner ( preferably L handed twist drills ). I would be very nervous using heat around the ways, but then again, the mass of the lathe may be able to absorb and distribute the heat with ease.
 
thanks, all, I applied oil, heat and with a bit of energy they turned. Feeling of accomplishment! (Incidentally, I first tried a HF heat gun--the one with the warning not to dry your hair with LOL; it didn't work, so the propane torch came out and that did the trick)

Here's a quick video of the lathe in operation. If I can't get it back together after renovating it, at least I'll have this video to prove it turns LOL!

http://www.youtube.com/watch?v=Mgda49LKx5U

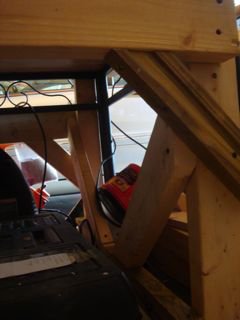
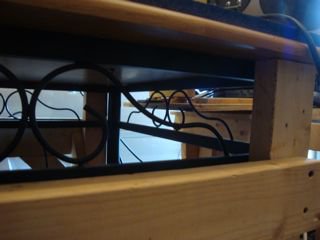
Forgot to mention, leveling the lathe and fortifying the bench took some time and effort. I found a truck load of 2x4s in a construction dumpster; just had to remove the nails. The steel bench now is fortified with the 2x4s and won't budge

I'm going to provide detailed and frequent updates to this, hoping it will help some other idiot abroad like myself LOL
 
k,

a few more updates; here's some stills of the bench fortification

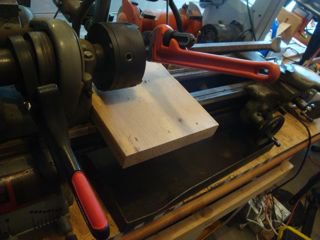
also, 2 shots of removing the chuck. Some idiot dumber than me must have dropped the chuck a bunch of times on the ways b/c I see a ****load of marks right under the chuck.

per recommendation of the Ilion book: http://books.google.com/books/about/A_Guide_to_Renovating_the_South_Bend_Lat.html?id=Q-P3tgAACAAJ

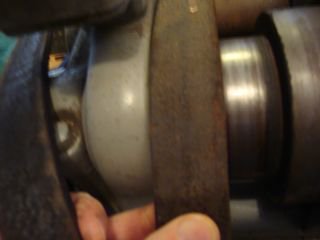
I heeded the warning NEVER use the back gear lock to disengage the chuck. Instead, use a strap wrench on the pulley cone and insert a hex rod into the chuck and turn with wrench.

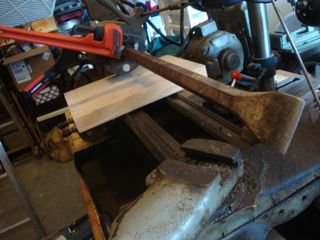
last night I got a Husky strap wrench from Home Depot. I then cut in half a Harbor Freight 7' long steel digger (I have an extra one) and used this to turn with wrench; see photos


It is likely I'll purchase a serpentine belt from Autozone or somewhere as the leather belt is 1.25 inches wide, about 1/8" too wide to fit on the smallest pulley cone (it fits on the others OK

DSC01946.jpg DSC01954.jpg DSC01955.jpg DSC01959.jpg DSC01960.jpg
 
thanks, Professor, I was posting when you were.

BTW, I'm taking a lot of photos of parts as I dissassemble them. Hopefully that will help me later, as it's always easier removing stuff than putting it back. LOL
 
I am hoping to get my restored Logan back together today, and the pictures have been a huge help. If you have not done so already, there is a seller on ebay who has the rebuild kits. The kits have a detailed dissassembly / assembly booklet and all of the replacement felts. There is one screw on the apron that is left hand thread that is commonly broke by the novice, but I don't recall which one off the top of my head.
 
I am hoping to get my restored Logan back together today, and the pictures have been a huge help. If you have not done so already, there is a seller on ebay who has the rebuild kits. The kits have a detailed dissassembly / assembly booklet and all of the replacement felts. There is one screw on the apron that is left hand thread that is commonly broke by the novice, but I don't recall which one off the top of my head.

The star wheel screw is left hand thread and is commonly damaged from turning the normal but wrong way. I destroyed the nut on my chop saw, btw, turning it counterclockwise to get the nut off to replace the blade when it was left hand thread. You'd think they'd put a warning label or something on the machine. There are plenty of other warnings, like don't put your hand in the blade when it's spinning and don't operate when drinking, etc LOL

LOL, I'm at a sticking point again. I think we both have the rebuild kit you mentioned with the replacement consumables (nonedible consumables that is).

Here's where I'm stuck and need advice so I don't completely destroy the reverse gear assembly

So I removed the square nut and the reversing gear assembly came out in a unit. That part was fine.

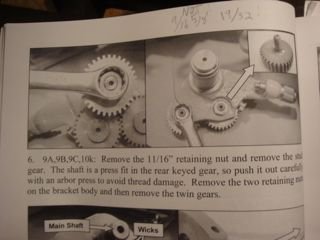
Then, I removed the 11/16" retaining nut, holding the top gear and took off that and the gear. So far so good.

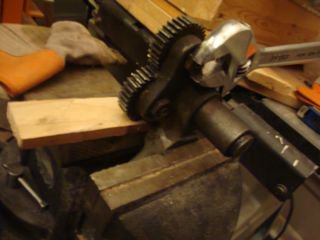
Then, I removed the two retaining nuts on the bracket body (used a vice to hold the frame and stuck a block of wood under the teeth so they wouldn't be damaged and then turned them off with a crescent wrench. I couldn't use a box wrench b/c apparently, those retaining nuts are a weird size, 19/32 I believe. LOL.

So far, so good.

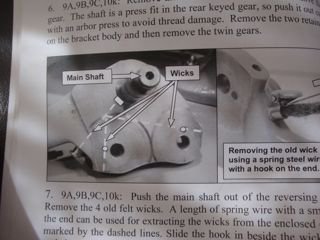
Now, I need to remove the main shaft and the other two shafts to remove the 3 gears remaining on the assembly. How?

The book says to press the shafts off with an arbor. Have have a shop press so I'm going to use that.

However, the book doesn't say which way to press them off, from the front (where the gears are located) or from the back. Also, I probably need to use a piece of round stock to push the shafts all the way through.

Any advice will help!!!!!!!! I'm not going any further until I hear back. LOL

Here's some photos

DSC01988.jpg DSC01989.jpg DSC01990.jpg
 
well, not having heard back yet, I'm assuming the 3 gear shafts in the reversing assembly can be pressed out in either direction. Otherwise, the book would have stated which direction. So perhaps later tonight or tomorrow I'll give it a go.

One quick test I did was to check if the ways are worn near the headstock. The book recommends tightening the square carriage locking bolt lightly by hand until it just touches the underside of the bed. Note the position of the bolt's head. Next, run the carriage all the way left to the chuck (where any wear would occur) and try to turn the screw down again by hand.

Keep track of how far the bolt turned. Most bolts are 5/16-18 thread so 1/4 turn will indicate about .014" of wear between this end of the bed and the far right end. This is the most it should turn, any more and you've got a swayback bed.

So I did the test and when I pulled the carriage up to the headstock to turn by hand again, it barely moved, perhaps 1/12 of a turn. Therefore, this indicates a fairly level bed that was maintained well. I was pretty happy after the test as a swayback would really suck.
 
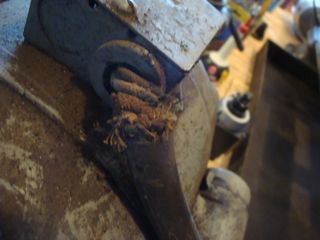
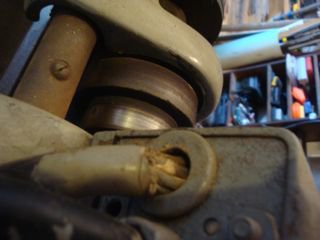
One nagging concern I have is the electrical system. Sure everything works fine, but the cords look pretty ragged and inside the box that has the forward-neutral-reverse power levers, the wires look really old. Here's some photos of the outside cords.

Unfortunately, the Guide to Renovation by Ilion (2011 copyright) does not appear to mention the wire system, capacitor, motor at all, so I'm left wondering...

DSC01947.jpg DSC01948.jpg
 
Back
Top