-
Welcome back Guest! Did you know you can mentor other members here at H-M? If not, please check out our Relaunch of Hobby Machinist Mentoring Program!
You are using an out of date browser. It may not display this or other websites correctly.
You should upgrade or use an alternative browser.
You should upgrade or use an alternative browser.
Where to start? Thinking of converting my mills and lathes to CNC.
- Thread starter GoMopar440
- Start date
- Joined
- Oct 19, 2011
- Messages
- 127
It's a lighted switch. I'll post up a pic tomorrow of the wiring diagram from the back of the package.
- Joined
- Oct 19, 2011
- Messages
- 127
School started getting pretty hectic over here so this project got bumped to the back burner till finals are over. I'll be glad when all the tests are finally done (5/15) and I can get back to finishing this so I can start making some chips.
- Joined
- Oct 19, 2011
- Messages
- 127
Schools out, honey-do list is caught up and I finally got some free time to start on this project again.  hew:
hew:
Today I started out test fitting the X axis ballscrew to the saddle and it looked like there was some interference. The ballscrew and the aluminum pinch clamp were hitting the top of the saddle and keeping the ballscrew sitting way above the correct center line. I put a little Dykem on the saddle and after it dried I then set the ballscrew assy in place and scribed around the points of contact. I left the saddle in place and slipped the gib in place and locked it down tight so it was locked solidly to the base. Then I brought the base and saddle over to the Bridgeport mill and bolted to to the table. Since I was using a 1/2" hogging bit I did the milling at full depth (.250" deep) and cut a rectangular box pattern that was just large enough to make all the scribe lines disappear. When I set the ballscrew back on the saddle, it now appears able to sit just a little lower than will be needed when it is bolted to the table and adjusted.
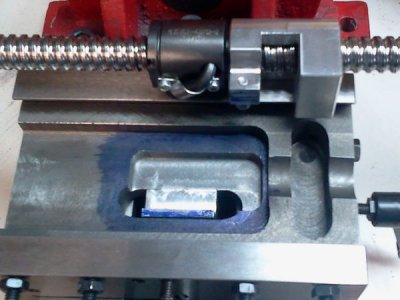
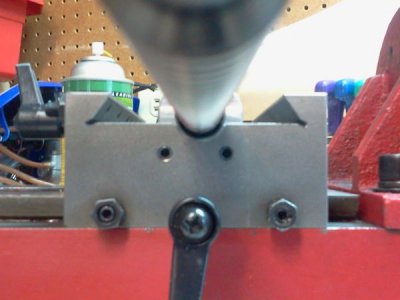
The pics can probably show it better than how I'm explaining it. If anyone has any questions about what I did or why, just put it in a post and I'll try to make it all clear.
Today I started out test fitting the X axis ballscrew to the saddle and it looked like there was some interference. The ballscrew and the aluminum pinch clamp were hitting the top of the saddle and keeping the ballscrew sitting way above the correct center line. I put a little Dykem on the saddle and after it dried I then set the ballscrew assy in place and scribed around the points of contact. I left the saddle in place and slipped the gib in place and locked it down tight so it was locked solidly to the base. Then I brought the base and saddle over to the Bridgeport mill and bolted to to the table. Since I was using a 1/2" hogging bit I did the milling at full depth (.250" deep) and cut a rectangular box pattern that was just large enough to make all the scribe lines disappear. When I set the ballscrew back on the saddle, it now appears able to sit just a little lower than will be needed when it is bolted to the table and adjusted.


The pics can probably show it better than how I'm explaining it. If anyone has any questions about what I did or why, just put it in a post and I'll try to make it all clear.
- Joined
- Oct 19, 2011
- Messages
- 127
With the saddle now clearanced to fit the ballnut and the aluminum pinch block, I attempted to fit the table. The ballnut assembly was contacting the table from both ends and preventing it from being able to slide over it. I used some Dykem on the ends and scribed around the areas that were hitting the table. From there I took the X2 table over to the Bridgeport and started to whittle away at the bottom of the table. I made stepped passes with a 1/2" ball endmill (biggest one I had) and cleaned up the rough casting surfaces on both sides of the center channel. I rechecked the table on the saddle and it now cleared the pinch block but was still hitting the ballnut itself in the center. I reblued it and scribed it on both sides and brought it back over to the big mill. I used a 1/2" hogging bit centered on the radius I had traced and made a full depth pass to try to get rid of the scribe line. It didn't get rid of the line on the opposite side so I lowered the endmill just enough to make it disappear and cut it again. After that I swapped the ball endmill back in and then ran the center along both sides of the 1/2" cut. This time the table fit on the saddle with enough room to clear the ballnut and pinch block assembly through the full range of motion.
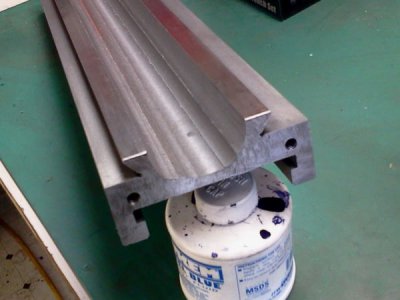
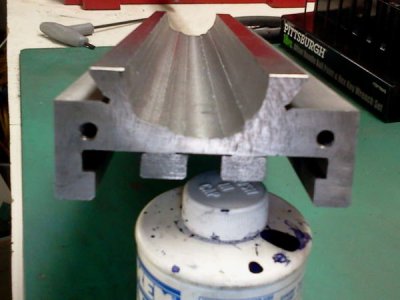
The table gib was put in place and the tension was set to make sure it was still going to clear when in it's normal assembled state. So far so good. I'll make sure to put some good rustproofing paint on the underside of the table before it gets bolted together for the last time.


The table gib was put in place and the tension was set to make sure it was still going to clear when in it's normal assembled state. So far so good. I'll make sure to put some good rustproofing paint on the underside of the table before it gets bolted together for the last time.
- Joined
- Oct 19, 2011
- Messages
- 127
DOnt buy **** from these people I am still waiting over two months for them to replace my x axis ball screw that was defective. They never reply to my email and did not send me the part they said they would , I called my credit card company and complained and also with pay-pal, and the BBB they are crooks.....Not sure. They're the ones that ship with the CNC Fusion kit. I didn't get the ballscrew upgrade since I've heard they wear out faster than the normal ballscrews that come with the kit. I'll go poke around on the CNC Fusion website and see if they have any info posted on the regular ballscrews.
- Joined
- Oct 19, 2011
- Messages
- 127
Luckily the parts I received from CNCFusion seem to be of decent quality for the most part. The one notable exception are the spider couplers that have slop in them even though new. I knew about that issue from researching them online before ordering so I had already planned on replacing them with some solid 1 piece spiral cut aluminum couplers anyway.
The CNCFusion website stated the wait times for their kits, but I don't know about how long it might take them to get replacement parts. Depends on who supplies the ballscrews to them. Kinda tough if you can't get an answer from them though to know where it stands on getting the parts you need.
Unfortunately the Honey-do list took priority over the summer so I had to put this project on the back burner for a while. Now that I'm in the middle of the fall semester at school, all the rest of my other projects are on hold as well. Hopefully I'll be able to get started back up on this project (and the Atlas 10F rebuild) again once winter break starts.

