Tramming a vise- the easy way

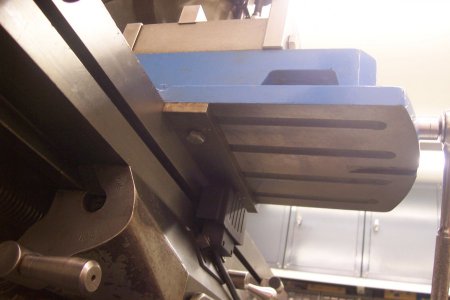
Here is another way to tram a vise on a mill that I have not seen anywhere else. My mini mill is a LMS 3960 so I believe that this will work on a mill of similar type. I found out that the jaws on a mill vise can be taken from the inside and placed on the outside so one can hold larger work. Got this from watching a Blondihacks. So, it got me thinking. Is the flat surface of the column parallel to the X axis? Mounted the vise on the table leaving both screws slightly loose. Put a 123 block between the column and the outside of the vise where the jaw would be mounted. Tightened the X screw enough so there is no light between the surfaces. Tightened the screws on the vise and backed out the X to release the 123 block. Check it the usual way with dial indicator, there was barely any movement on the needle! This was the quickest and easiest way that I have trammed a vise on a mill. Sorry that I don't have pictures. Right now the mill is apart for cleaning and adding the LMS "Tweaks & Enhancements Kit. Soon as I get done, pictures will come, at least some diagrams. Mark
 
I know that I'm a little late to the party on this but I was checking to see if there were any good posts about tramming that I might have overlooked. I have watched about every YouTube machinist tram a vise and I have obviously learned a lot. My last 3 attempted at tramming took only 2 hours, 1.5 hours, and 40 minutes - in that order. So you can see the improvement.

A couple things that I've learned how to do are; tapping on the right side of the vise to move the needle left, then tapping on the left side of the vise to move the needle even further left; also, when within about .002" on either side, tapping one side .001" moves the other side .010" - this way you are assured another half hour's work to straighten it out.

I'm sure that I can give you even more advise about tramming, if interested.
 
Silly question, where does the word “tram” come from in this context?
 
Interesting thoughts about the origin of the word tram. The term probably derived from trammel although the earliest use of trammel was for a type of net for fishing consisting of three different sizd meshes, the word derived from the Latin for three and mesh. Later use was for various restraining devices. The first referenced use of trammel with regard to restraint was from the 16th century and referred to binding up a corpse, possibly using fishing net. Trammels are used to restrain horses to force them into an unnatural gait.

The connection between restaining devices and tools for measurement isn't very clear. Possibly because a gauge is used for determining mesh size when making nets? Carpenters have long used trammel points , otherwise known as a beam compass, for laying out circles and precision measurements. The beam compass more than likely was used since humans first began building. The beam compass has been used for ages by blacksmiths, machinists, and engineers in the same fashion as calipers are used for shorter distances. From there, the transition to the use of "tram" as a term for making measurements would be fairly short.

All conjecture on my part.
 
Tom Lipton method.

go to 12:30 for a clearer look at the procedure
I use the keys on my vise but they are narrower than the width of the Tee slot to allow for some adjustment. For use when high accuracy isn't required, I mount the vise so the keys contact the front edge of the slot. To ensure contact with the front edge, I use a block of wood between the column and the rear base of the vise. This will get me to better than .0005" over 6".

If I want better alignment, I note which side is closer to the front of the table and loosen that clamping bolt and loosen the other clamping bolt to just past snug as Tom does in the video above. Then I use his technique to adjust the vise to parallel to the ways.
 
Here is what I do:
  1. I lightly clamp the left side of the vise
  2. zero the indicator on the left side of the jaw as close to the anchor point as possible
  3. move across to the right side and tap the vise to remove half the difference
  4. move back to the left side and repeat 2, 3, and 4,
  5. Lock down the right side and tighten the left side clamps
  6. Recheck alignmnet
The error after steps 2 and 3 arises because the left zero point isn't above the pivot point but amounts to around 10% of the error before correction. You can use "Kentucky windage" to allow for the error. Usually, no more than two iterations are required.
As the original post suggested - fully clamp one side and zero indicator. This keeps that side at zero. Move over and tap until indicator is zero and clamp tight.
No need to tap the vice to remove half the difference - remove all the difference - the original side has not moved.
Send vice back to original position to check, loosen original nut to tap to zero if required.
If using more than 2 clamps tighten them last.
You are correct. In that first post, I was thinking about how I tram the vise on the RT mounted on my RF clone. I actually use the RT for alignment in that case. The pivot point is approximately midway between the two ends of the vise jaws so in that case, removing half the difference is valid. However, when the pivot point is one of the anchor points, removing all the difference is the correct procedure.

In reality, my clamp point on the vise is about two inches forward of the back jaw of the vise so there is a slight movement on that side as well when I pivot the vise. However, for out of tram conditions of less than 25 thou, the movement will be less than a tenth.
 
Hi, to save time I drilled and tapped 2 - 3/8" holes in the underside of my mill vise and attached a piece of 8" x 1 1/2" x 3/8" CR flat stock under the vice that rides along side of the table to maintain dead "0" so no more tramming. Works great.FDD91314-DB3B-4185-B414-B5B9CD711051.jpeg
 
Last edited:
Back
Top