TH54 Atlas lathe rebuild/refurb project (pic heavy)

The 4th of July holiday and a boat load of honey-do's have been keeping me off this project for a little bit, but I'm going to be getting back into it very shortly.

I'm familiar with Oilite bronze as I've used it to make bushings before. These bushings don't seem to have the same sort of fuzzy feel to them as Oilite, and the wear looks like what I'd expect to see on brass or regular bronze. I'd like to get some Oilite to remake all the bushings, but it's not going to happen soon due to lack of funds right now. For now I'll have to put it back together as is till I can get some material to make new bushings with. I'll also be on the lookout for some new shafts for the QCGB as well. If I cant find any shafts I'll probably turn down the ends and shrink fit some oversized sleeves onto them and turn them back down to the original sizes. I'll be sure to drill the oil holes through the bushings so I can keep the wear from getting any worse than it is right now.
 
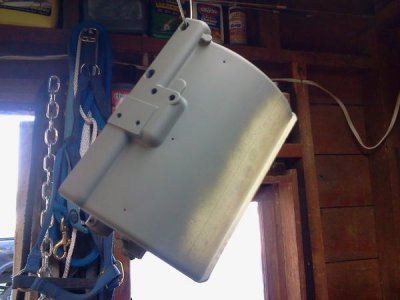
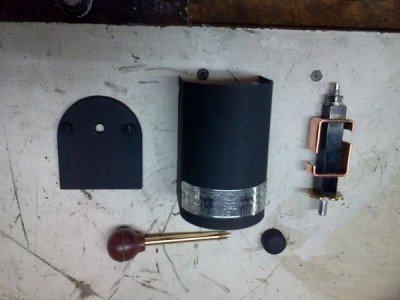
Today I cleaned the QCGB housing shell up a bit more till it was ready for paint. I decided to not paint the area under the levers as it just gets scratched up when the locking pins drag across it. Instead I polished that area from the bottom of the label tag to the notched lip at the bottom front edge and all the way across from side to side. I taped off the polished area and plugged the shaft holes to keep the paint out of the bushings. I used the self etching primer first and let it dry while I worked on some other parts.

2013-07-07182504.jpg

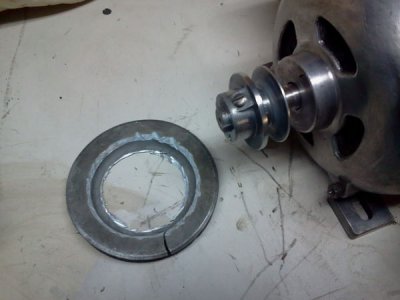
Next I was cleaning up the motor and tried to pull the pulley off the shaft. It was stuck on pretty well so I sprayed it with PB Blaster to loosen it up. The larger pulley wasn't useable any more so I decided to cut it off and just clean up the smaller pulley for now. I took an angle grinder with a thin 4" cut off wheel and started slicing the inside of the larger pulley all the way around till it finally came apart. I left enough material all the way around so I could clean it up on the little lathe. The heat from cutting the pulley helped the PB work the pulley hub loose from the shaft. Once I had it off it only took a couple of minutes to get the pulley cleaned up on the lathe.

2013-07-07223830.jpg

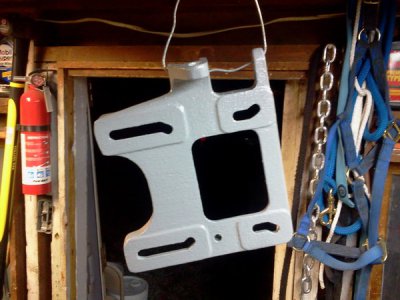
The motor and mounting base got cleaned up next and the base got a coat of primer as well.

2013-07-07225104.jpg

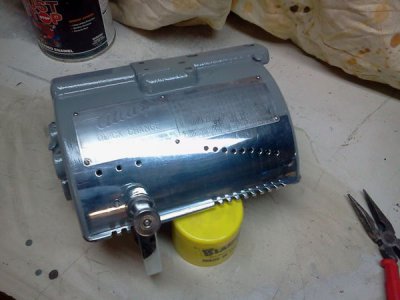
After the primer had dried I painted the QCGB housing and the motor mounting base. While the paint was drying I cleaned and polished the QCGB chart plate that goes on the front. I ended up removing the red paint in the process, but that's fine with me since I'm not a fan of the color red anyway. After the paint was dry I pulled the tape and plugs off and remounted the front plate onto the QCGB housing. I just tapped the screw rivets back into place (not hard enough to dimple the plate) and they all went back in place nice and tight. I hung one of the front levers in place to show what I'm doing with those (yup, more polishing).

2013-07-07223706.jpg

And that's where I left off for tonight.
 
Making good progress! I did the same thing with my gear box and polished the flat area too. Looking good, I am enjoying watching your progress. Keep the pics coming.
 
The cleaning seems to have unexpectedly done the motor some good. Now it starts up every time with no help needed to get it started. :allgood:

The V-belt groove in the small pulley is worn down to a U shape. It'll probably work for now, but it's just another thing added to the ever growing "need to replace" list.

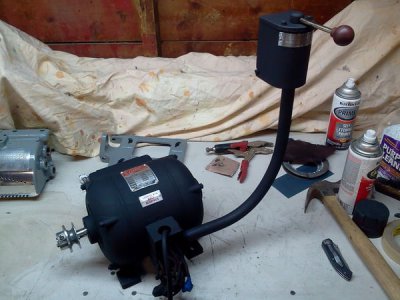
I pulled the drum switch apart and cleaned up the internal contacts as well as the outer shell and switch handle. The switch handle and name plate got polished and everything else was painted black. The only black paint I had was flat. Gloss would have been better IMHO, but this is good enough for me.
2013-07-10193618.jpg

I painted the motor, support arm and drum switch housing with the same flat black paint. After it dried I bolted it back onto the motor plate and reassembled the drum switch.

2013-07-10200222.jpg

One more sub assembly finished, and just a couple more to go before I can get it all back together and up and running.
 
I've really enjoyed seeing your pics. I'm currently restoring my grandfather's TH54 - it looks like you're a little bit ahead of me. I had to scrap the pulley on my motor after I got a little overzealous with the gear puller when I tried to remove it. Before I realized what was happening, the flange of the larger pulley tore out. I tried to bend it back in and braze it, but this Zamak stuff doesn't cooperate very well when it comes to repairs. I ended up finding a used one on Ebay for a decent price. It has a larger diameter (5/8") than my motor (1/2"), so I made a sleeve bushing for it on my 7x14 lathe. You mentioned being stationed in Mississippi in one of your posts. Since I live in MS, I was just wondering where you were stationed.

Allen
 
I'll most likely have to keep an eye on ebay for a pulley when I get ready to fire it up.

The house needed a bit of attention on some fairly major projects so that slowed me down for a while. Now the project is currently back on hold since I started with the fall semester of college again. At least I'll have some time to gather some more parts for when I get back to work on it over the winter break.

I was stationed on Naval Station Pascagoula, MS at SIMA (Shore Intermediate Maintenance Activity) working in the machine shop there from 2000 to 2003.
 
Go figure. I was born and raised in Pascagoula. I live a little over an hour away now near Picayune. That navy base you were stationed at was built on an island made from all the dredgings from the channel. When I was a kid it was simply called "the mud lump".

I took vacation this week and I'm cleaning and painting all of the cast iron pieces. My lathe was passed down to me from my grandfather (in Pascagoula) before he passed away a few years back. I remember being fascinated with it when I was a kid. I was talking to my grandmother on the phone last night and mentioned that I was working on the lathe again and she informed me that my grandfather obtained it from his father, so it would actually make it my great grandfather's lathe. I found the date engraved into the bearing race when I removed the spindle - 12/23/42. Pretty cool. I plan on posting some pics of mine when I'm done.
 
aforsman,

Please post the model number and serial number with the bearing date (or dates, if the two are not the same).

Robert D.
 
Model TH54
Serial #041945
Bearing/race #1 - 12/23/42
Bearing/race #2 - 12/29/42
 
Back
Top