Starting a new shop building

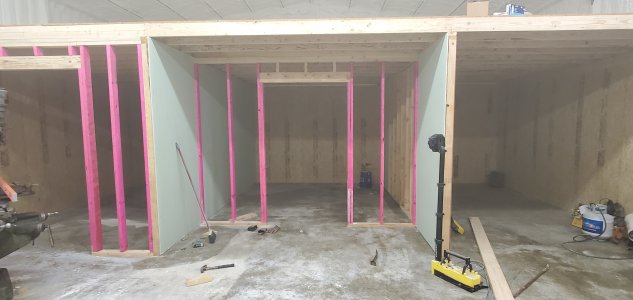
Well, I've got some more done. Things have been slow with the smowmageddon recently. Took a while for me to be able to get some things done. But here we are:
20210227_180554.jpg

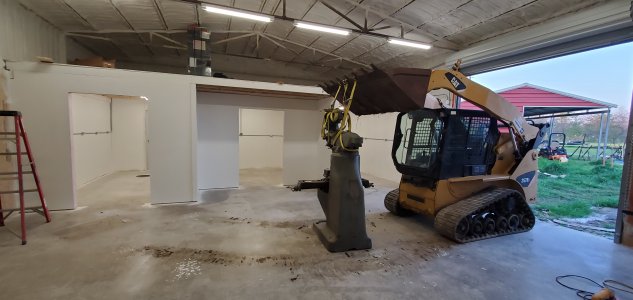
I had enough plywood to deck above these rooms, and to line the walls on both outside rooms. Basically rooms on either side of the center room have plywood all around. The center room has 1/2" sheetrock, as well as the 'exterior' of the rooms. I used what I call 'green rock", which is supposed to be mold and mildew resistant. I don't think it is code compliant for bathrooms any longer in many areas, but 6 years ago it is what was used in my baths around showers and tubs.
20210228_180414.jpg

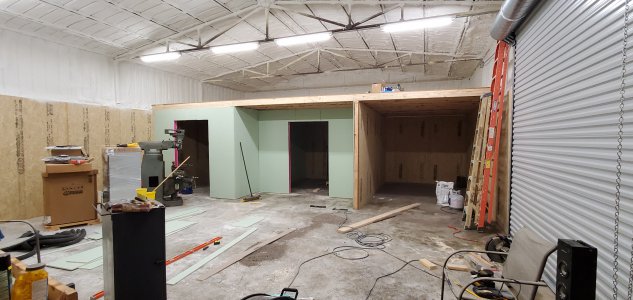
And of course I got the pleasure of taping and bedding.
20210305_152237.jpg

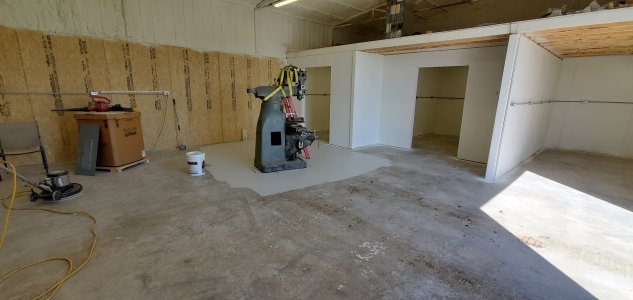
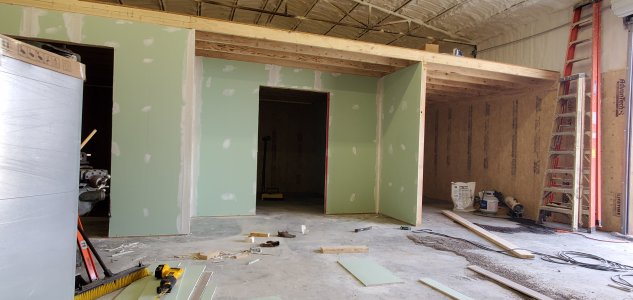
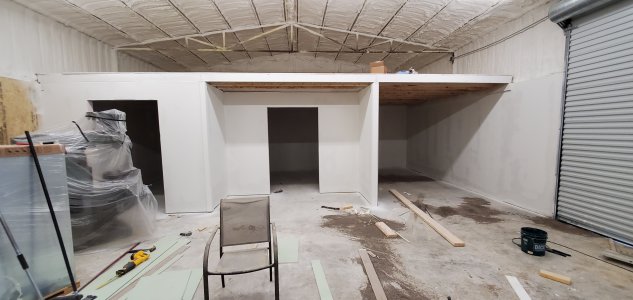
Finally got everything sanded and painted. I used the same flat "maintenance" paint on the walls that I used on the foam. I only painted the walled section of the shop. The big open section, which is where I am standing while taking these photos, was left unpainted.
20210307_175646.jpg

ONe other thing I have done was add an emergency light. This building was built with no windows. I had some concern that working inside if a main breaker went out, or if somehow I lost power I would be standing in the dark. SO, I added an emergency light.
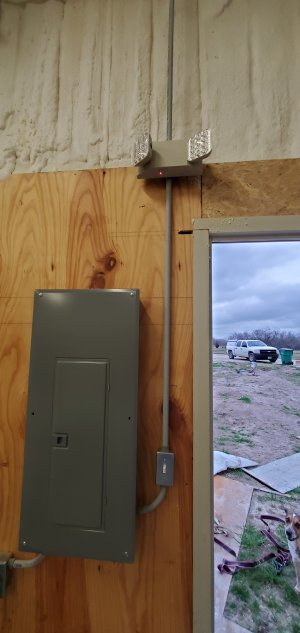
20210305_173612.jpg

It's not really alot of light, but it's enough.
 
I know someone will ask, why not paint everything all around? Let me address that. Basically I'm over budget, not severely but enough. I have been forced to cut a few things I wanted to do to keep it reasonable. I painted the interior rooms for 2 main reasons: 1. I had about 2 gallons of left over white paint from painting the foam, and 2. I needed to paint the sheetrock at least.

I ended up buying another 5 gallons of paint, it was only about $35 for a 5 gallon bucket. That was enough to paint the interior of all 3 rooms, sheetrock and osb plywood on the walls. It was also enough to go back and do a few touch ups to make it even. It did help with how bright the areas seem to be and I'm sure when I add the lights it will be very helpful.

I didn't paint the rest of the shop because I would have to buy more paint and I'm trying not to nickle and dime myself to death. And honestly, I like the look of wood on the walls. Next is running the electricity all around and lights in the rooms.
 
Looking real nice. I admit the paint in the smaller rooms is an excellent idea since you will most likely need it for more detailed work.

I like the idea of the emergency lighting. One question, did you wire it so it would come on only if the light switch was on and the power went out or will it come on any time the power fails, even if you are not in the shop? I assume it will come on any time the power fails. Very smart idea that I had not thought about. Will be adding to the plan list.

As for the budget. You can always address something you skipped today down the road when your budget recovers. Supplies have gotten completely out of hand price wise. Since we are not the goberment, we can't print it so we have to manage it.

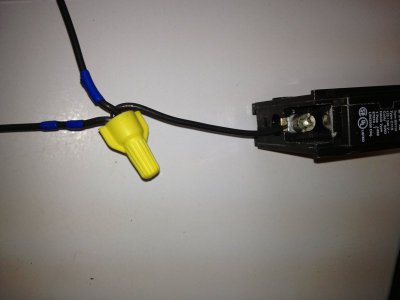
It's known as a pig tail. By code, you can only have one wire connected to a single breaker. SO, inside the breaker box/electrical panel the black wire is connected to the breaker, white to common bar, and ground to ground bar. the black wire coming off the breaker is pig tailed into 2 wires, one goes to the switch to turn the lights on and off, the other goes to the emergency lights so they are under power at all times. The batteries in the emergency lights stay charged. If the light circuit losses power such a throwing a breaker or complete power failure, the emergency lights come on, regardless of the position of the light switch.

Hope that makes sense.

doubletapped3.jpg
 
It's known as a pig tail. By code, you can only have one wire connected to a single breaker. SO, inside the breaker box/electrical panel the black wire is connected to the breaker, white to common bar, and ground to ground bar. the black wire coming off the breaker is pig tailed into 2 wires, one goes to the switch to turn the lights on and off, the other goes to the emergency lights so they are under power at all times. The batteries in the emergency lights stay charged. If the light circuit losses power such a throwing a breaker or complete power failure, the emergency lights come on, regardless of the position of the light switch.

Hope that makes sense.

View attachment 358527

It does, and as I think about it, I should have known that. Must need more coffee or a senior moment.

Thanks for sharing that though. I do like the concept and will be adding it to the design of my shop.
 
It's known as a pig tail. By code, you can only have one wire connected to a single breaker. SO, inside the breaker box/electrical panel the black wire is connected to the breaker, white to common bar, and ground to ground bar. the black wire coming off the breaker is pig tailed into 2 wires, one goes to the switch to turn the lights on and off, the other goes to the emergency lights so they are under power at all times. The batteries in the emergency lights stay charged. If the light circuit losses power such a throwing a breaker or complete power failure, the emergency lights come on, regardless of the position of the light switch.

Hope that makes sense.

View attachment 358527
I did not know this was allowed under code.
 
Actually the pigtail was done inside the switchbox. The photo was just for explanation, it's not mine.
 
Update:
I have the 120v electrical installed in all rooms and around the shop. This is the 'main' section of electrical work I need. I will need to add a couple of 220v circuits for my Radial Arm Saw and Tablesaw, as well as running to my RPC for the mill and lathe.

The B'port clone mill was bought a while back, and inside this building was the only place I had to put it.

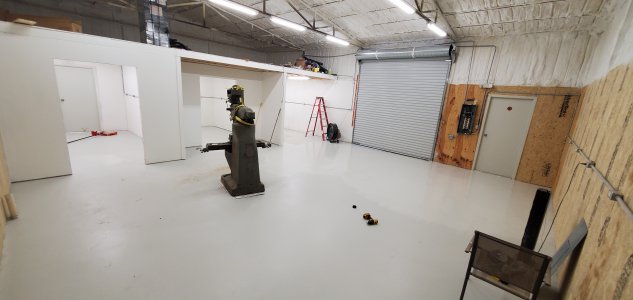
I made some mistakes when working on the building, mainly I didn't protect the floor while doing the spray foam. I got overspray on it in places. Then I compounded that problem by painting the walls without protecting the floor. I assumed I could easily clean it up and then do some sort of densifier sealer to keep the dust down and help with stains. Turns out, spray foam won't come off and paint is pretty tough to get up all the way as well. So, I decided to 'paint' the floor. I got a floor buffer and used 36 grit sandpaper all over the floor to clean it as best I could. It did nothing to the concrete but did remove the foam overspray and some of the paint. I figured what paint was still stuck after that was good enough to paint over anyway. I had to move the mill, paint the area where it would go, then put it down, then paint the rest of the place.

20210401_192211.jpg


20210402_102926.jpg

20210411_182757.jpg
 
Back
Top