Southbend 9 x 48 - How worn is too worn?

From my observation of Taz, He has ample experience in scraping, is an excellent mechanic and teacher. Taz your disassembled pictures and the information you provided to the group looks as if you were instructing and helping the other SB owners with a "how to" post. I believe many here like to give advice because they care and think they are helping.


Thanks for your posts.


Rich

PS: I am back from my vacation and was immediately depressed....came home to 12" of snow in my driveway Monday night, Last night it snowed again. UuFDAH.. We were so lucky compared to those poor folks on the Carnival ship.

 
Last edited by a moderator:
From my observation of Taz, He has ample experience in scraping, is an excellent mechanic and teacher. Taz your disassembled pictures and the information you provided to the group looks as if you were instructing and helping the other SB owners with a "how to" post. I believe many here like to give advice because they care and think they are helping.


Thanks for your posts.


Rich

First of all, wow, and thanks so much! I feel like I get more help and input here than any other forum I've ever been a part of. Much of what I learn these days are from threads exactly like this one, where someone else's questions got me the answer for mine, so I try to be detailed. Making deposits, not just withdrawals so to speak.

If someone can benefit from my experience, great! If someone can benefit from my in-experience... Even better! Not many places in the world where the
latter is possible, I'm greatful for this one.

BTW hope your cruise was/is great!

Chad
 
Duplicate... Deleted.

Chad
 
Last edited:
....I'm preparing for a wet fit this weekend before I get to the rest of the painting.....but I actually enjoy scraping.
Sidenote... rebuild kit arrives today!
Hi Chad, I hope the trial assembly of the head stock goes well (I guess that's what a "wet fit" is!). Look forward to seeing pics etc as usual.

I love old machines and doing a general fix-up and nice paint job. But the thought of scraping slide ways is beyond my enthusiasm. I completely rebuilt the tailstock of a TOZ Toolroom Lathe as one of a group of apprentices who reconditioned the machine. Scraped the base to the (hardened) bed, machined the top and made a packing plate to bring it back to centre height, and made a new barrel, internally grinding the Morse taper. That was the experience of a lifetime i.e. I never felt the need to do it again...:))

Next month I hope to start the resto of my 1914-ish 10" Pratt & Whitney. Luckily, all the slides are almost like new, amazing for a century old lathe.

BTW Chad, your SB9 rebuild has convinced me to order the manual and rebuild kit for my (Dad's) '47 SB9 (post#31), and mount it on a cabinet stand (with the horizontal drive setup as per your pics, thanks). The timber bench in the photo was full of borers, so the lathe is on the floor at the moment. It's in perfect condition, but seeing the oiling felt in your headstock made me realise that after 65+years, it's time for a strip down (careful with the original paint), clean out, new felts etc.

Chad, thanks for starting this thread, and thanks to all others for your posts, it is really interesting.

Regards, RossG.
radial1951
______________
 
I admire your experience Ross. I spent much of my life focusing on where I was headed, and found it terribly difficult to be wherever I was. Today, with a crazy job, I enjoy an act that yields something beautiful at the end, but I find peace in the act itself! I'm always a little sad when there's nothing minuscule left to quibble over, though I do understand where you're coming from.

Wet fit = dry fit with oil. I was taught that something that needs oil to run, needs oil to assemble. Later in life I learned that in a sterile environment thats not necessarily true, but my shop is far from sterile! So... I wet fit.

Had meetings till late tonight, but I did manage to spray a little paint, and clean almost everything else (bed, cabinet, and motor mount are all that's left).

I was thinking, since I have it apart, and it wouldn't take much. What do you guys think of a real life exploded parts view? I have a copy of the parts list for a very similar model, and thought it would be cool to arrange the parts in the same fashion as the drawing, photograph in high-res, and label them just the same. Might be a handy reference for future rebuilders. Does this exist already?

Chad
 
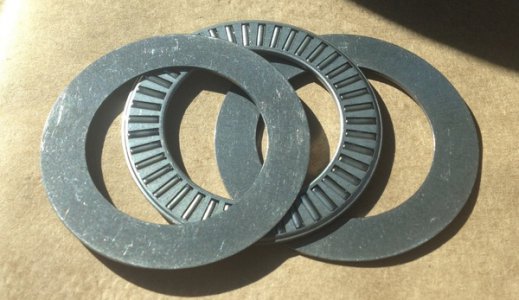
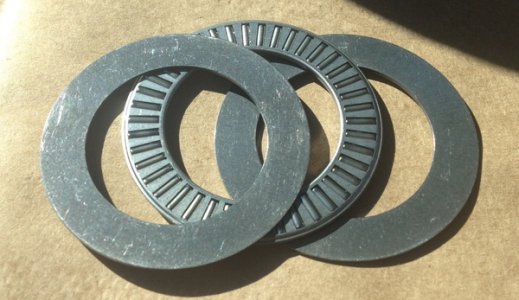
More parts came in! Funny the fairly standard and very expensive thrust bearing didn't come in, but this one came 8am next day. Overly insane load rating on these, for $4.00, 1/5 the price of the thrust bearing.

018CADCF-38F7-4C62-8546-F5E54C45D7DC-1580-000000B059B35217.jpg

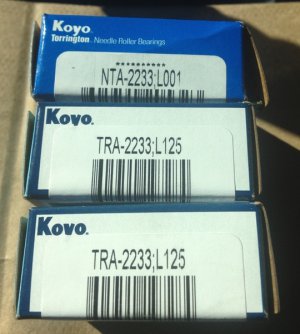
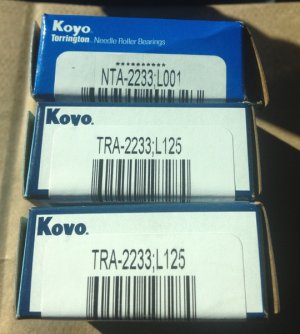
For those who have an IBT close by, and want to go this route, here are the part numbers.

Koyo
NTA-2233;L001 x 1
NTA-2233;L125 x 2

D29214D0-C7B3-4E72-BC7F-6CE38A6B29D7-1580-000000B0787B3CD2.jpg

Chad

018CADCF-38F7-4C62-8546-F5E54C45D7DC-1580-000000B059B35217.jpg

D29214D0-C7B3-4E72-BC7F-6CE38A6B29D7-1580-000000B0787B3CD2.jpg
 
Last edited:
I was thinking, since I have it apart, and it wouldn't take much. What do you guys think of a real life exploded parts view? I have a copy of the parts list for a very similar model, and thought it would be cool to arrange the parts in the same fashion as the drawing, photograph in high-res, and label them just the same. Might be a handy reference for future rebuilders. Does this exist already?

Chad
I think that would be a great thing to do for many on this forum. For current members and those that would come long after your build is done. I don't know if it already exist :dunno: but it sure would be cool to have a fresh version.
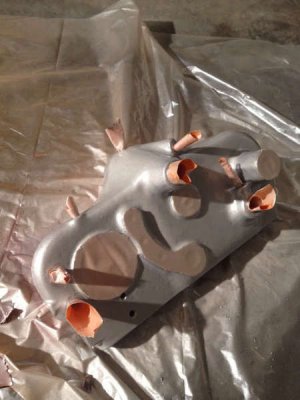
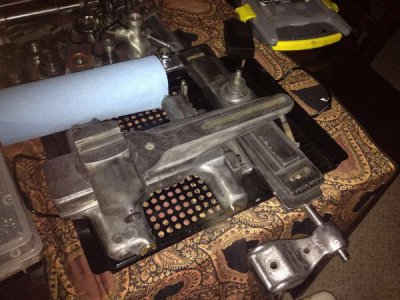
 
it sure would be cool to have a fresh version.
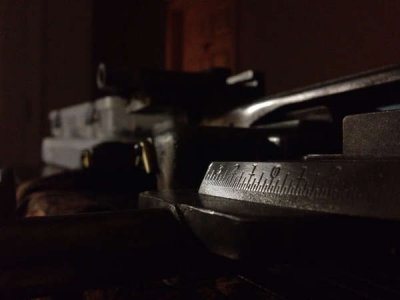
I think so too! I would have loved to see a photo-catalog of all the parts. Just to learn all the part names, and see that what looks like 20 pieces assembled is really more like 100 LOL. I bet you I could make an interactive PDF or something that one could download, where clicking a part would pop-up an info-box, or take you to another page with close ups or additional data... Hmmmmm.......


Chad
 
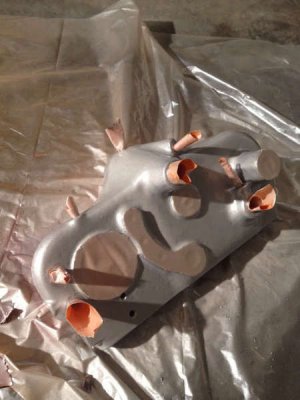
Not too much time to myself this week, and I leave town tomorrow on business for a week, but I did knock out a bunch of the small stuff. Got the remaining paint off of most of the parts, cut the ugly back off the motor mount plate, formed the bed of that plate to match the motor mount foot, polished lots of steel, took my first shot at the main color (didn't like), and even squeezed a little scraping in.

Too much of the natural iron color is coming through this to shoot it straight. Its supposed to be a white pearlescent, but looks silver. I found a combination of white base coat, light flake champagne middle coat, and THEN pearl that looks better, but now that I see how much of the irons texture comes through I'm debating whether to bondo and smooth, or use a hammered base coat to even it out.

Here's the un-successful shoot.
a27077826aa3c5afa39fbbe5d3a18794.jpg

Painted parts all clean. These things have many parts!
8d294623ac69b4e3ecb8e31e710294ac.jpg
003a7be62bcbfc397216ee0ec495cebc.jpg

Little scrapey scrape.
a77edcbc3b25c07c4da795a47fc4aec2.jpg
Started in on the taper attachment, it's almost done too.

This thing was disgusting. There was barely contact point that wasn't black as night. Just about everything in there was covered with a good coating of soot. I can't imagine that's very good for the power curve.
7cfa2076e26feafe29bc77423b05fcc7.jpg

Guess I gotta take a week off, and go make that money!


Chad

a27077826aa3c5afa39fbbe5d3a18794.jpg

8d294623ac69b4e3ecb8e31e710294ac.jpg

003a7be62bcbfc397216ee0ec495cebc.jpg

a77edcbc3b25c07c4da795a47fc4aec2.jpg

7cfa2076e26feafe29bc77423b05fcc7.jpg
 
What size V-belt does it have?

Chad, those bare castings are really nice. Did you clean them up with a wire whee, or a buff? They look too good to cover them up with paint!

I realise your lathe has a "custom" mounting position for the drive, but just wondering what size V-Belt is fitted.

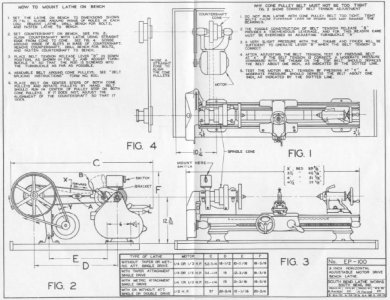
Does anybody know the correct V-Belt size to use from the countershaft to spindle on a horizontal drive bench model SB9". Mine currently has a B-51, the original Hoover 1/2hp motor with 2 step V-pulley. Can a shorter belt be used to keep the bench width to a minimum? (It's in pieces on the floor waiting for a new bench/cabinet). The drawing shows different positions for the countershaft (it's not very clear). I can't see why taper turning or metric attachment would affect the position of the drive. Any ideas?

Regards, RossG
ragial1951
_____________

South Bend 9" Drawing and Set Up.jpg
 
Back
Top