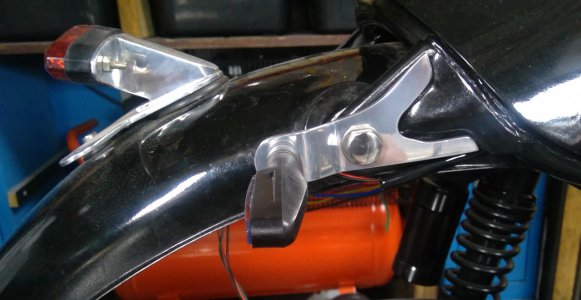
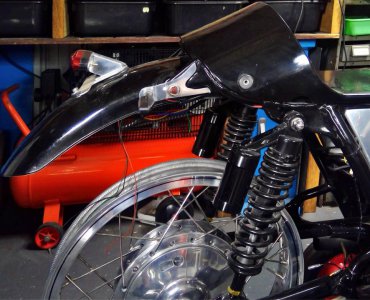
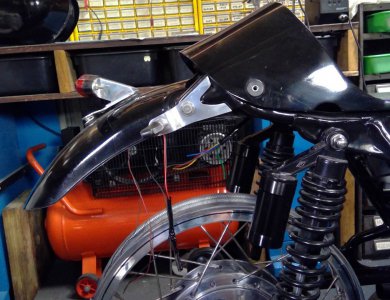
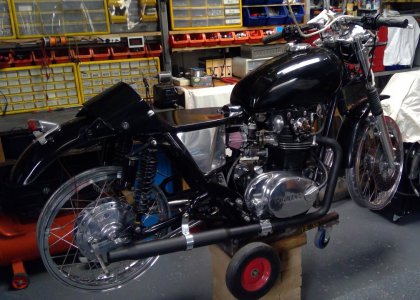
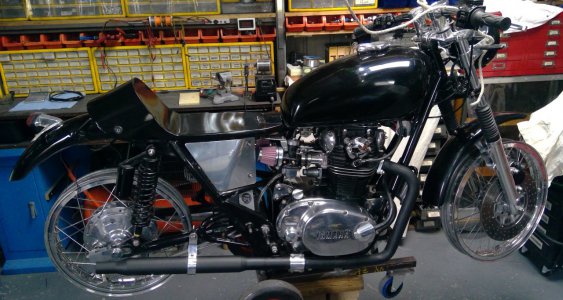
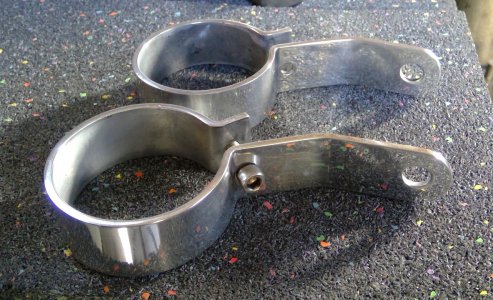
The indicators I bought don't have a long enough threaded section to go through the guard bracket, so I made these extension brackets to mount the indicators on. The V shaped cut out at the rear of the brackets fits around the frame tab protrusion, thus stopping the brackets from moving.
-
Welcome back Guest! Did you know you can mentor other members here at H-M? If not, please check out our Relaunch of Hobby Machinist Mentoring Program!
You are using an out of date browser. It may not display this or other websites correctly.
You should upgrade or use an alternative browser.
You should upgrade or use an alternative browser.
Some work on a TX650.
- Thread starter th62
- Start date
Nup, binned them. Looking at the picture I noticed the line on the top the aluminium bracket doesn't follow the line on the top of the frame tab. So I made a new pair. Not a lot I could do with the bottom line as the tab angle is different to the guard angle, so I followed the tab angle down to the bottom of the guard then followed the arch of the guard. I might have to thin it down a bit though, looks a bit too big???
Attachments
A few weeks ago I sent off for some tapered mufflers, these were said to suit from 38 - 45mm pipes using the supplied sleeves. Well they came, but aside from being chrome when I ordered black, they were rubbish: The spigot that goes over the exhaust pipe is tapered, so no matter how tight the clamp is done up, they have an alarming amount of movement, so I wrapped them up and on sold them.
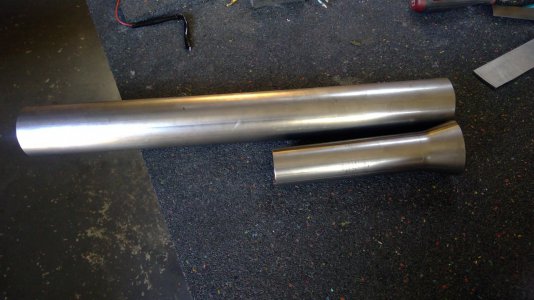
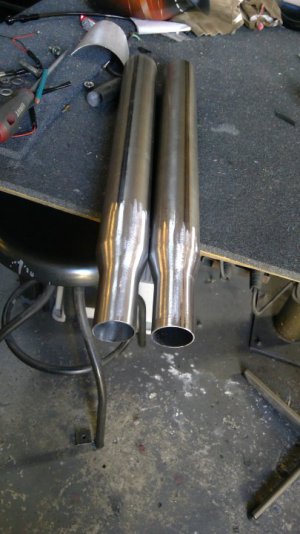
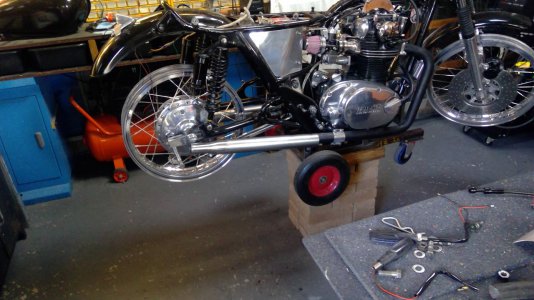
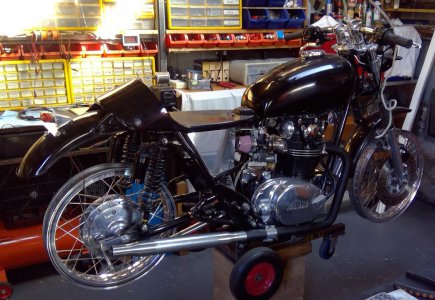
Today I went to an exhaust shop and bought 1.5 m of 57 mm pipe and the same amount of 41mm pipe and asked the guy to taper the ends of the 41mm pipe out to 57mm. This was just an experiment mind, just wanted to see what they'd look like. Once I'd welded the tapered cones on to the 57mm pipe, I slid the 57mm end of the mufflers over the exhaust, stood back and had a squiz. Very pleasantly surprised, they give the bike the look I'm after. So next week, or whenever, I'll get some 45mm pipe and get the guy to expand the ends out to 57 mm and weld them on to the other end of the muffler.
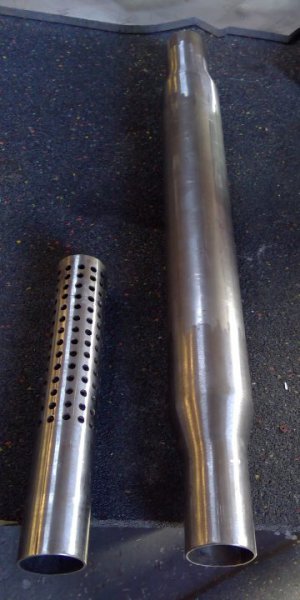
The plan is to make up a couple of long baffles and slide them all the way inside the mufflers, start the bike and gradually slide the baffles out until I achieve what I think is an acceptable noise level. I'll also throw a bit of fibreglass insulation in the bodies to dampen the high level noise.
They look a bit Pommyish, but that's alright, I like Pommy bikes.
Once I've finished the mufflers, that's pretty much the build finished. So I'll strip it down, repaint everything again, give the tank a coat of isocynate free clear coat and stick the bike back together. All that remains to be done then is get some tyres fitted and upholster the seat. That'll be the end of my bike building days though, unfortunately, this build has pretty much stuffed my body, my elbows are stuffed, can't doing anything without lots of pain now. So once finished I'll probably book elbow replacement surgery and retire from life. Although, every now and again I'll probably wander out to the workshop, sit on the bike, blow through my lips to make some bike noises, dribble down my chin and remember the good old days of my youth. Still a bit left to do though.
Attachments
Finished one of the mufflers today, plus a baffle. Unfortunately, none of the tube sizes will slide inside the next size up, .25mm too big. I did, consider getting the exhaust guy to expand the tubes, but, I don't share their idea of a 'good fit'. So, using a drum sander I shaved .25mm off the inside of the tail pipe and the same amount of the receiver end. Now, because round tube is not round, more egg shaped, I can match the oval shapes together, push one tube in, twist and get a really tight fit.
Baffles were fun to make, 168 holes in total. I drilled 14 along the length of the pipe, then drilled another 11 lines of holes around the circumference, by the time I'd drilled the last line the holes didn't match up, so, I mounted another piece of tube on the lathe and used the bit to scribe lines along the length, 9.9mm apart, then used the dial indicator to mark around the tube at 10mm intervals, then drilled using the mill. Success. I know you can't see the holes in the baffles and it won't make any difference, but,
At least I'll know they are neat and the rows and lines match.
All I have to do to tune the decibels is start the bike and pull the baffle out until I'm happy with the noise level then cut the excess off. In area, I need 58 x 5mm holes to match the area of the exhaust pipe outlet, I can probably go a few less actually because the exhaust outlet is only arlound 34/36mm as is the baffle outlet.
Welding the cones front and back was also fun: Tacked the cone in four places as straight as I could get it, then mounted the muffler in the chuck, spun it and using a dial gauge, marked where I needed to weld in order to pull it straight. Four times from memory I did this, with 25mm long beads. The tail pipe on the other one I did yesterday, manually, is a little off, but I'll remedy that after I've added the receiver cone.
A good day today, muffler gives the bike the look I wanted. Once both are done, I'll double skin a portion on the inside, weld some mounting points on, then paint them black. Not sure what type bracket to use, but it will attached to a polished aluminium stay bolted to the pillion passenger peg mounts. I'm thinking of a wide polished aluminium clamp around the body of the muffler, that will negate the need for double skinning. I can feel a 'try and see' coming up
Attachments
Finished off the muffler today and made a polished aluminium hanger for it. I was going to double skin a section on the side of the muffler and weld mounting tabs to it, but decided this full cradle hangers would look better, plus, nothing to break off from the vibration. Happy with the result, these mufflers look nice and suit the build I think.
Attachments
Very nice. Better quality than factory, it appears. Will the hangers be painted to match the pipes? Very nice either way. I had a heck of a time keeping fiberglass packing in my Emgo slash-cut shorties. Ended up with stainless steel pot scrubbers sandwiched between inner and outer layer of fiberglass cloth, all wrapped and wired around the center perfed core. Happily, the Emgo center core is removable via just one bolt.
One man's polish is another man's paint prep. As I said, looks nice either way.Why on earth would I polish the hangers if I was going to paint them?


