Well, I finally have the Power Draw Bar completed, and it works great. Changing TTS tooling is a breeze now. The design is similar to others I've seen online but I wanted to use the CNC Mill itself to do some of the work as a learning process. I did have to do some research on belleville spring washers and Oring gland design to complete the design, but I always enjoy learning something new. I've provided an explanation below of how this was designed and built along with some photos. Perhaps someone else can benefit from this.
The Tormach Tooling System (TTS) uses a modified 3/4" R8 collet to capture the various tooling, all of which have a 3/4" shank. You can use a conventional draw-bar but this requires a couple of wrenches and 3rd hand to catch the tool as it falls out, not a very user-friendly method. There are a couple of different styles of Power Draw Bars you can go with. One basically uses an air wrench to tighten and loosen the draw bar. The other uses an air cylinder to push the draw-bar down against some spring washers, which is the method I chose.
However, there are a couple of things to consider when using the air cylinder method. To create enough force on the draw-bar to hold the tool in the collet you basically tighten the nut on top the draw bar through belleville spring washers. The belleville spring washers will then be compressed to push the draw-bar down. This requires a significant amount of pressure and consequently a very large air cylinder to do this. One solution to this is to use a 3 stage air cylinder which is basically 3 air cylinders in series which triples the force. The second thing to consider is that you don't want to press down on the draw-bar directly against the spindle bearings to avoid damaging the bearings and/or the headstock.
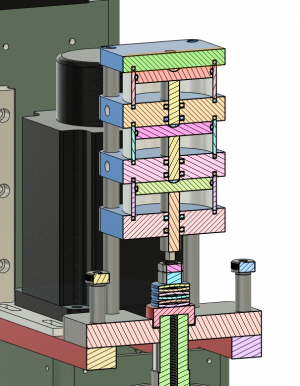
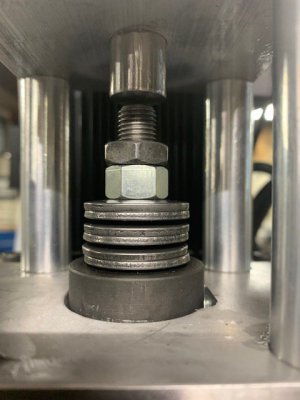
For this design I used belleville springs washers with a working load of 1,890 lbs. (McMaster-Carr 9712K436). Each spring washer will deflect 0.025" at this load. I used 6 spring washers stacked in series to give a total deflection of 0.150", which should be enough release the collet. I designed the air cylinders with an ID of 2.75", which gives an area of about 5.9 sq inches. My shop air is set at 120 PSI so doing the math each cylinder will produce about 700 lbs of force. 3 cylinders in series will then provide about 2,100 lbs of force which is enough to overcome the belleville spring washer stack. Belleville spring washers stacked in series do not increase the working load, it simply increases the deflection distance.
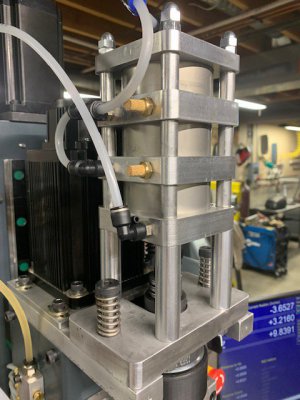
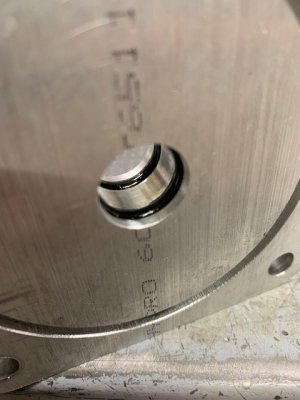
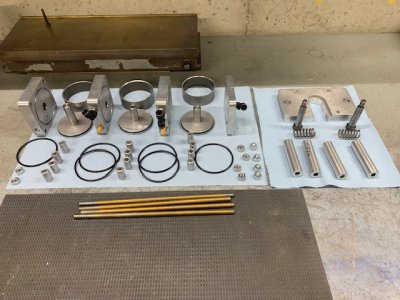
I found some small "mute" cylinders on-line that were about the right size and were only about $7 each. I did cut them in the lathe to the needed length. I made the pistons from 3/8" aluminum with a single groove for an Oring. The push rod is 5/8" stainless steel connected to the piston with a counter sunk flat head screw. The top and bottom of the cylinders are 3/4" aluminum to allow room for an Oring groove to seal the cylinders. There are two Orings to seal the push rods. Cutting those internal grooves on the lathe was the most challenging part of the machining. Each air cylinder has an inlet port on top the piston and outlet port on the bottom of the piston to allow the air under the piston to escape. I use the outlet port on the bottom cylinder as an inlet port also to push the piston stack back up. There are spacers between each cylinder to allow proper compression of the Orings on the top and bottom of the cylinders. The whole assembly is connected with four B7 grade 5/16" threaded rod. The draw-bar itself is B7 grade 7/16-20 threaded rod.
There is a collar that rides on top of the spindle on which the belleville spring washers sit. The cylinder assembly is connected to a 3/4" aluminum "lift plate" which pulls up on the collar and compresses the belleville spring washers when the cylinder is activated. The nut and lock nut on the top of the draw-bar are used to set holding torque on the TTS collet. I used electric air solenoid valves rather than manual valves so I could enable the Power Draw Bar only when the spindle is not turning as a safety feature.
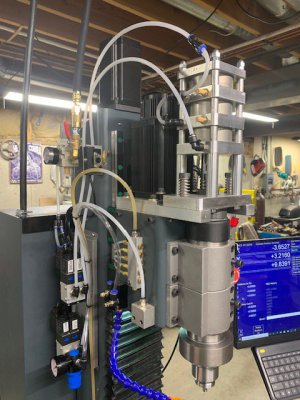
This has been a long but fun project. I have lots of things planned for the mill. I'm working on the design for a shop-built CNC Lathe which will be a future project for which the CNC mill will likely be useful. And I'm already using it for parts needed on the restoration I'm doing on a Harig surface grinder. Thanks for all the comments and replies.
Jim

![IMG_1532[1].JPG IMG_1532[1].JPG](https://www.hobby-machinist.com/data/attachments/415/415770-6af2a5906a636e5bd20ce85ed3b85571.jpg)
