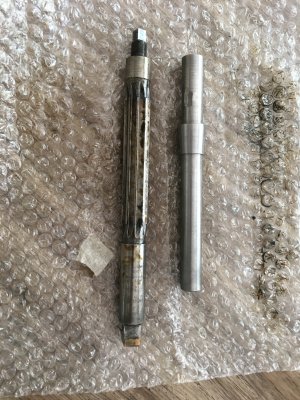
Reaming experience advice appreciated

Firstly - following the thread hijack rabbit-hole. I rode a vintage 500cc Velocette across part of what was Rhodesia, along with a friend who was riding a Norton. After the "accident" where he rode into a deer, I ended up taking the deer home strapped across the back of the Velocette. We kept to the back roads in the early evening, not wishing to explain this novel form of "hunting". The venison biltong (jerky) turned out great! (er.. a little yada??)

To reamers: Many kinds - adjustable even, some with square ends as "hand reamers". We get spiral reamers, too, which prompts the question. On the fine finish spiral reamers, is it that they have a LEFT-hand spiral, but with the cutting edges on the back of the flutes such that they are rotated clockwise?.

Are reamers with RIGHT-hand spirals ever known?
It's just that I can get confused. When we say (RH) reamers, we mean ones which cut when turned clockwise, regardless that the spirals might go the opposite way to (say) the flutes on a drill bit.

I do know that if you try to use a straight flute reamer up a hole with a keyway, the situation is more or less doomed!
 
And down the rabbit hole we go. Rode an ‘83R100RS for 25 yrs, also Moto Guzzi Le Mans & Norton Commando. Now have a BMW F800ST, yada, yada, yada......

I love this rabbit hole...... great to have company as I slither down...

This is my sons bike on which I did a major engine rebuild on about four years ago.DSC05802.jpg
 
I concur with what projectnut said. I have never had any luck with those adjustable blade reamers, they tend to chatter and make a total mess of things.

What I have found useful is the older spiral solid reamers that have an adjusting screw on the end. The screw on the end will force the body of the reamer to distort and open up a bit larger (some number of thousandths, not as lot!). You can make a guide that screws over the adjustment screw if it does not come with one.

These are all "hand" reamers, so should not be used in a drill. Here is an example:

Always turn (RH) reamers in CW direction only otherwise you will ruin the cutting edges. Do not reverse direction to remove!

Now we seem to be getting somewhere.... its hard to gain experience without expense...... lucklily I have just enough experience to know that I needed a lot of help.... before I went ahead and stuffed the job up.

Thanks for your help.

Mal
 
Firstly - following the thread hijack rabbit-hole. I rode a vintage 500cc Velocette across part of what was Rhodesia, along with a friend who was riding a Norton. After the "accident" where he rode into a deer, I ended up taking the deer home strapped across the back of the Velocette. We kept to the back roads in the early evening, not wishing to explain this novel form of "hunting". The venison biltong (jerky) turned out great! (er.. a little yada??)

To reamers: Many kinds - adjustable even, some with square ends as "hand reamers". We get spiral reamers, too, which prompts the question. On the fine finish spiral reamers, is it that they have a LEFT-hand spiral, but with the cutting edges on the back of the flutes such that they are rotated clockwise?.

Are reamers with RIGHT-hand spirals ever known?
It's just that I can get confused. When we say (RH) reamers, we mean ones which cut when turned clockwise, regardless that the spirals might go the opposite way to (say) the flutes on a drill bit.

I do know that if you try to use a straight flute reamer up a hole with a keyway, the situation is more or less doomed!

Great anecdote re the road kill.... glad it did not go to waste.

Thank you for sharing your knowledge on reamers.... much appreciated.


Mal
 
another way to skin the cat is to make your own reamer out of tool steel (O1 or similar) and make a leading and trailing "pilot". The first is sized to the existing hole and comes before the cutting edge(s), the second comes after the cutting edge and is sized to the larger bore. It's a little tedious to make, but with a bit of care (and maybe a test piece or two first!) you can end up with a really nice tool that does exactly what you want.

Different application, but this is one I made for enlarging the holes on one side of a bike frame but so that the enlarged hole was still aligned with the one on the other side.
IMG_8637.JPG
IMG_8638.JPG

not sure how well it'll work for your application, especially with regards to finished tolerances, but another way of thinking about the problem.
 
another way to skin the cat is to make your own reamer out of tool steel (O1 or similar) and make a leading and trailing "pilot". The first is sized to the existing hole and comes before the cutting edge(s), the second comes after the cutting edge and is sized to the larger bore. It's a little tedious to make, but with a bit of care (and maybe a test piece or two first!) you can end up with a really nice tool that does exactly what you want.

Different application, but this is one I made for enlarging the holes on one side of a bike frame but so that the enlarged hole was still aligned with the one on the other side.
View attachment 334769
View attachment 334770

not sure how well it'll work for your application, especially with regards to finished tolerances, but another way of thinking about the problem.

Your suggestion has merit. I did make some trapezoidal taps for a project I did recently.

My concerns re your idea - which should not be read as NOT GOING TO TRY IT

1. I don't have any suitable tool steel of the correct dimensions - I checked the price for a length of 22mm O1 tool steel - nearly $400 australian.
2. I would want the tap to be spiraled - so that means I would have an excuse to finally commission my super dividing head which cuts spirals
3. I would need to make it a little over sized to allow for the heat treatment and tempering process
4. I would have to sot out my planned precision grinding attachment for my lathe to dress the finished reamer to spec.

As you can see a few hurdles to leap over in that little lot, but all good things to undertake.
It is just a question of time and how to reduce my to do list down to several thousand pages!!!!!!!!!!!!!!!!!!!!

However I am indebted to you for the excellent suggestion.

Mal

MAL_0734.jpg
 
Last edited:
Pics of a "line reamer" guide setup that I came up with to ream out a pair of welded in bushings that would then take a slip fit pin.
I made the guide rod and "cone" pieces, which you can sometimes buy as well. With this setup you typically do a little from each side until the desired clearances are reached.

The guide rod has a carefully drilled and tapped hole that fits somewhat snuggely on the reamer adjustment screw. The fit between the rod and cone is also a slight slip fit.
 

Attachments

  • reamer_guide.jpg
    reamer_guide.jpg
    2 MB · Views: 5
Pics of a "line reamer" guide setup that I came up with to ream out a pair of welded in bushings that would then take a slip fit pin.
I made the guide rod and "cone" pieces, which you can sometimes buy as well. With this setup you typically do a little from each side until the desired clearances are reached.

The guide rod has a carefully drilled and tapped hole that fits somewhat snuggely on the reamer adjustment screw. The fit between the rod and cone is also a slight slip fit.

As a matter of interest what material were the bushes made of? Could I assume steel on the basis that you said welded in?

Also just confirming, the guide set up rod is the neat size of the original worn hole and the taper acts to centre the reamer as the size of the hole is increased in size Or have I got this all wrong?

Mal
 
The bushings to be reamed were steel, made from DOM tubing.
The guide rod needs to be smaller than the ID of the bushings and the guide cone needs to be sized to make contact with the ID.
The attached pic shows it in use; the guide cone is on the far right hand side.

bushing_reamer2.jpg
 
Back
Top