Quickly Aligning A Four Jaw Lathe Chuck

In regards to Abom79. There's no special technique that he uses. It's just the fact he's so good at it that makes him so quick at doing it in front of your eyes. Adam is one of the Youtube machining guys. You won't find posts here about it, although he happens to be a member here but really doesn't come here much. You have to watch his channel to know what he's about.
 
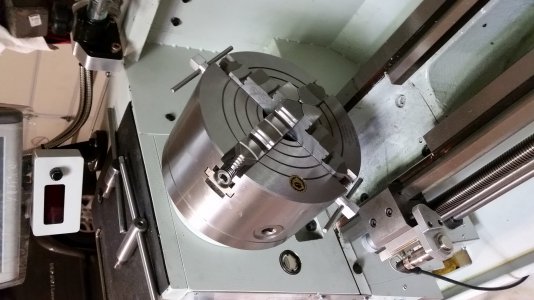
Also use the twin key method for adjusting a Bison 4 jaw combination chuck (Scroll + Independent). Made two keys for the independent jaws with magnets in the end. The magnets keep the keys in place when turning/adjusting and checking the run out. The combination chuck is a bit quicker to set up then a independent, I set all 4 jaws to a fixed stop/position, then scroll down onto the piece. Check run-out with a dial indicator, and tweak the centering using both keys at once on opposite jaws. Scroll feature of the combination allows doing repeat pieces quickly, and with very little variance (but I still recheck). I am pretty compulsive of not leaving the keys in the chuck at any time other than when I have my hands on the chuck to adjust it, even if it is to get something else, I remove the key(s).

The combination chuck also works great for square/rectangular stock. Really liking this chuck the more I use it.


Bison 4 Jaw combination chuck.jpg
 
The magnets are a very clever idea but I'm not envisioning where they are located and how they are secured. Any chance of posting a photo with a brief "how to" description ? Thanks and that's a very pretty chuck !
 
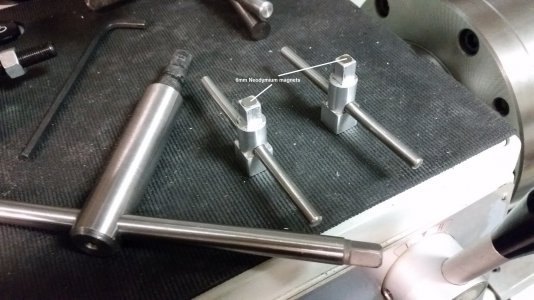
I bored a 6mm x 1.5mm deep hole in the end of the key with an end mill. Used a bit of metal bonding epoxy to secure a 6mm x 1.5mm Neodymium magnet in the end. Picture of the new keys with magnets and original key. Much easier to setup with the dual keys, and I do not have problems with the keys falling out when I turn the chuck to check the alignment. The keys are not that heavy and the Neodymium magnets can be quite strong when in direct contact with ferrous metals. The applied hand torque is similar and more even/balanced than the original key, it is also possible to torque the new keys evenly using the square end of each key (fits a 5/8" 12 point socket).

Like the designing "Vacuum Tube Amplifiers"... Have lots of tubes and run some Cary 805AE amps with modified Quad electrostatic speakers, too chicken to build anything running a 1000+volts.

Bison combination chuck keys with magnets.jpg
 
Many thanks, it's very clear and again a very clever idea which I intend to steal :)

Glad that you liked my book; I designed all of my high-voltage supplies and they are limited to 450 volts. At one of my previous employers, we used a HUGE vacuum tube amplifier to drive a 500 pound vibration table up to 20g acceleration. The amplifier made the lights dim when the plate supply was enabled and the 400 SF room would heat up about 10 degrees F in the fifteen minutes or so required to make a vibration run. I often wondered about the courageous tech that serviced that amplifier.

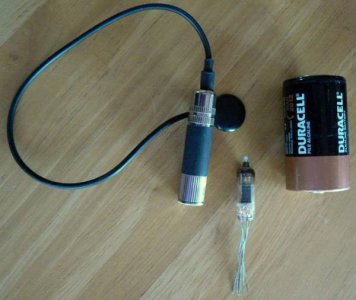
At the other extreme is this little dual triode that I intend to use as a preamplifier for the piezoelectric transducer shown beside it. This will be used on an old Gibson J-55 guitar. The preamplifier will be built into the guitar cable as a small module very near the guitar jack to minimize high-frequency attenuation from cable length. Note that the vacuum tube is smaller than the guitar jack.

P1040401_zpsdd1bc2a7.jpg
 
Last edited:
...Much easier to setup with the dual keys, and I do not have problems with the keys falling out when I turn the chuck to check the alignment. The keys are not that heavy and the Neodymium magnets can be quite strong when in direct contact with ferrous metals...[/ATTACH]

A final question: is the body of your chuck keys non-magnetic (i.e. titanium alloy) ?
 
cheers for that.
put my 4 jaw on this morning just to try it. although had to cut bit of plate to use as only one key.
what a difference.
now ordered spare key.
 
The keys are aluminum alloy and stainless T bar held in with a set screw, just what I had on hand. But could also use steel. I can use much shorter keys because the independent jaw adjustments move with the scroll, an independent only chuck would need longer keys. Once set, the repeatability with the combination chuck is quite good, but I still verify TIR as small variances in jaw pressure or material size can change the center. Yet, one can zero the piece very quickly with the dual keys.:D
 
I started with the 3 jaw chuck and it was about .005 off from the beginning. Not bad for most of what I was doing, but for precise work, every time you re chuck you add the concentric errors.
I would mark the work to fit it to the chuck for return cuts and use the indicator to get it back. But the part held in the chuck is centered different than the part of the work I just cut.
You can also use a homemade lathe center with dog and cut it each time you use it.

Once I started using the 4 jaw, I will never go back to the three jaw. The 3 jaw is more work to maintain concentric parts.
It seems like it would be less work; but if you want precision, you have to work around the reality of this design.

When doing production parts, you can turn two of the jaws out the same number of turns (or half turn or whatever is required), to release the part.
Then put the next part in and turn them down the same number of turns, then dial it in fast.

I have one key now and have been looking for a second.

Just some thoughts.
 
Last edited:
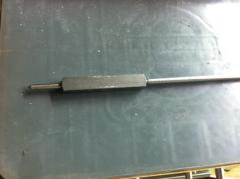
I have made this tool to make the alignment quicker, especially on non-round material, but it also works well on round stock. The hardened tip is spring-loaded to compensate for the change in length as you get closer to the center. The tail is made from 6mm mild steel and is about 250mm long and the square portion is 12mm key steel. The tail allows for quite a lot of flex to swing with the material out of center. The tail is just clamped in a chuck in the tailstock with the spring-loaded tip put in a punch pop mark in the material. This mark can be in the center or out of center if you want to turn eccentric. The square head allows for a nice flat surface to locate the DTI on. Works like a charm. Initially, you do not even need a DTI to get it close, you can just eyeball it.

center_tool.jpeg
 
Back
Top