PM932 CNC Build

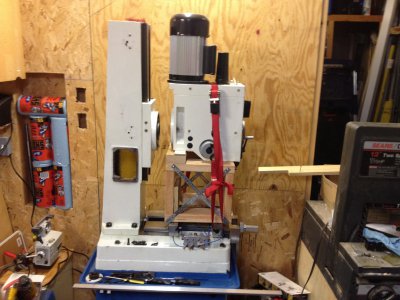
Ran into my first hiccup last weekend when I discovered the x axis ball screw was bent. Fortunately the supplier is replacing it but it will be a few weeks before I get the replacement.

This week I started on fitting the one-shot oiler supply lines. The ball nuts came with zert fittings but I plan on running oil lines to them so I modified the zert fittings to accept the tube fittings.

I need to start thinking about the coolant tray. I would like to use sheet metal but don't have access to a shear or break large enough.

Jay

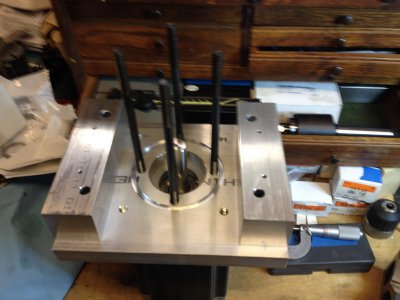
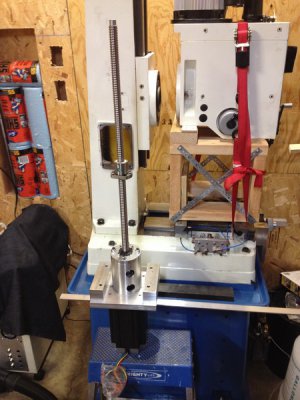
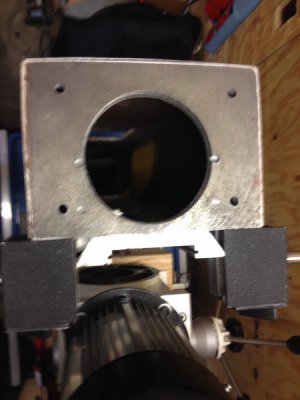
View attachment 73194View attachment 73195View attachment 73196View attachment 73197
I been lurking watching you do this build, keep up the good work looking nice.
 
I been lurking watching you do this build, keep up the good work looking nice.

Thanks Bill.

It's hard to appreciate how much work is involved until you are actually doing it.

Jay
 
While I am waiting for the replacement ball screw I took a closer look at the BK bearing blocks that came with the ball screws. These hold the angular contact bearings that support the fixed end of the ball screw. I have no idea as to the quality of rating of the AC bearings but I do know they are not matched sets meaning they have no pre-load.

On top of that, with the bearing cap on the block there is extra space to let the bearings move back and forth. This turned out to be okay as it allowed space for shims to take up the slack in the bearings. Also note that the bearings were not orientated in any particular direction which is incorrect for the AC bearings.

To measure the slop in the bearings and bearing block I installed the ball screw on the machine and locked down the center base. The bearings are oriented in the DB configuration. This is so shims can be installed in-between the outer races and keep the correct loading.
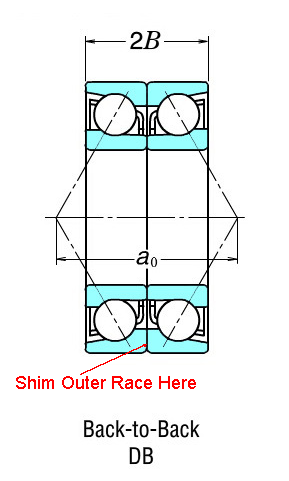
AC-DB Mounting.png

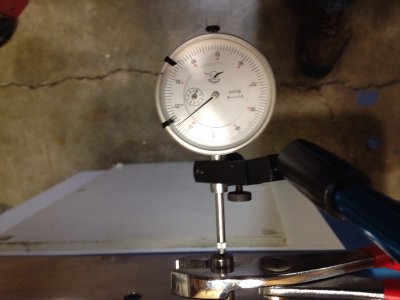
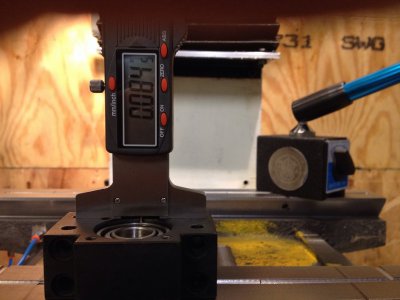
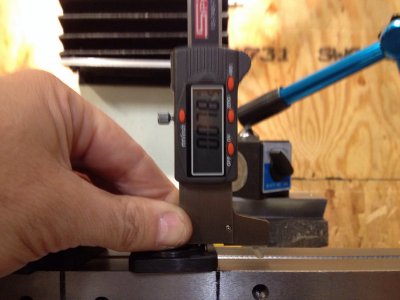
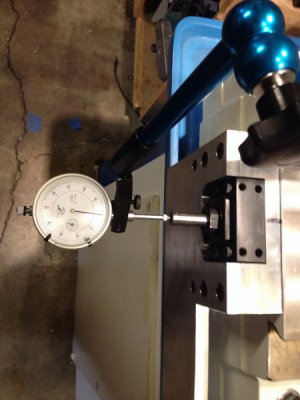
A dial indicator placed at the end of the screw is zero'd and by turning the screw until tight by hand it shows the combined bearing / block slop. (I used pliers on this shaft to crank on it since it is being replaced it doesn't t matter if it gets marred). With the bearing block cap removed I measured the setback of the bearings at the outer race and then the depth of the cap. This difference difference is subtracted from the overall slop measurement which gives the bearing slop. For example overall measurement = 0.014", Bearing block / cap setback slop = 0.008". 0.014" - 0/008" = 0.006" bearing slop.

In this instance I installed 0.008" of shims. This tales up the slop and adds some pre-load. I have not taken the time to setup a jig to measure how much pre-load is really needed. I plan waiting until the machine is operational to see what the backlash is under machine load.

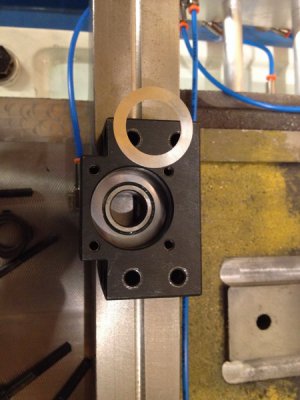
For the 2005 BK blocks they have 32mm OD bearings. I used 0.002" round shims. http://www.amazon.com/gp/product/B006U1JMZ2/ref=oh_details_o00_s00_i00?ie=UTF8&psc=1 The shim OD had to be turned down to 32mm.

Another issue with the BK blocks is the cap is secured to the block with (4) 4mm 0.7 x 6mm cap screws. The BK cap under the screw head is 3mm which leaves only 3mm of thread engagement. Subtract the bevel at the threaded hole and you only get 2 threads engaged in the block. Not cool. Fortunately the holes are 15mm deep so the threads can the extended with a tap. I replaced the 6mm long screws with 12mm.

The AC bearing in the photo below is actually from VXB bearings. I managed to blowup one of the BK bearings while fitting them to the ball screw shafts and lost half the balls to my not so tidy and crowded garage floor. The VXB AC bearings are not expensive bearings so I'll see how the hold up compared the the BK bearings. The VXB do have less slop than the BK's.

Jay
IMG_6.jpgIMG_5.jpgIMG_3.jpgIMG_2.jpgIMG_1.jpg

IMG_1.jpg IMG_2.jpg IMG_3.jpg IMG_5.jpg IMG_6.jpg
 
Last edited:
A little more progress.

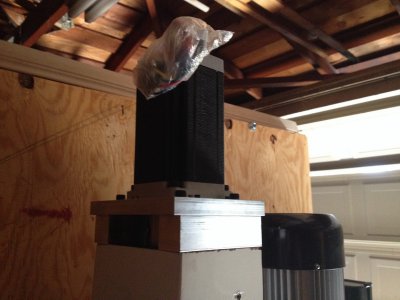
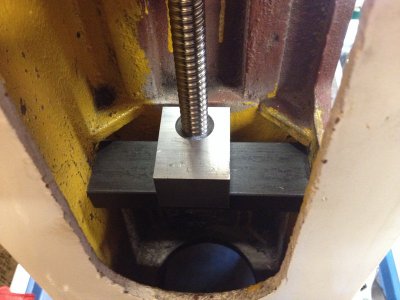
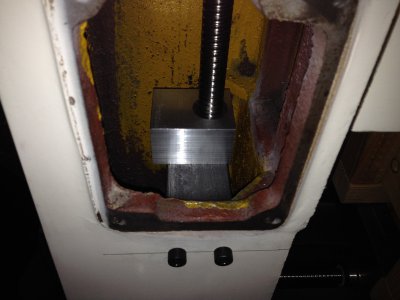
The head is now separated from the column. The z-axis ball screw and motor are assembled and temporarily installed. The top of the column only had a 3" hole and the motor coupler tube is 3.5" so I enlarged the hole to 4" with a 4" hole saw. The ball screw support and thrust bearing block are fabricated and fitted. Next step is to fabricate the ball nut to dovetail plate block.

Jay

IMG_0761_resize.JPGIMG_0774_resize.JPGIMG_0775_resize.JPGIMG_0777_resize.JPGIMG_0782_resize.JPGIMG_0780_resize.JPGIMG_0785_resize.JPG

IMG_0761_resize.JPG IMG_0774_resize.JPG IMG_0775_resize.JPG IMG_0777_resize.JPG IMG_0780_resize.JPG IMG_0782_resize.JPG IMG_0785_resize.JPG
 
Thanks Bill.

It's hard to appreciate how much work is involved until you are actually doing it.

Jay
I just ordered up some ball screws for my 45 to convert it over but am going to do it in steps.
Did a lot of reading on the different conversions here and on the cnc site and am getting educated best I can.:thinking:
 
Hi jay looking good
I like how you raised the z to pick up the extra z travel. I lost that on mine by flush mounting the motor.
when you put the shims in the bearing housing, you put them in between the 2 bearings right?
if you measure the inner and outer race heights of the bearings you will see they are the same. so you cannot get any preload unless your shims are in between the bearings. I could not tell from the picture. the shims have to be tall enough that when in between the 2 bearings the outer races press against each other before the cap contacts the housing. then the bearing can be adjusted to have preload and zero backlash by the nut on the ball-screw.
Every one of these bearing I purchased I had to do this, but its easy since the shim height is not critical as long as it is tall enough to keep the 2 inner races from contacting each other during preload adjustment.

steve
 
Hi Steve,

By your description I believe we have done the same thing other than I'm adding just enough shims between the outer races to add preload and keep the inner races tight to each other. Final preload adjustment will be done by adding additional shims between the outer races. I prefer the shaft nut the be tightened against a solid assembly.

I'm still not thrilled by the small screws they use to hold the bearing caps on, especially the FK support which only has 3mm screws.

Jay

- - - Updated - - -

I just ordered up some ball screws for my 45 to convert it over but am going to do it in steps.
Did a lot of reading on the different conversions here and on the cnc site and am getting educated best I can.:thinking:

Which machine do you have?
 
Hi Steve,

By your description I believe we have done the same thing other than I'm adding just enough shims between the outer races to add preload and keep the inner races tight to each other. Final preload adjustment will be done by adding additional shims between the outer races. I prefer the shaft nut the be tightened against a solid assembly.

I'm still not thrilled by the small screws they use to hold the bearing caps on, especially the FK support which only has 3mm screws.

Jay

- - - Updated - - -
Which machine do you have?


Enco zx45 I think that is the model, but just about all the 45s are related some what LOL:roflmao:
I bought mine two years ago and have not been happy with my choice so finally tore the X/Y apart and cutting groves for oil passage and one shot lube. Also going to ball screws for future conversion to CNC.
I am accustom to using Bridgeport's, Grazinos, American, Monarchs, & Leblond.
So I was a fool to buy this Enco model and not buy a used Bridgeport I found in AZ prior to purchase of the Enco 45.
Well just and old fools grumbling, I will make it into a usable piece of equipment.:thinking:
 
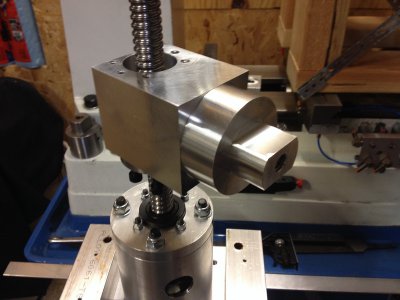
Got the z-axis ball nut to dovetail connector finished. Fun part to make. I was a bit nervous because the z-axis assembly is difficult to measure properly to get everything to align properly. I did a test fit tonight and it all works as planned. Tomorrow I will get the z axis completed and power up the stepper. Earlier this week I added oiler grooves and ports to the z-dovetail. A friend has access to a cnc laser cutter and large press brake so he is making me the parts for a chip / coolant pan. I'm hoping to pick that up this weekend.

Jay

IMG_0786.JPG

IMG_0786.JPG
 
Back
Top